|
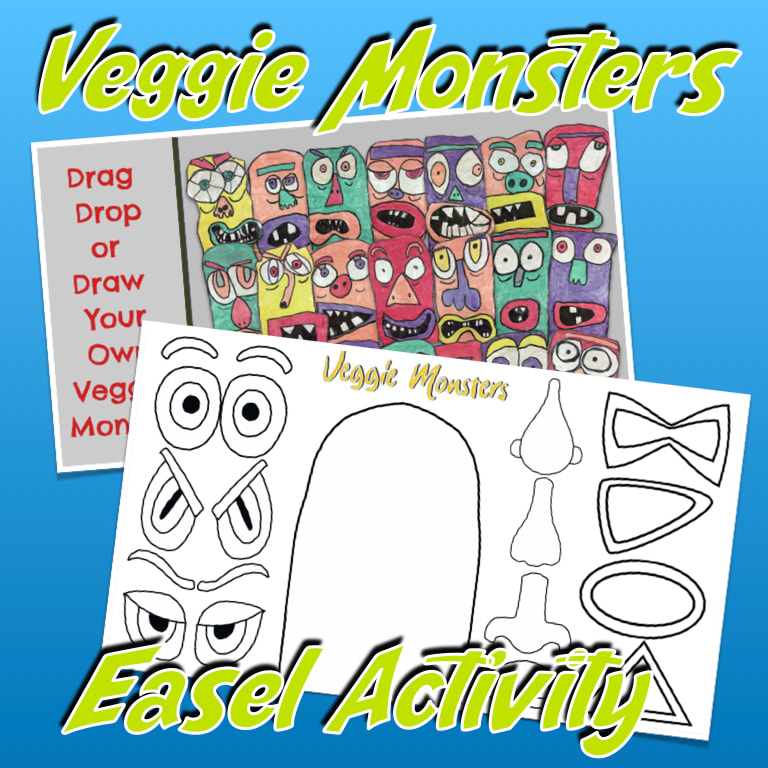
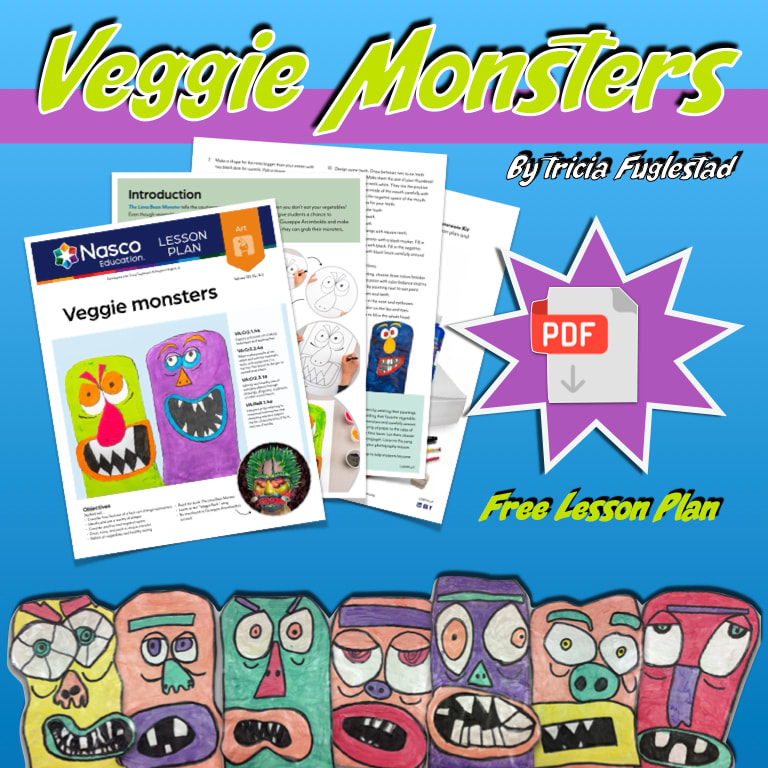
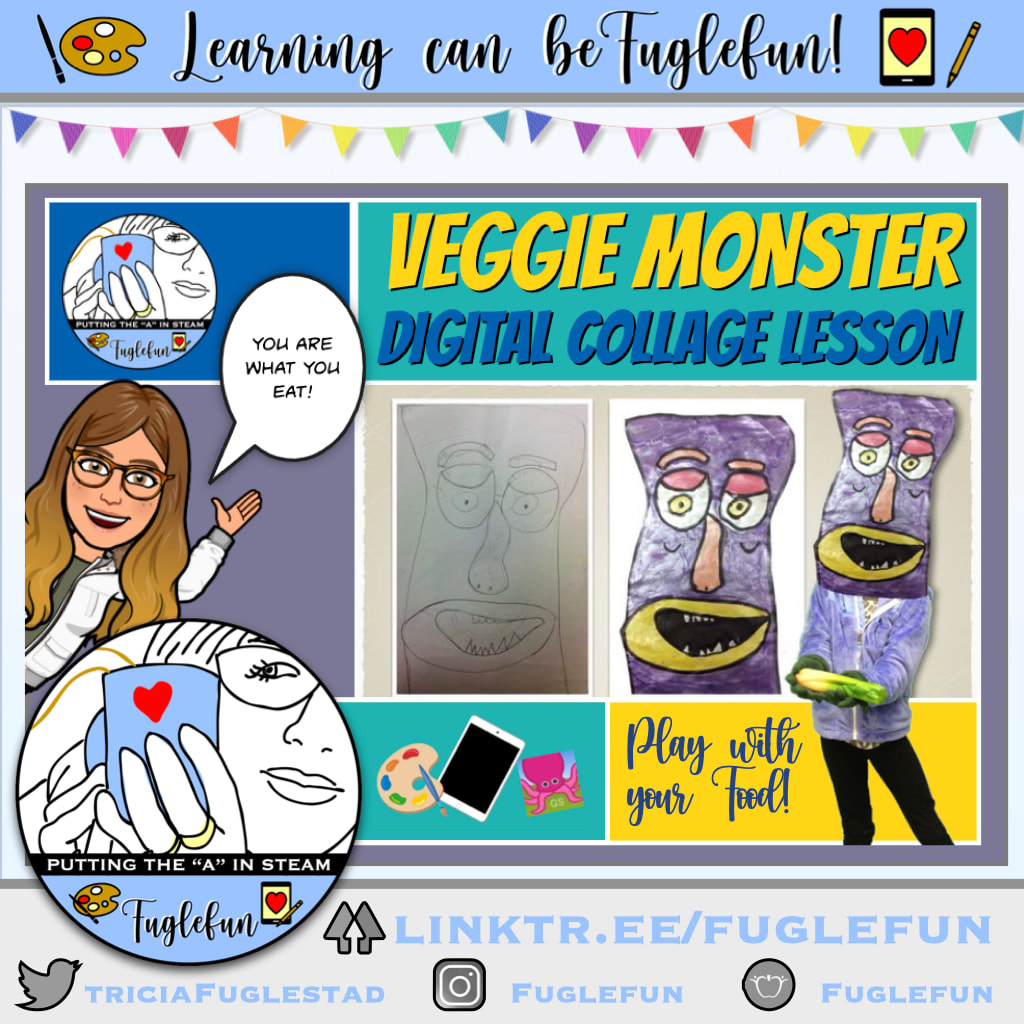
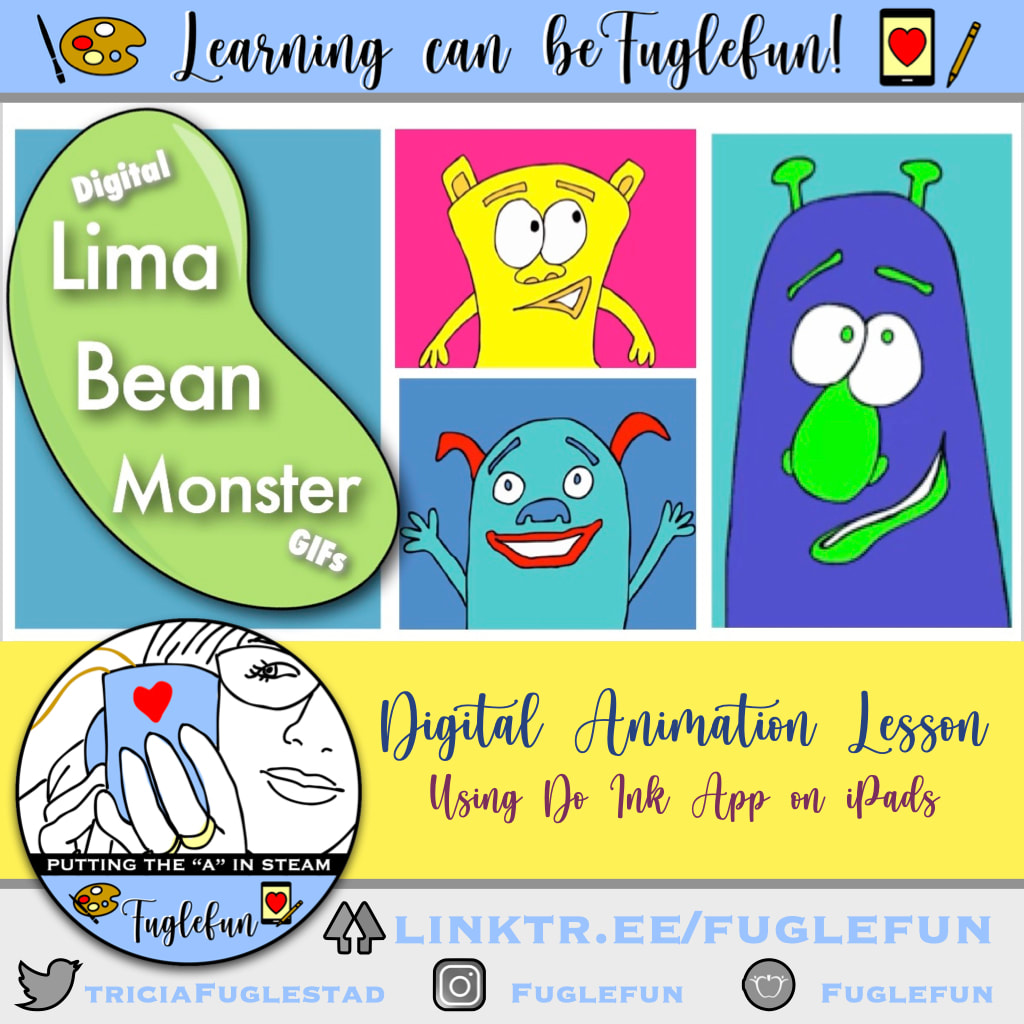
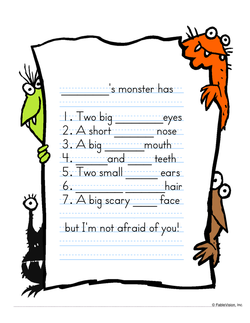
Practice Making a Veggie Monster on Easel
Create a Veggie Monster inspired by
Use the art work for a digital extension
Dive into digital animation
|
|
|
0 Comments
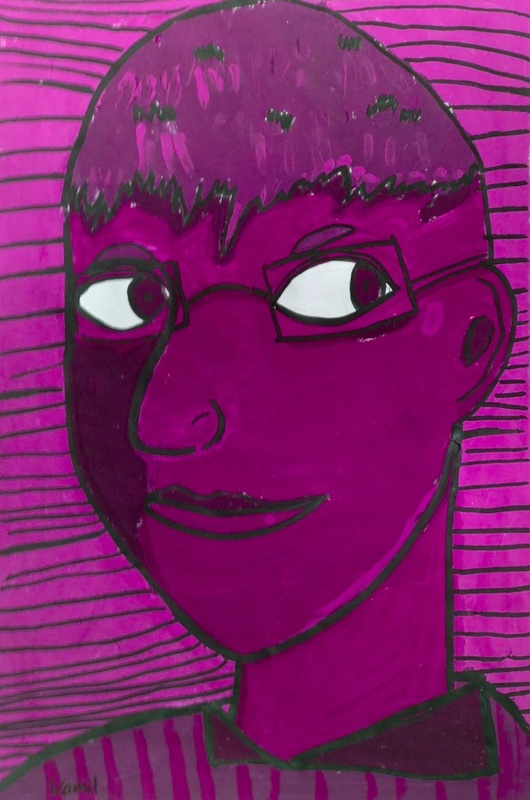
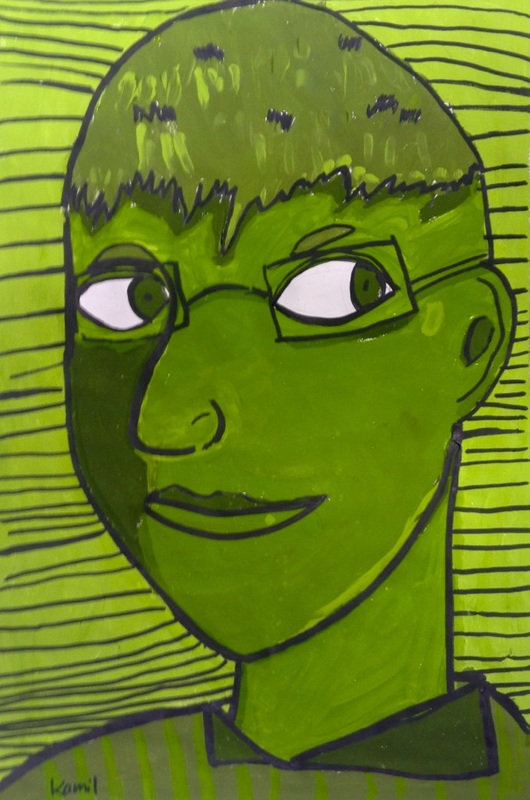
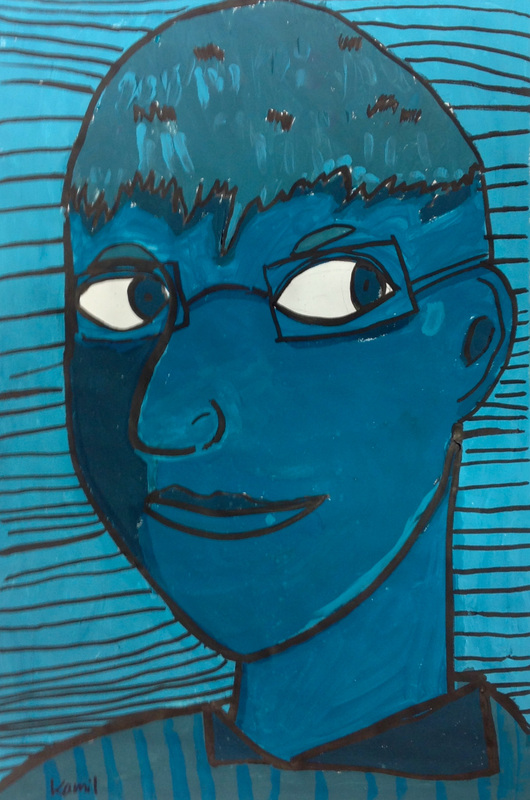
My second graders had two very different portrait experiences this year. First they learned all the rules for creating a REALISTIC self-portrait with features drawn in the correct places with correct proportions. We carefully measured and studied the face to make these beautiful winter self portraits. View the gallery of finished work here. 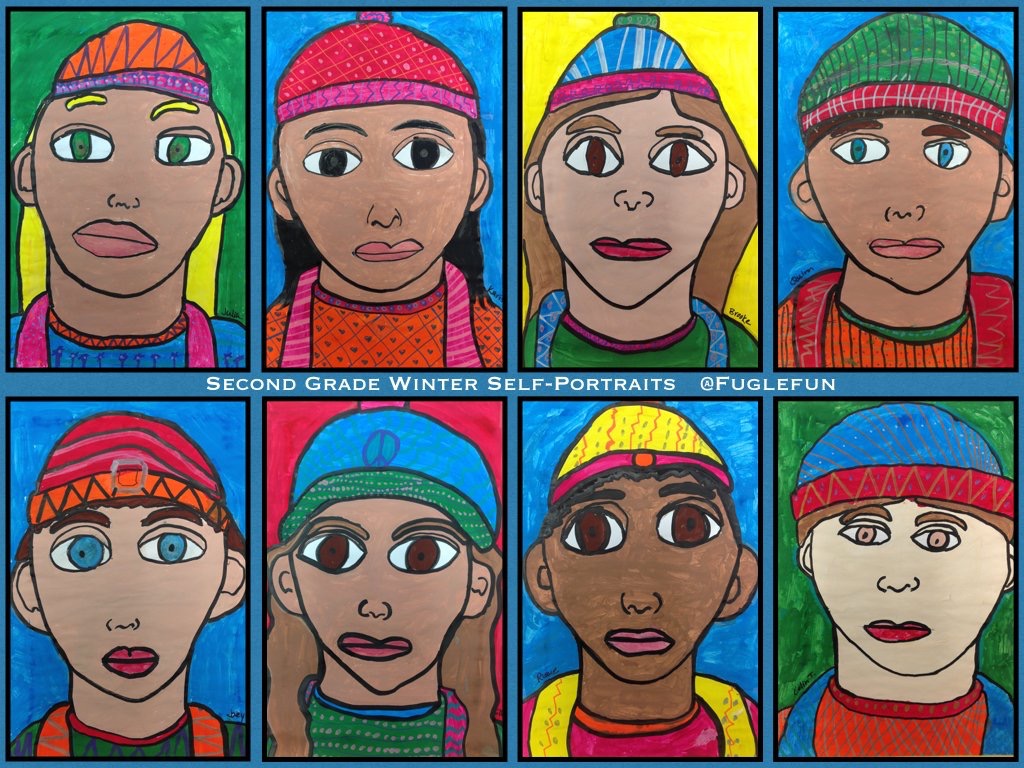 Then, these same students were given cardboard, foam board, puzzle pieces, and odds and ends. They were shown examples from this School Arts article by Donna Staten and images of Picasso's cubist portraits. They were then told to go ahead and break all the rules to make ABSTRACT portraits. See the growing gallery here. 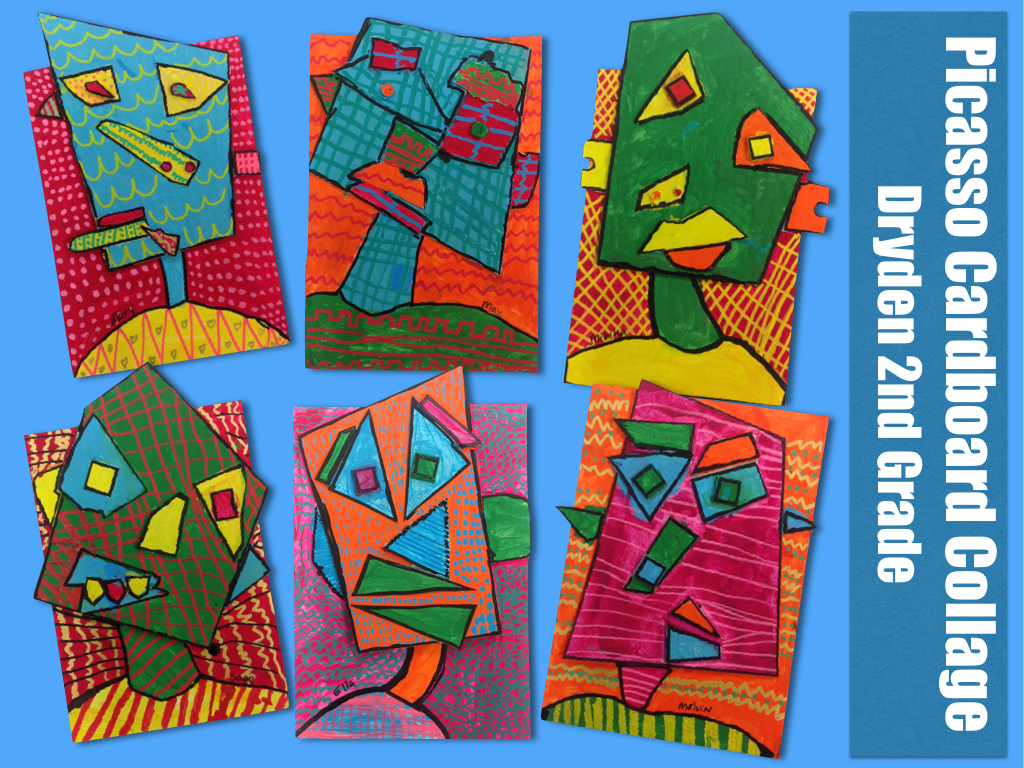
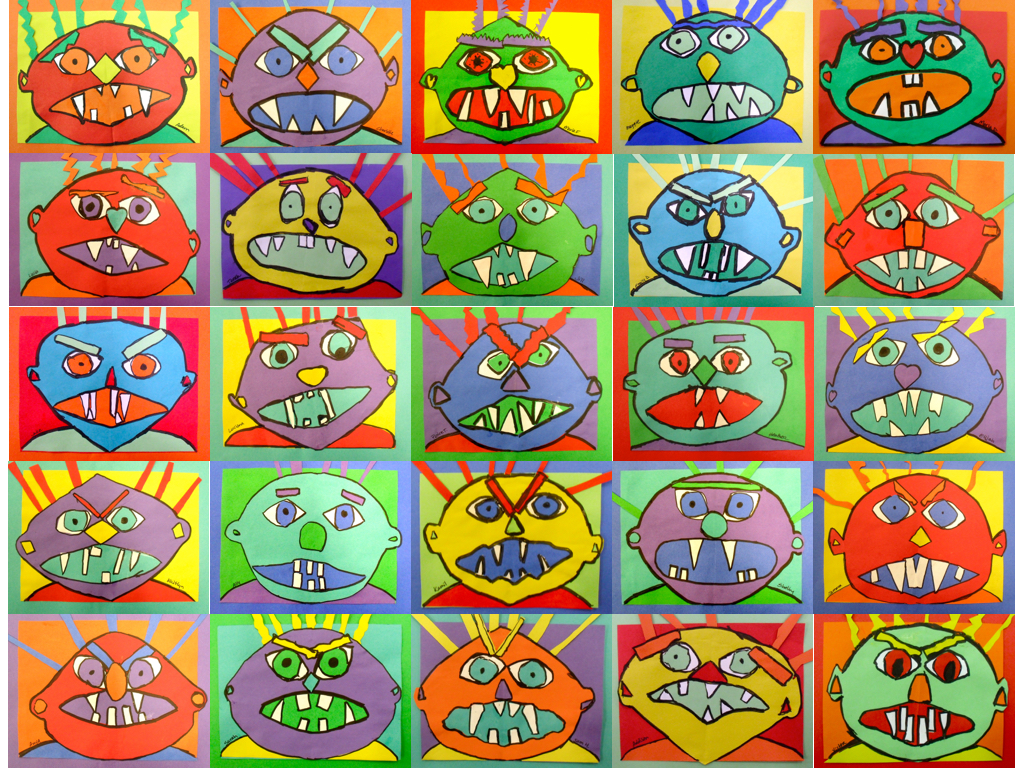
1st grade construction paper collage based on book, Go Away Big Green Monster. Click to view students' art gallery on Artsonia
 Fuglestad Jones
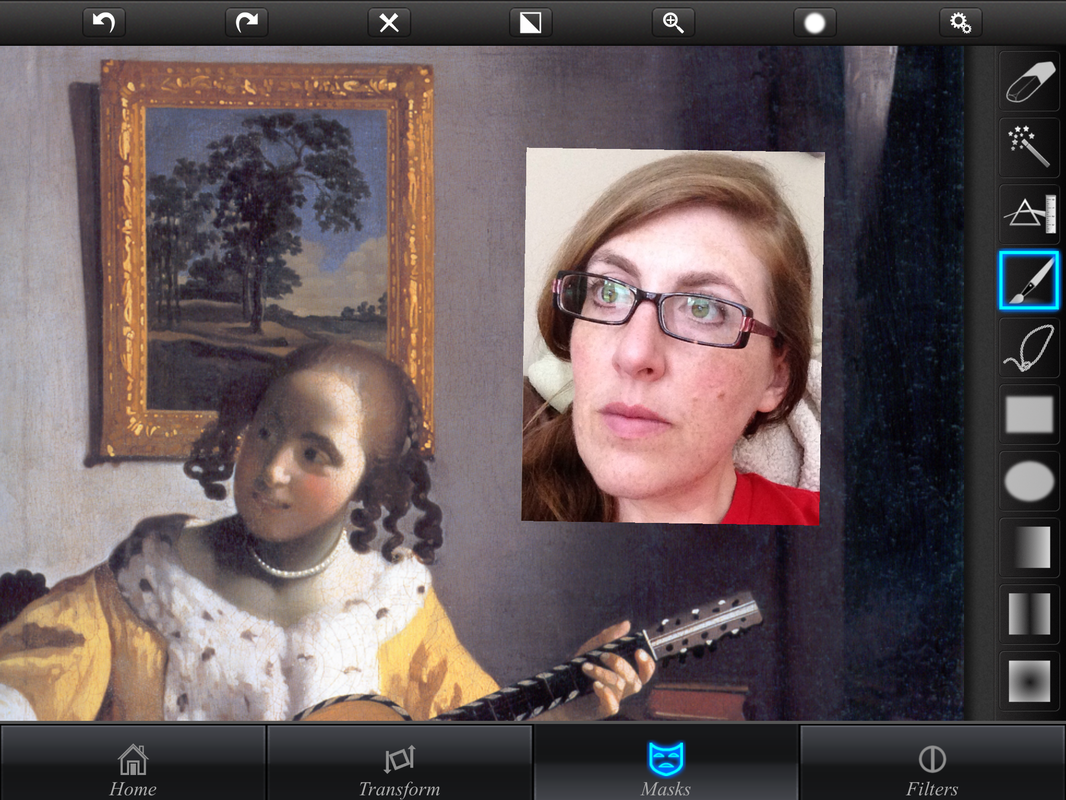
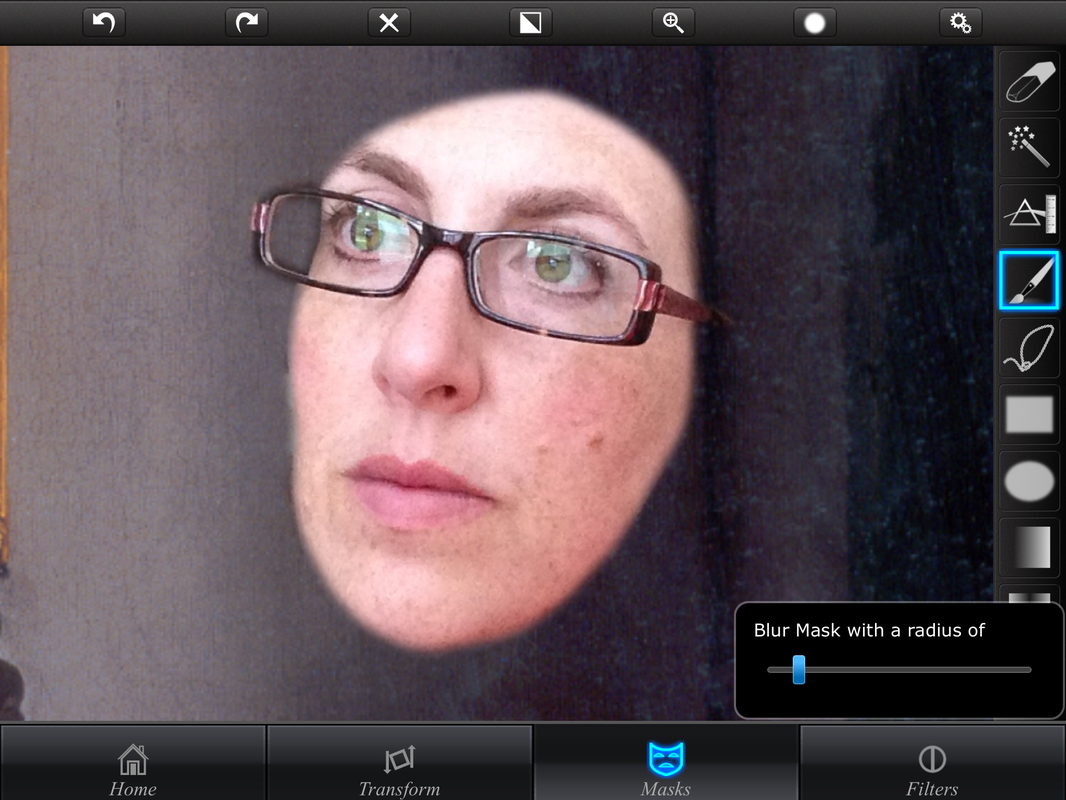
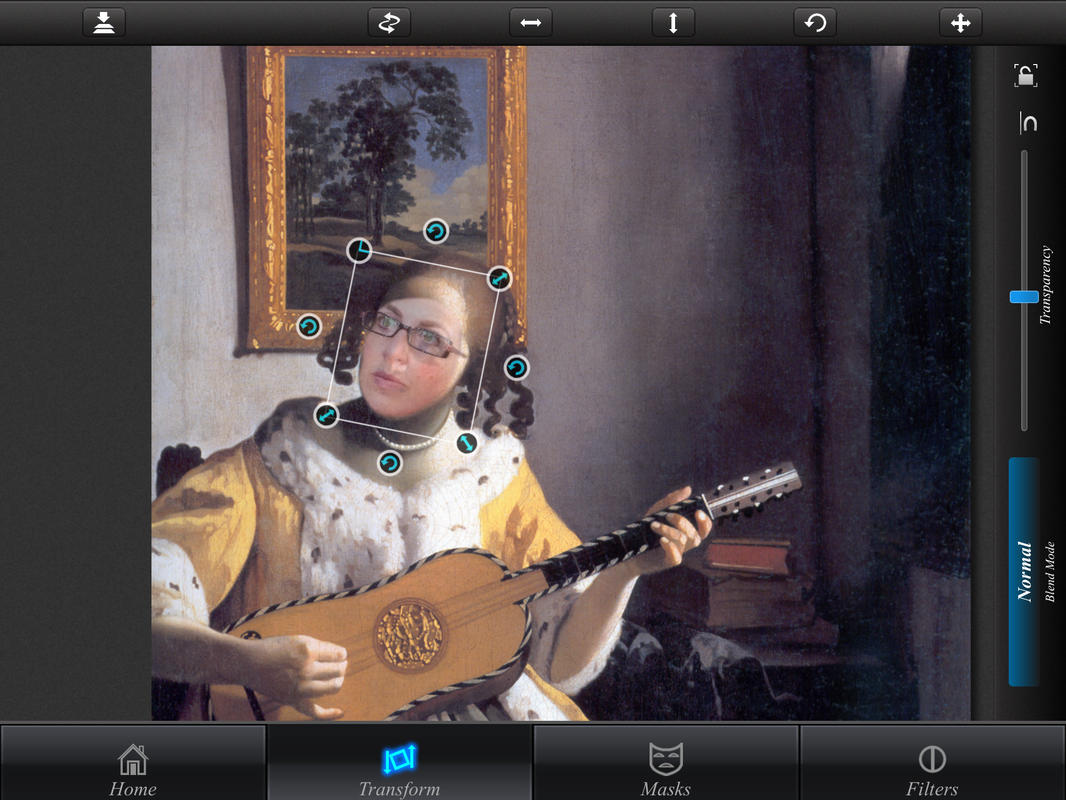
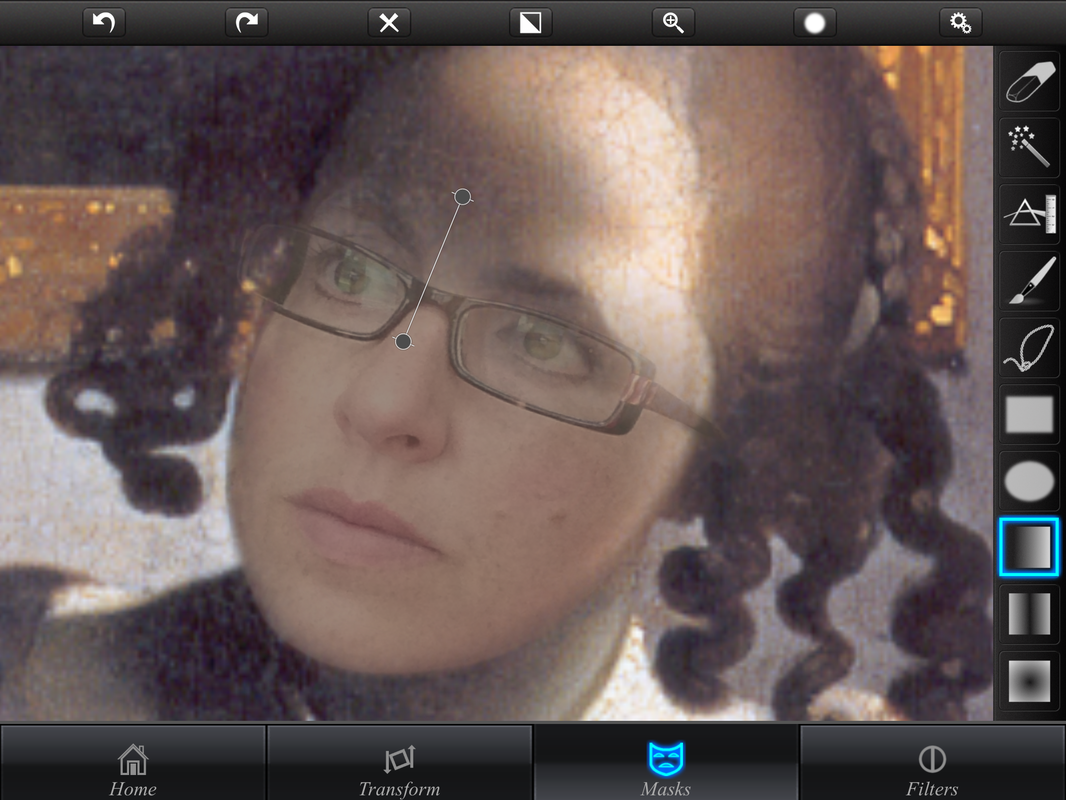
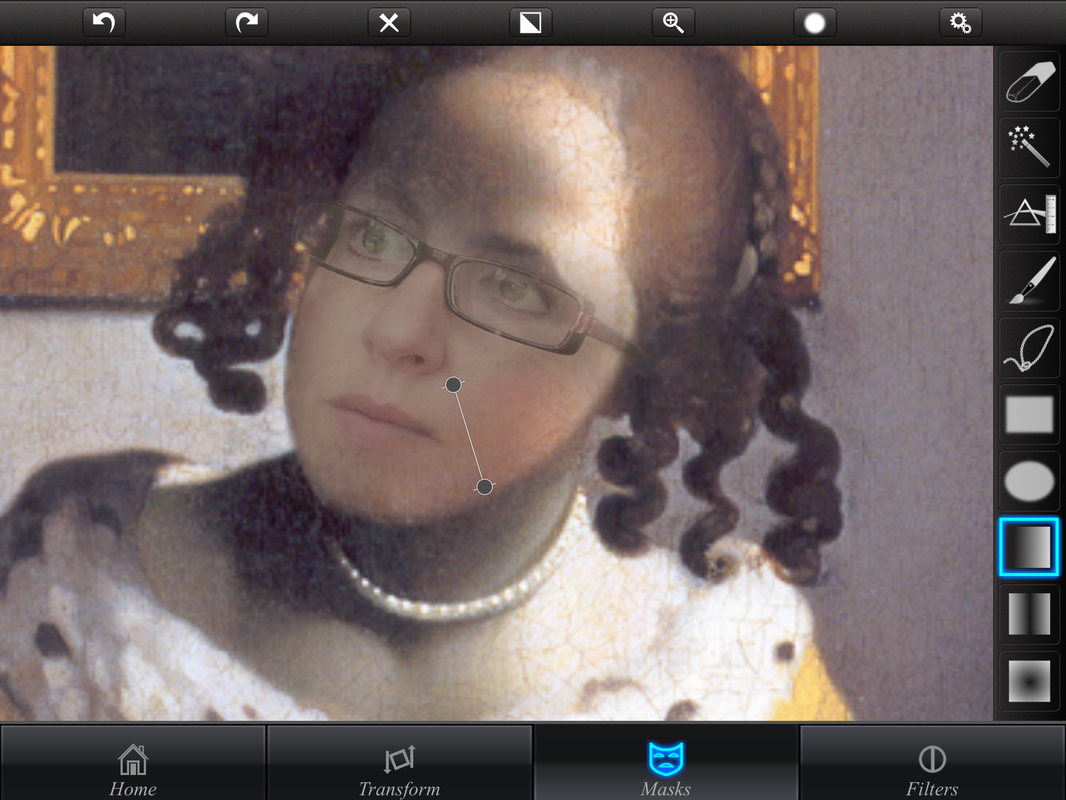 The gradient mask helps you photoschlop like a pro. They feather the two layers gradually.  Try adding a filter over the finished piece to even out the coloring and/or texture 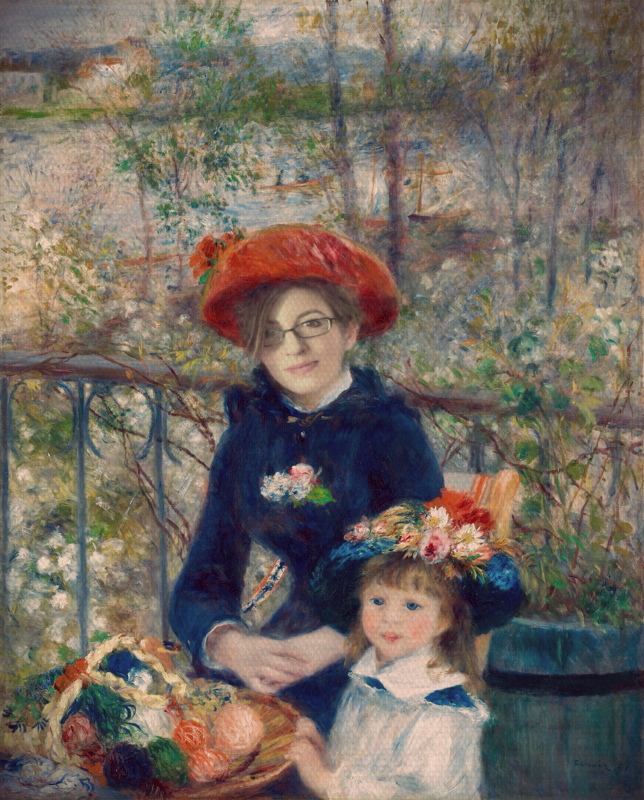 Me in Renoir's "Two Sisters" 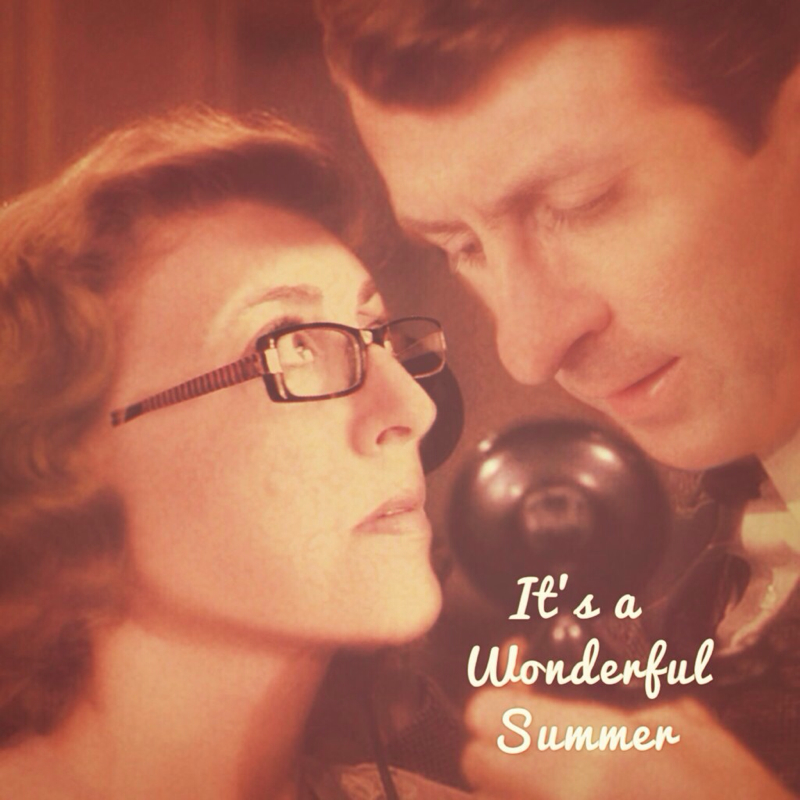 Mr. & Mrs. Fuglestad in a scene from "It's a Wonderful Life" 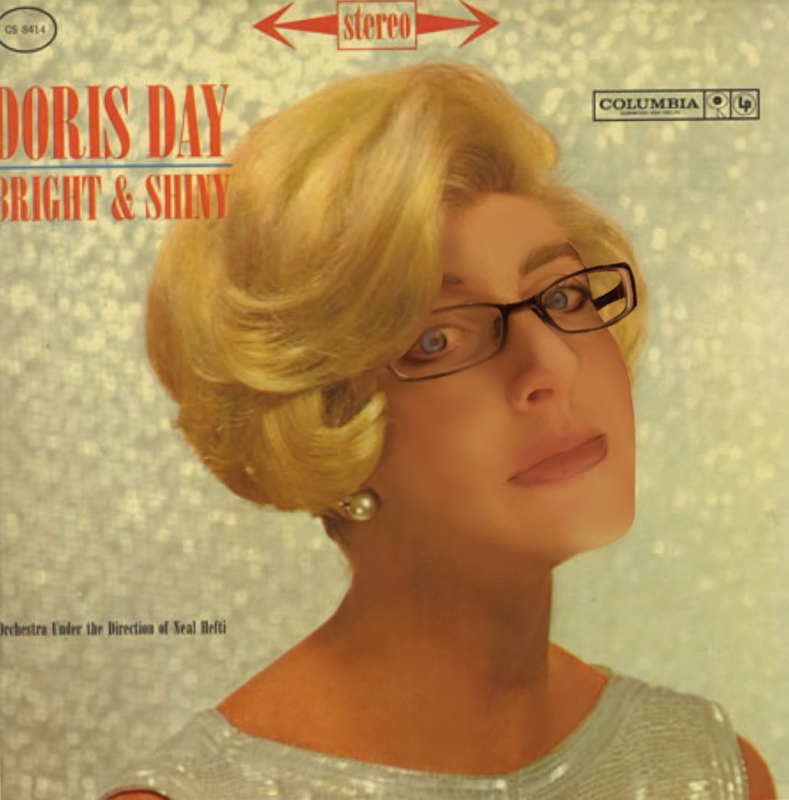 Me as Doris Day 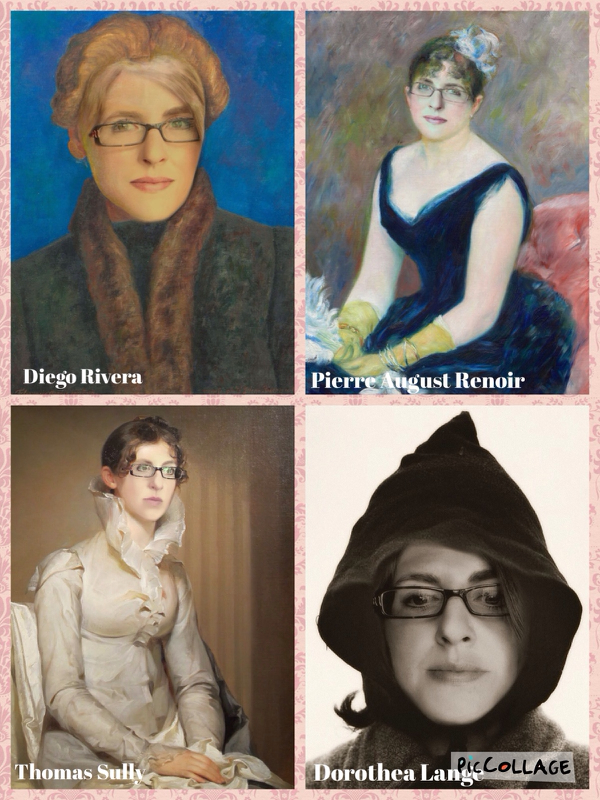 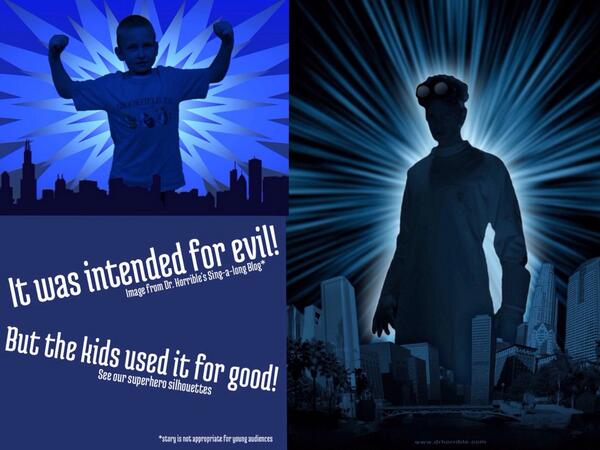 Our art project was inspired by this graphic for Dr. Horrible
 Click to view the gallery. Watch the tutorial below. Other resources: This original post contains links to worksheet, book, and the tutorial for creating this project on the desktop using Keynote. The link to my backgrounds is here.
Photobombing is the act of inserting oneself into the field of view of a photograph, often in order to play a practical joke on the photographer [painter for our purposes] or the subjects.
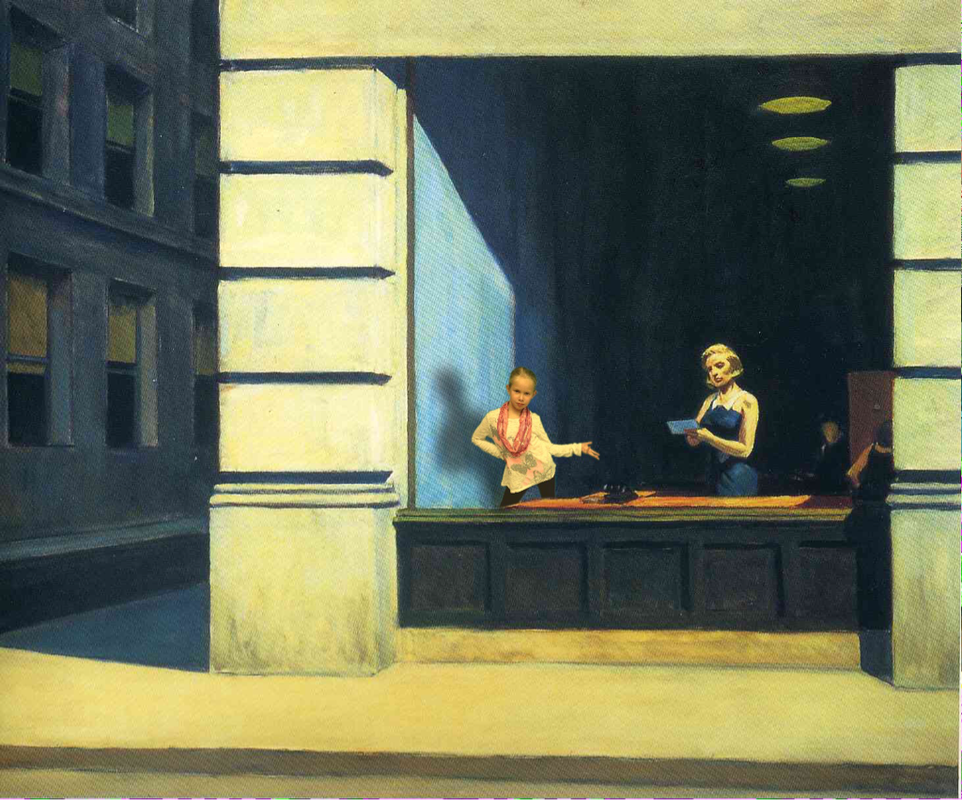
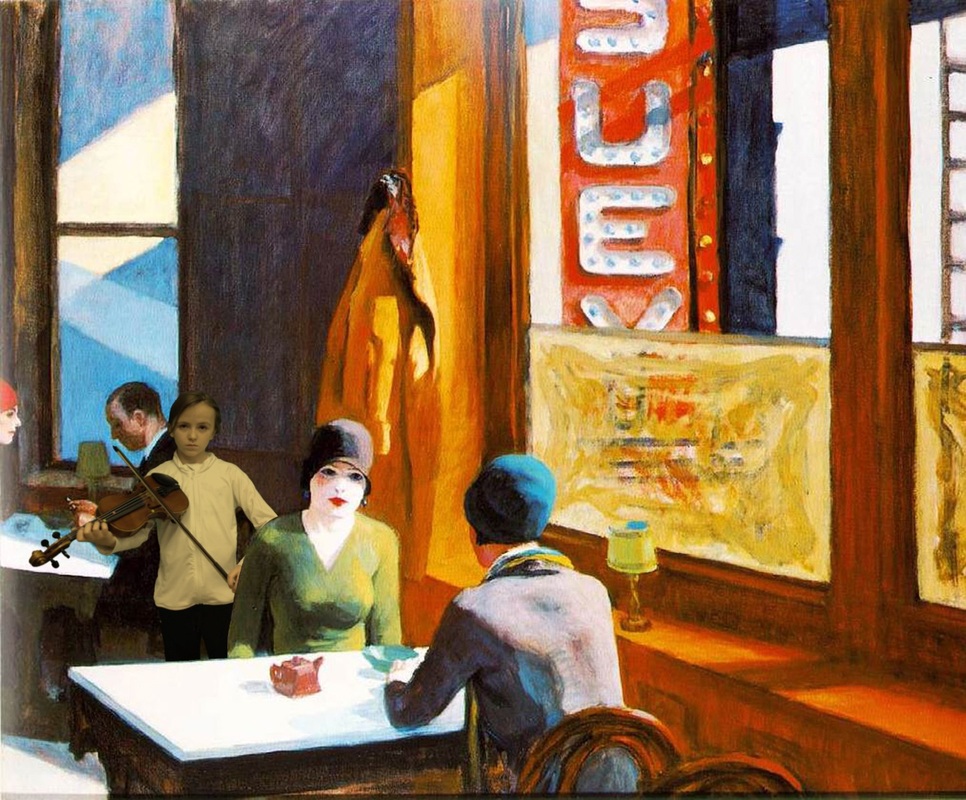
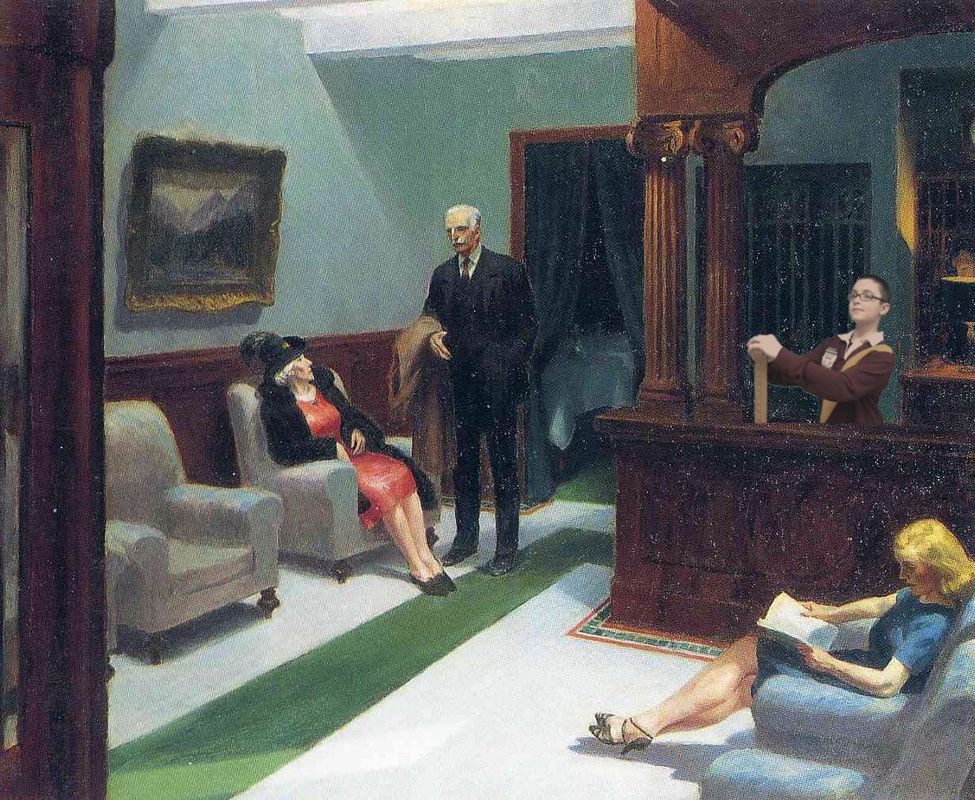
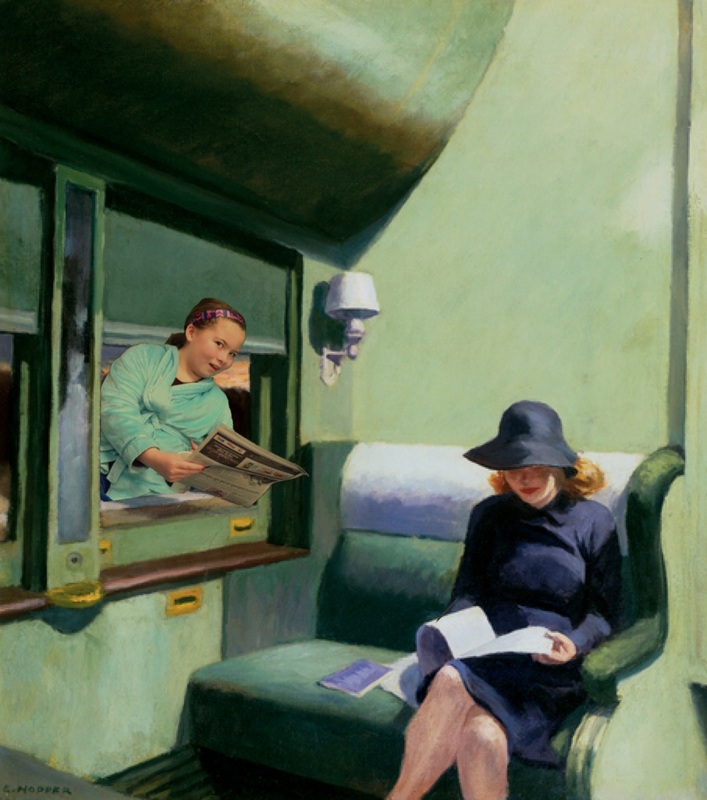
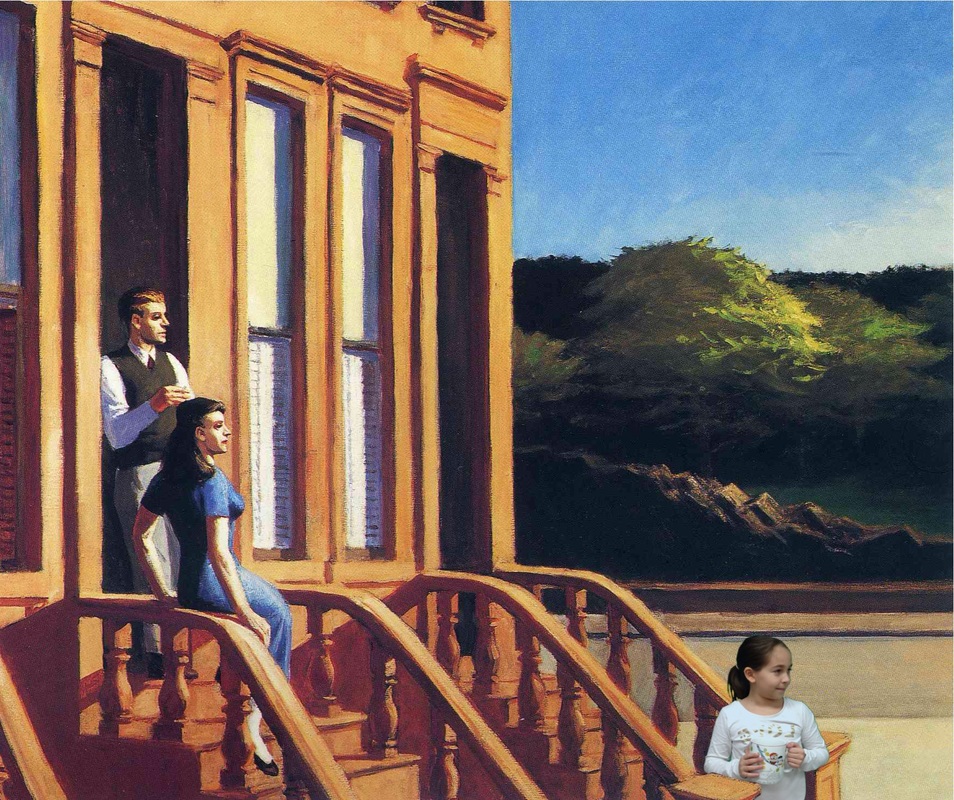
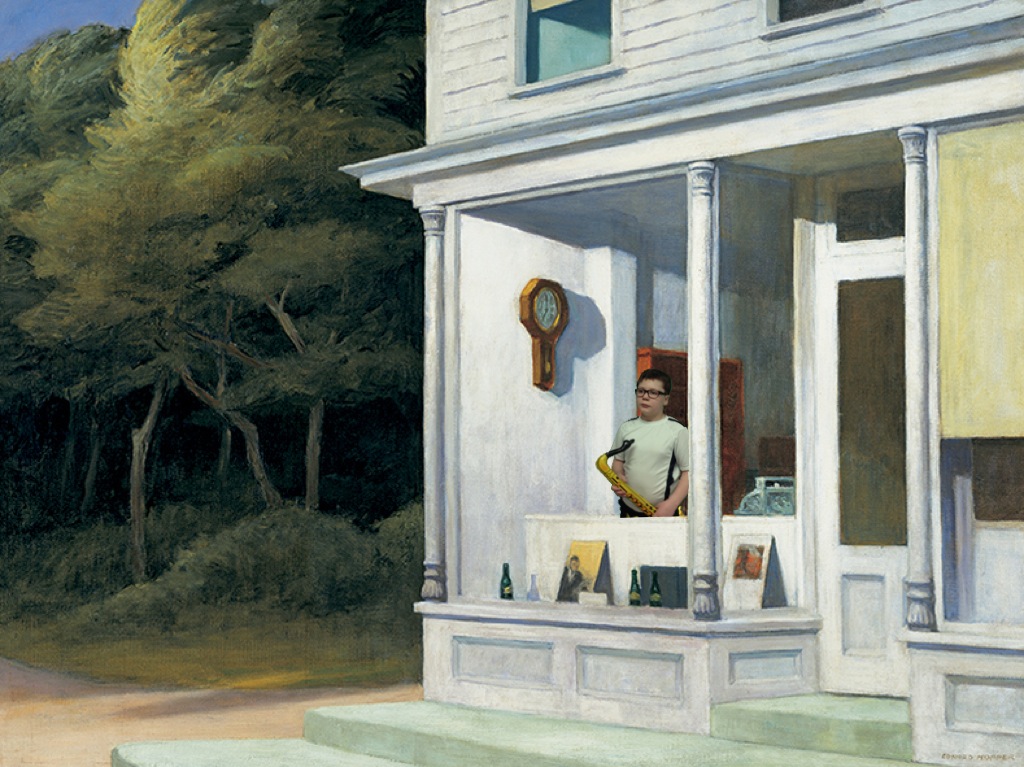
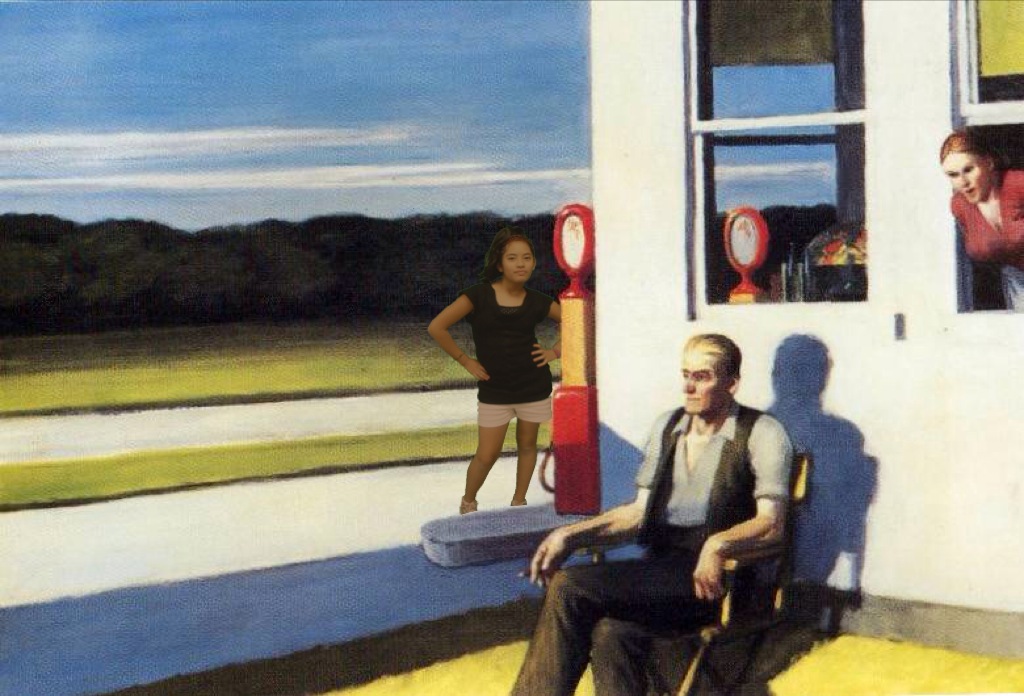
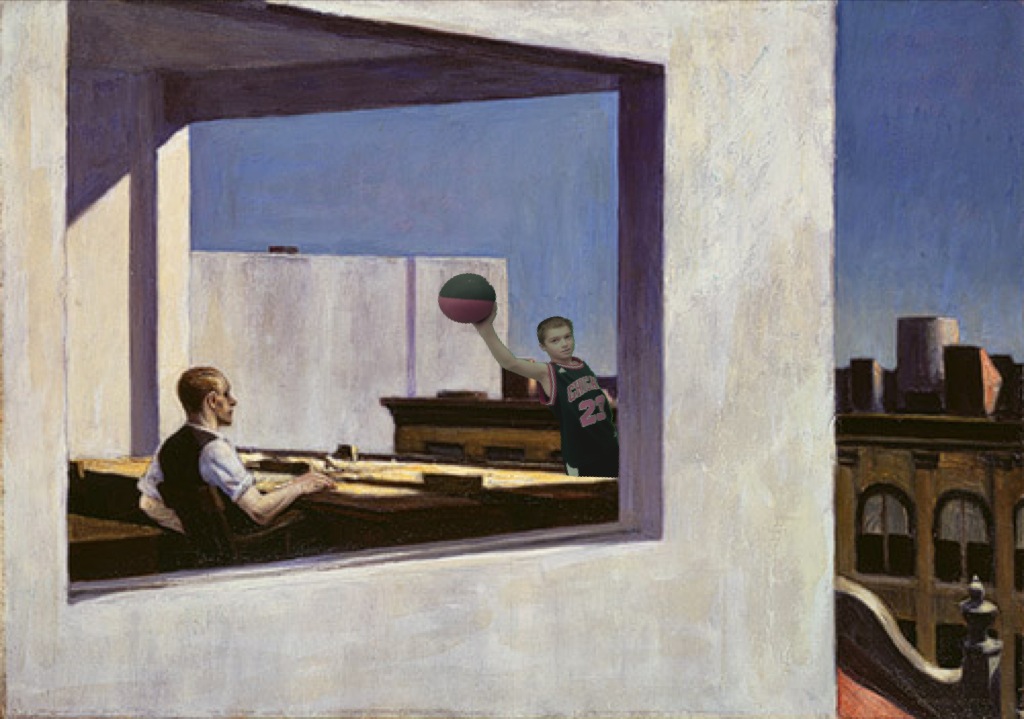
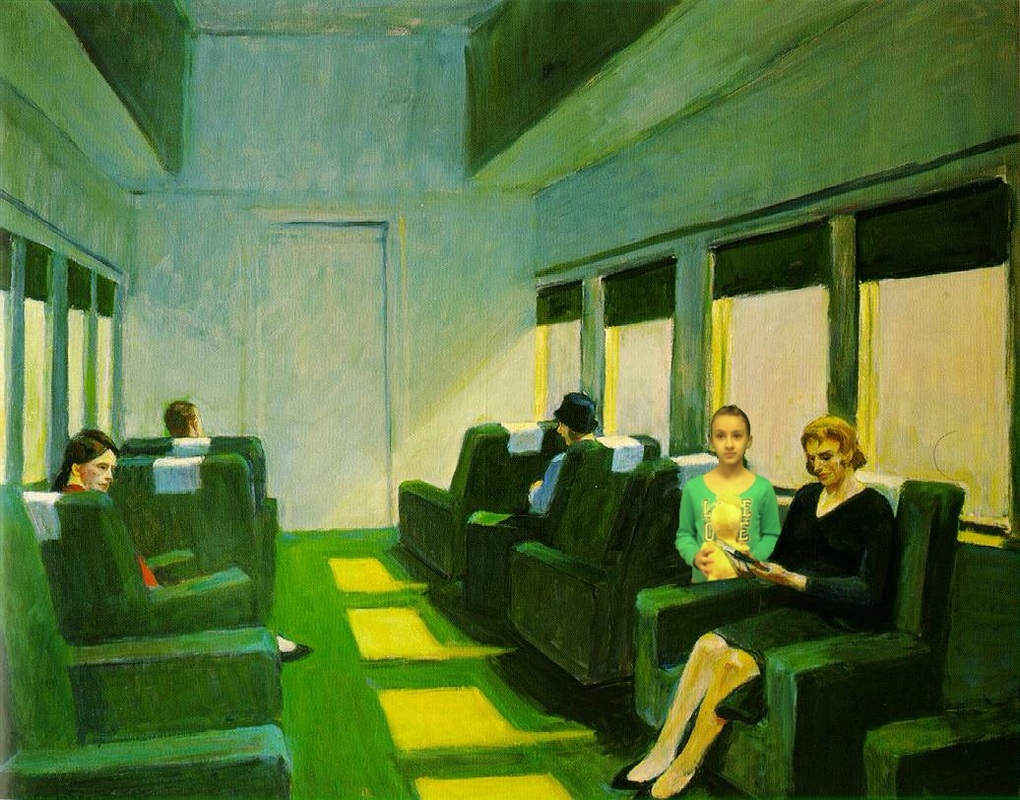
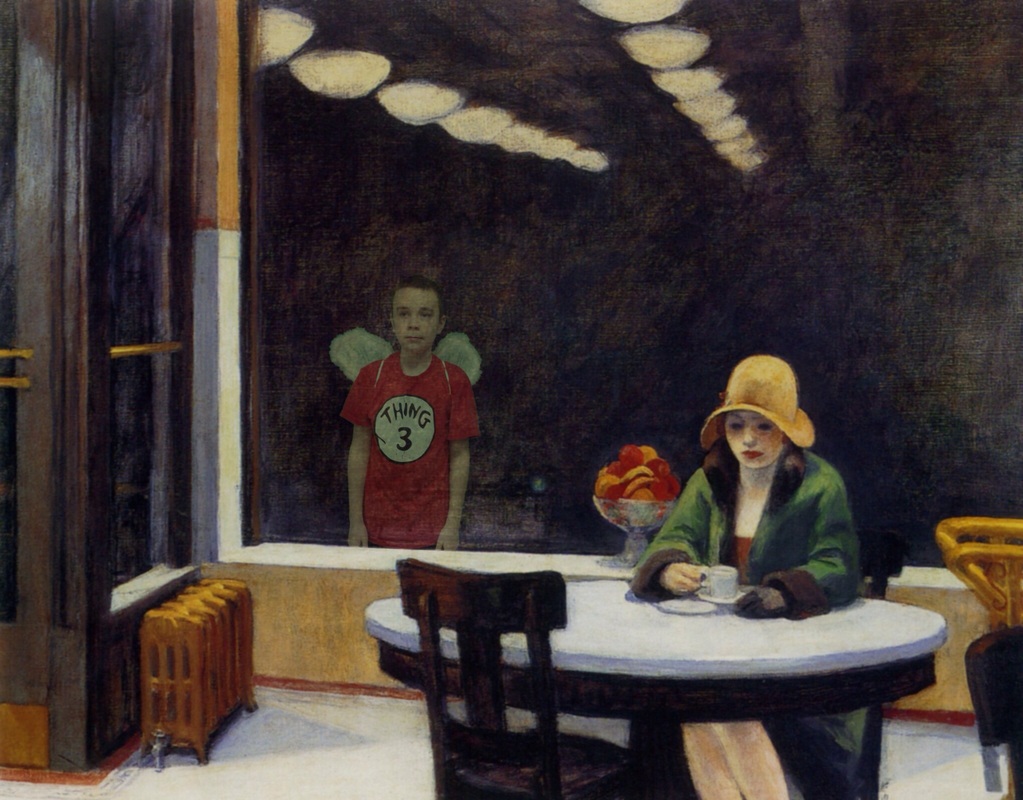
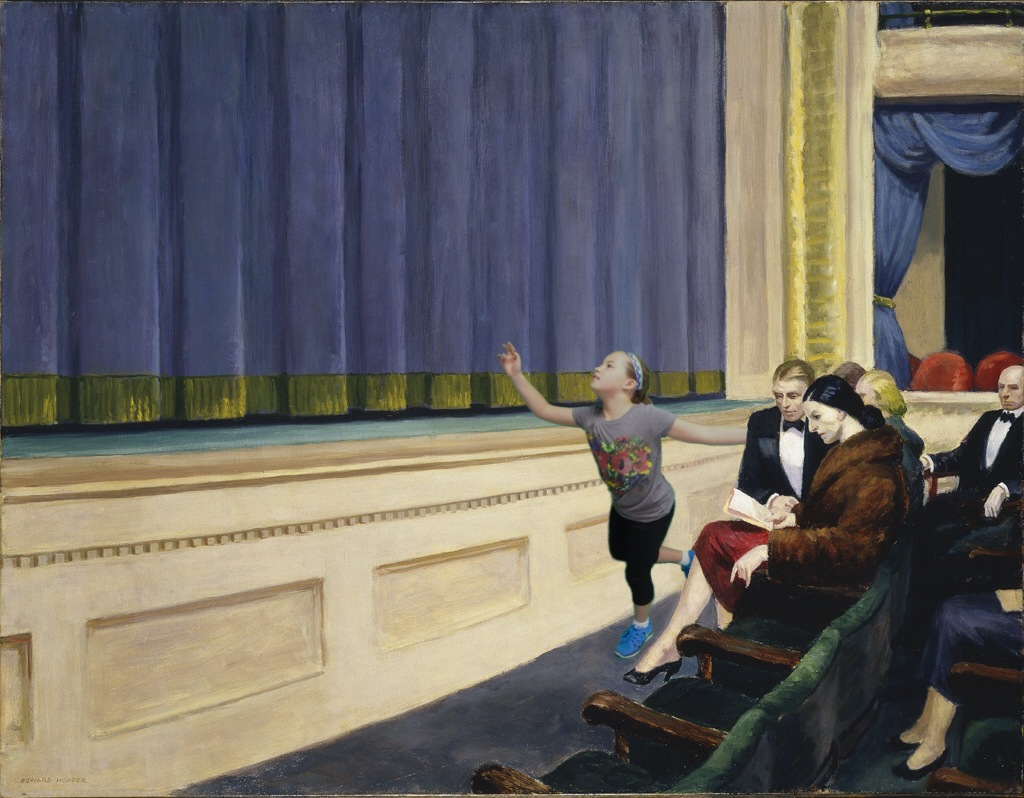
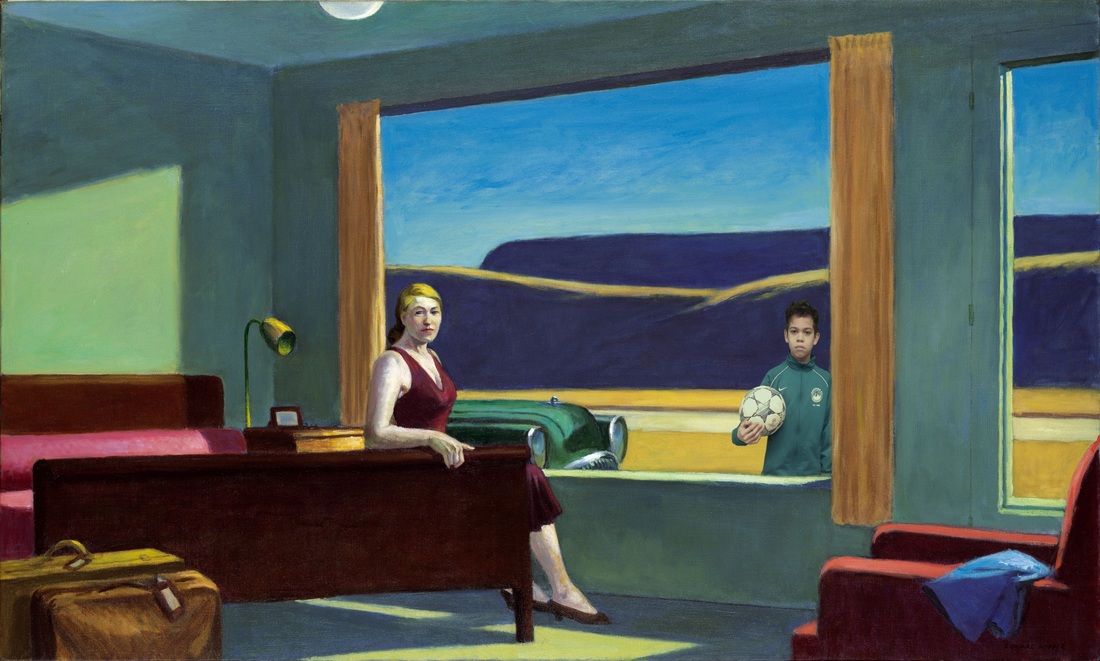
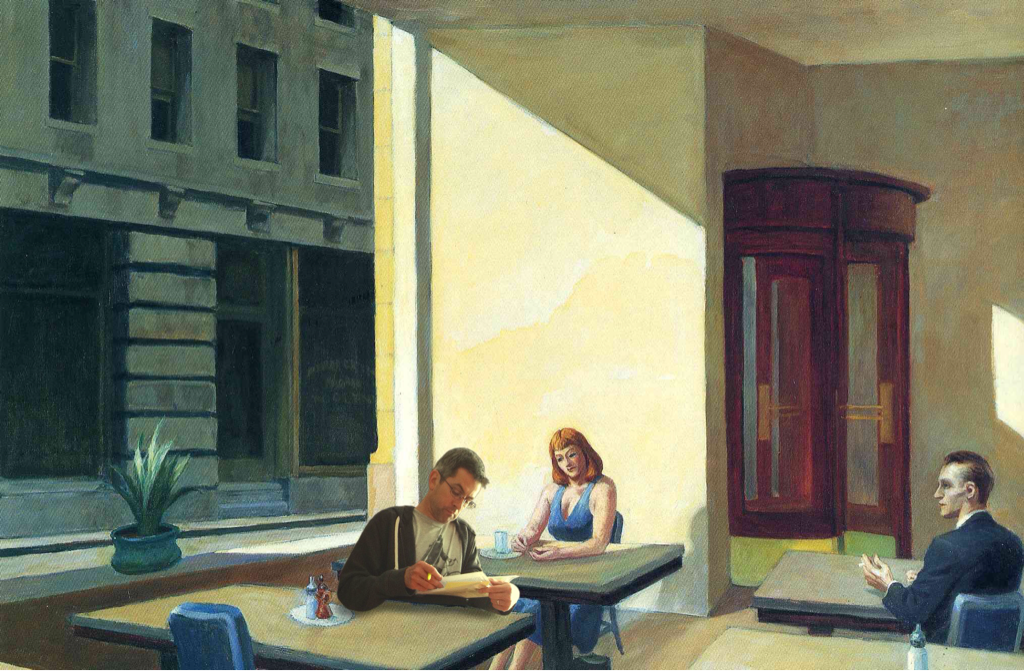
I was playing with the Superimpose app and looking for images to collage when I came across Automat by Edward Hopper. His work is full of open spaces with figures in quiet or isolated poses. Many of his pieces are perfect for practicing digital collages where students can explore overlapping, relative size, middle ground, and adjusting color filters to match the environment. I practiced these images below (click to view them large) with student photos from a previous assignment. The story changes when I added the photo. These would make interesting creative writing prompts as well. Here is my curated collection of images by Edward Hopper that will be perfect for students to photobomb.
Related post: Hopping into Hopper
Modeling at the New York Office

Click here to this free app from the Metropolitan Art Museum would be a wonderful introductory lesson. It shows manipulated photographs from the days before Photoshop. You can take a quiz, learn why they were manipulated, and browse the collection. Use this link to grab the app.
See this commercial from American Family where hopeful actors photobomb Edward Hopper's NightHawks (owned by the Art Institute of Chicago).
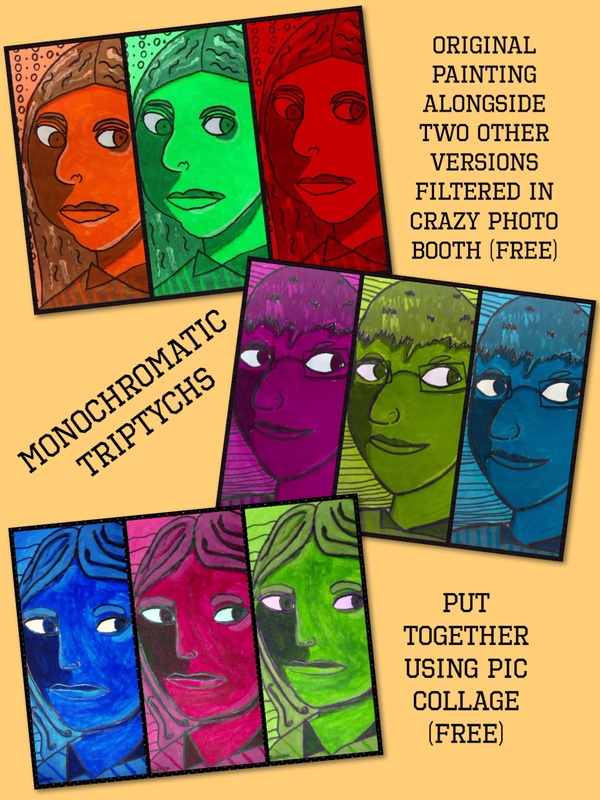 I was looking through my archives of art projects on Artsonia and found on I hadn't tried again in almost a decade. Monochromatic Triptychs (last attempted in 2005). The third graders made amazing monochromatic paintings this year so I thought it would be fun to use our iPads to turn them into triptychs where they could see their original image and two others with color filters in a different hue side by side. I played with two free apps to make my examples happen: Crazy Color Booth for the filters Pict Collage for the triptych I'm sure there are other apps to do this, but we have these installed and ready to go, so why not use them!
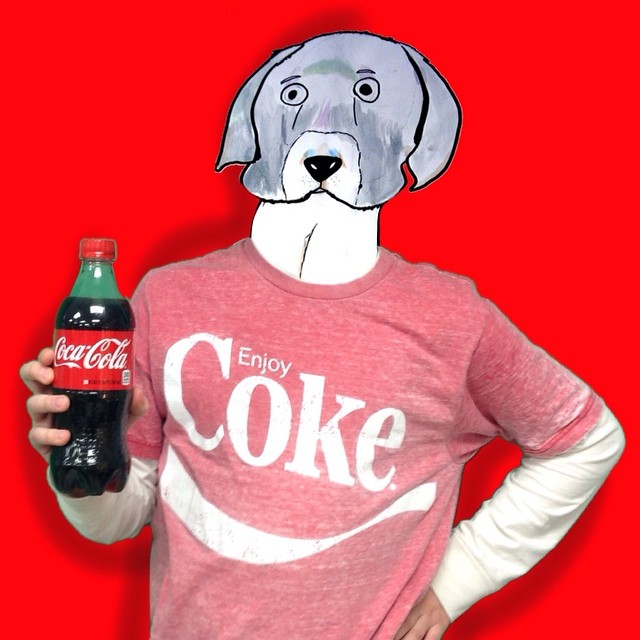
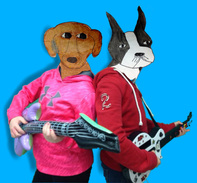
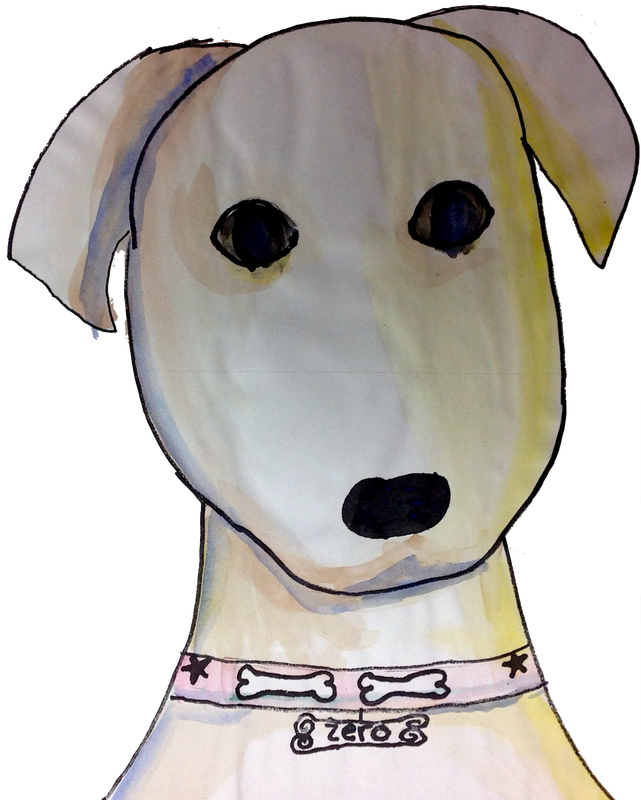
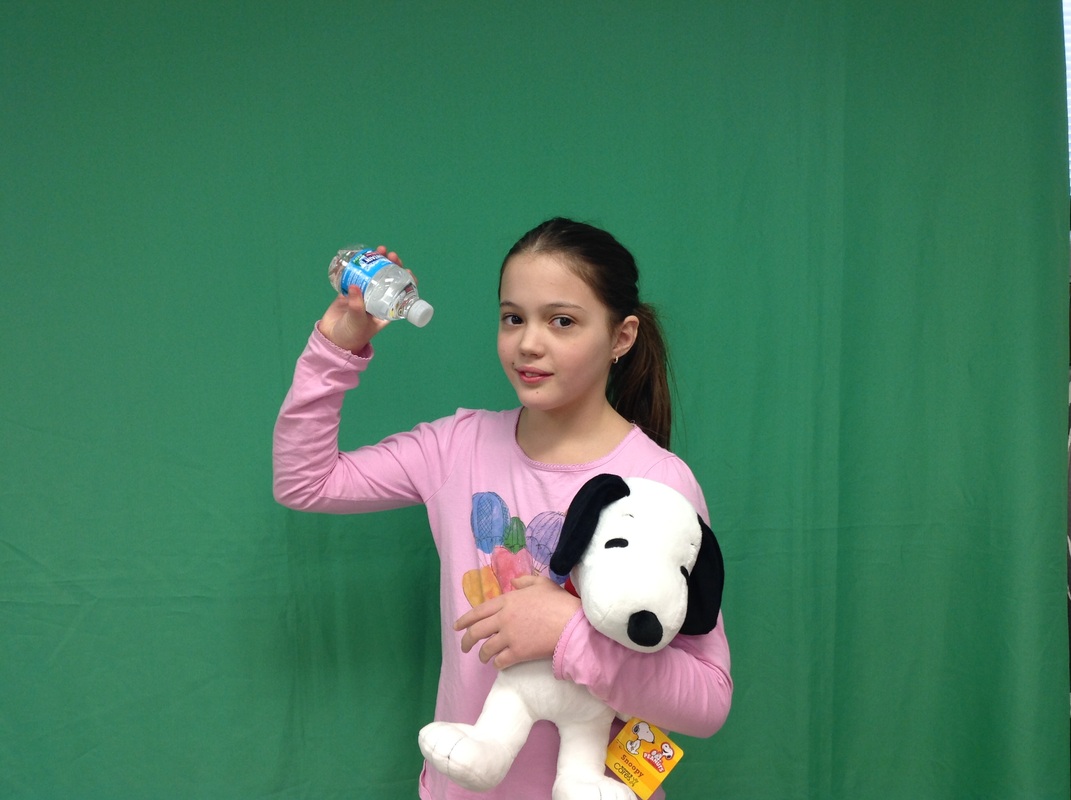
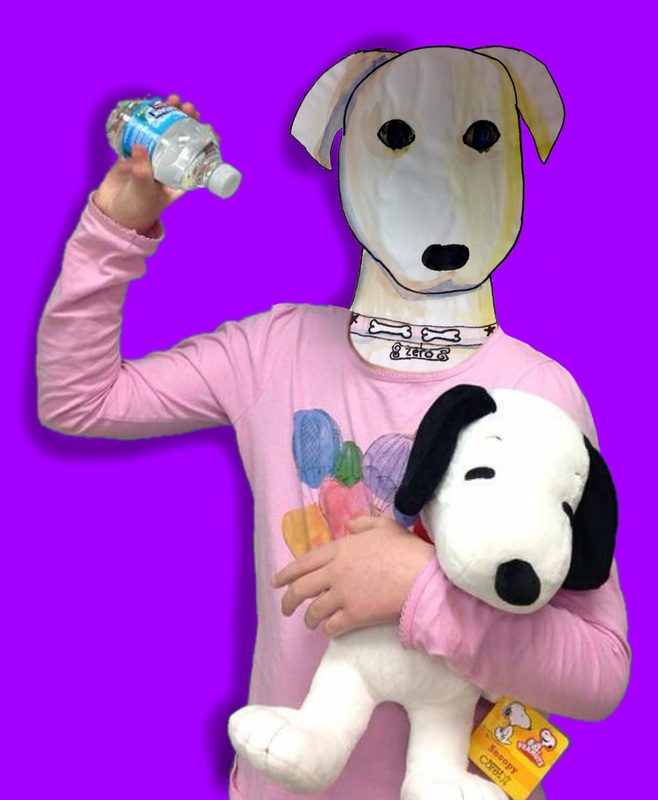
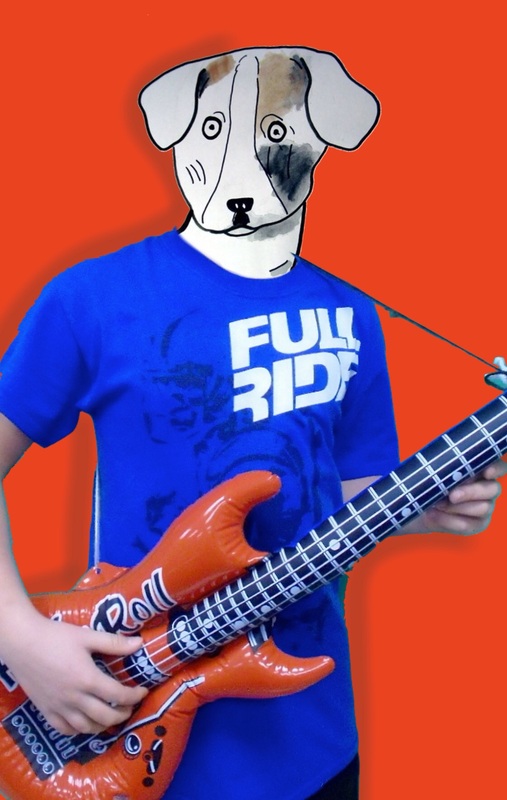
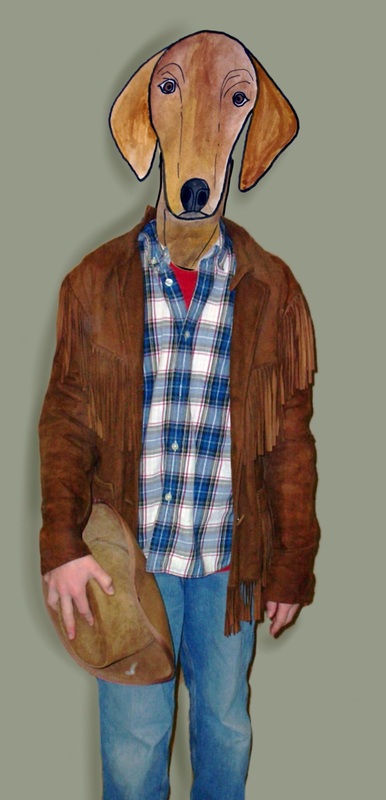
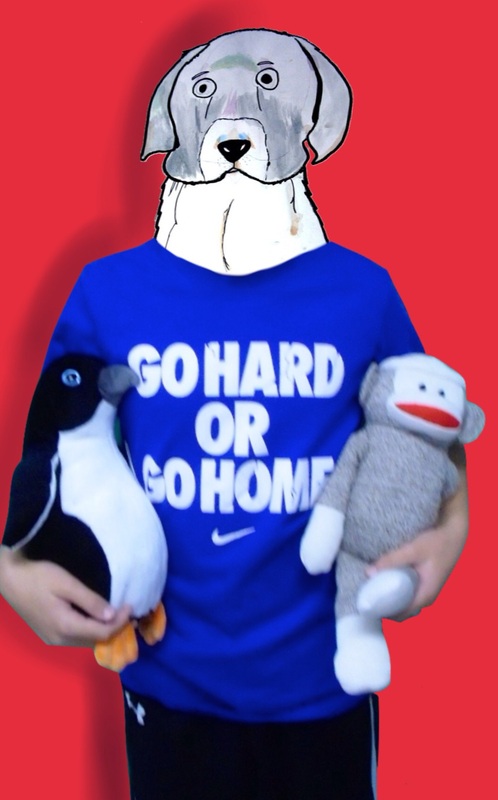
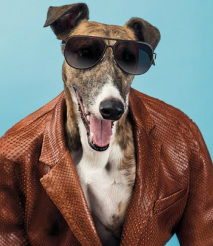
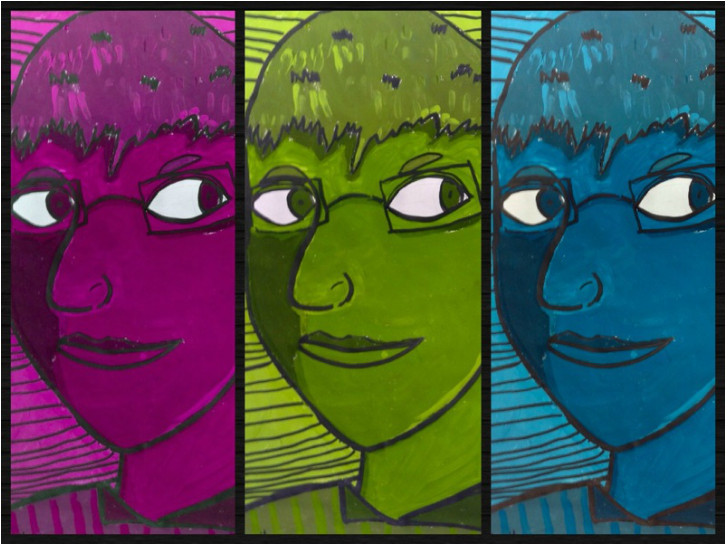 Used Pic Collage (horizontally) and chose 3 pict layout Update: See their finished work on ArtsoniaNew update: for iOS 11 updateI lost Crazy Photo Booth when my iPads were updated to iOS11 so I looked for another solution. I put the monochromatic portrait in Brushes Redux and shifted the hue. This is actually a better way to show students more dynamically what HUE is and how it can change the color scheme of your artwork. 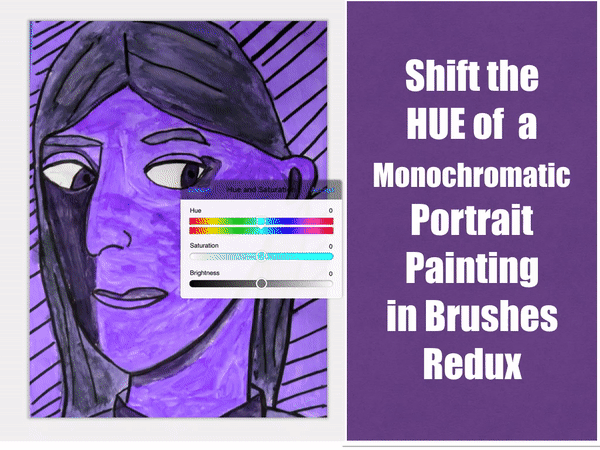  The monochromatic images were created in Brushes Redux and put side by side in Pic Collage 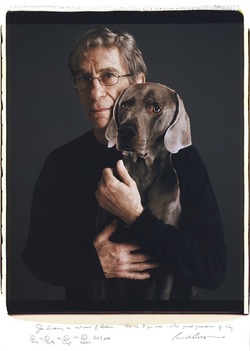 I introduced my 5th graders to the photographs and videos of William Wegman earlier this winter. He is famous for his photos that make his dogs look human. See examples from my pinterest board here. So, my students took on the challenge of making themselves look like dogs (just the opposite, I suppose). They began by drawing and painting a dog water color portrait. See their finished dog paintings here. Then students came to art class with props and costumes to stand before our green screen to pose for a photo. These photos were then added to my dropbox along with their dog portraits. For the next couple of weeks students went through the steps of erasing the backgrounds of their art in Superimpose app, layering their images, artistically convincing us that the two are combined, adding a background, and creating a shadow on one side. All these steps are part of my tutorial which you can view here. I made this blog post to teach from with examples, tutorials, and links to resources. VIEW THE WHOLE GALLERY OF WILLIAM WEGMAN INSPIRED COLLAGES HERE.
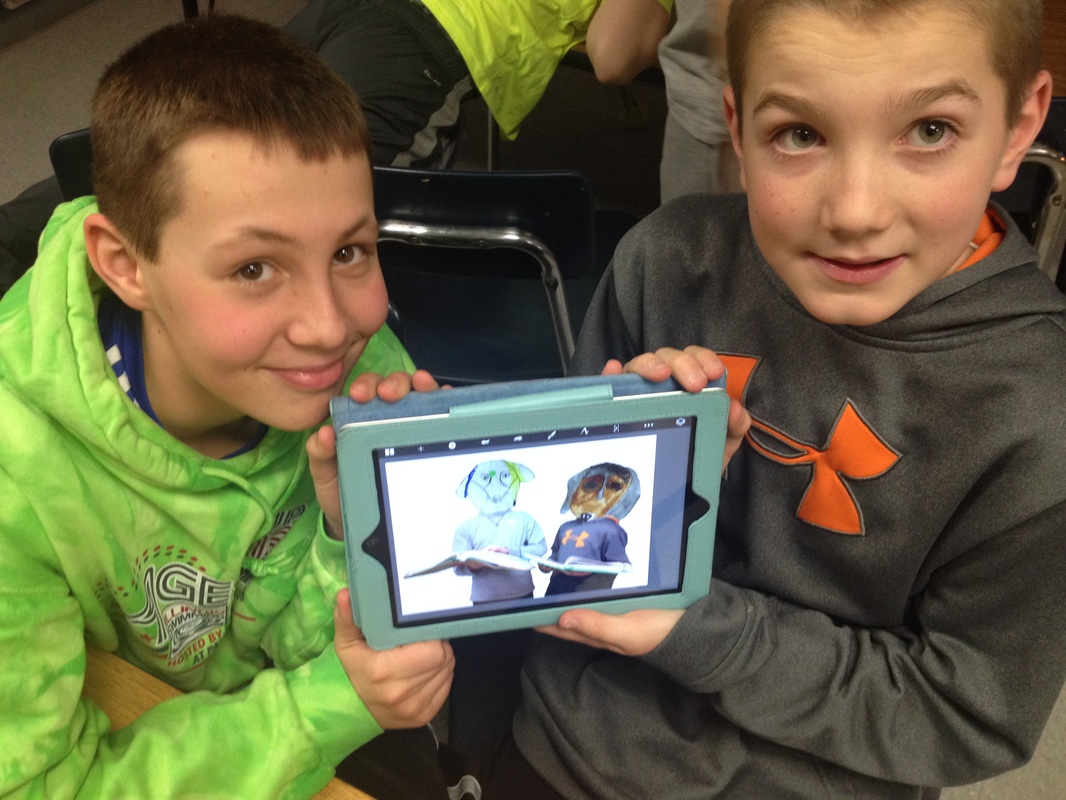
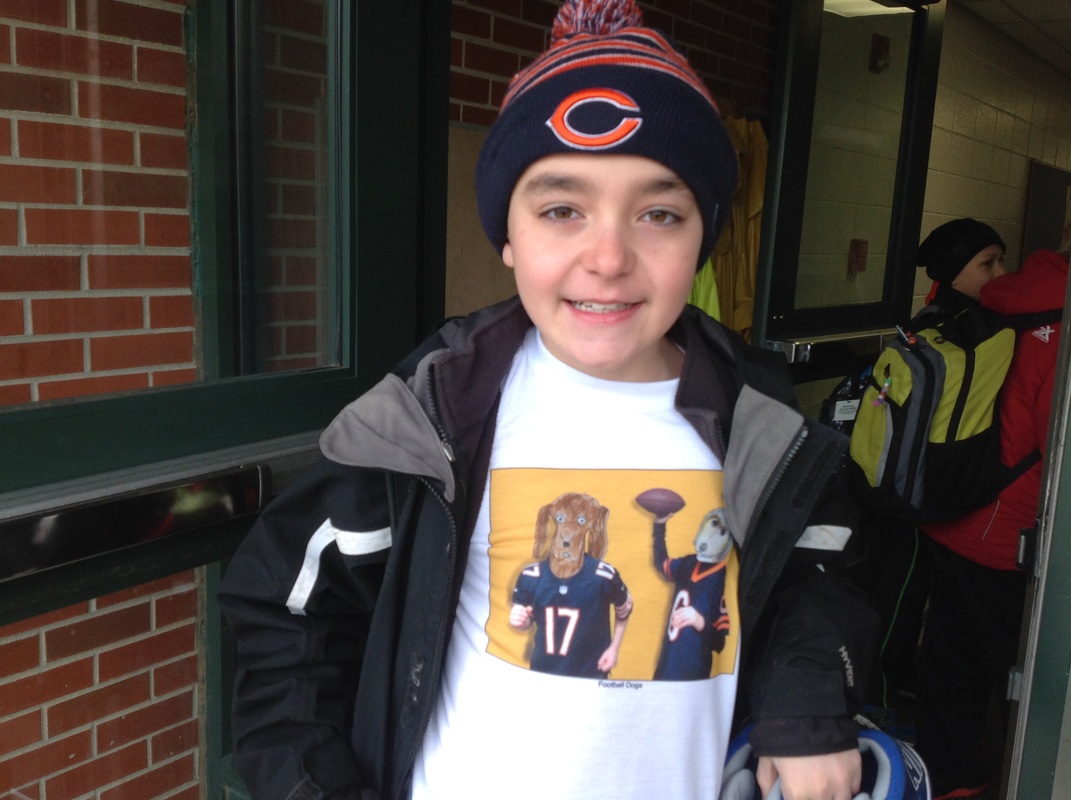 This artist showed up for school sporting his creation on his Artsonia T-Shirt
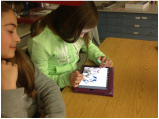
 My fifth graders are working on creating a William Wegman Styled photo collage from their water colored dog paintings and a photo they pose for with props and costumes. These images will be combined using two apps on the iPad. We will use the Superimpose app to create transparent backgrounds on both the child's pose and dog portrait painting. They will then use Sketchbook Express to layer the dog head, body, background, and shadow. There are a few techniques I came up with that make this pretty easy. Watch my tutorial below to learn my tricks. Other Resources:
 UPDATE:
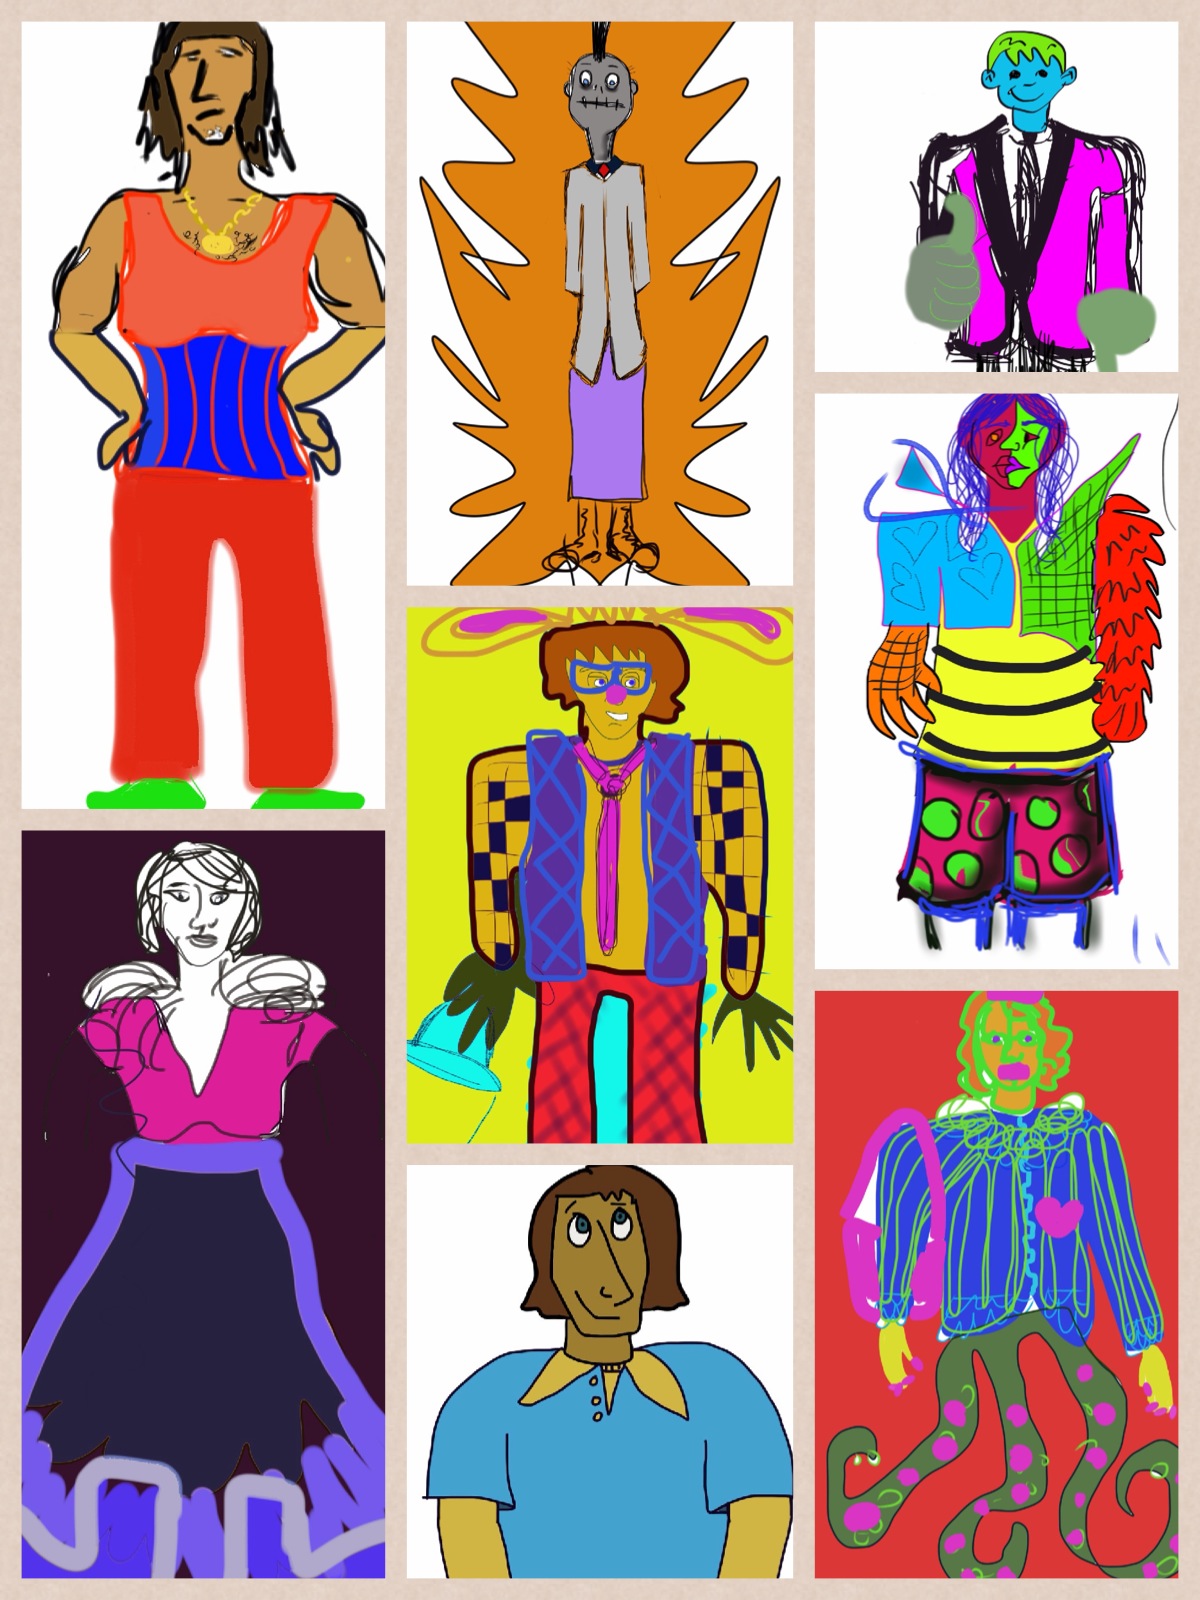
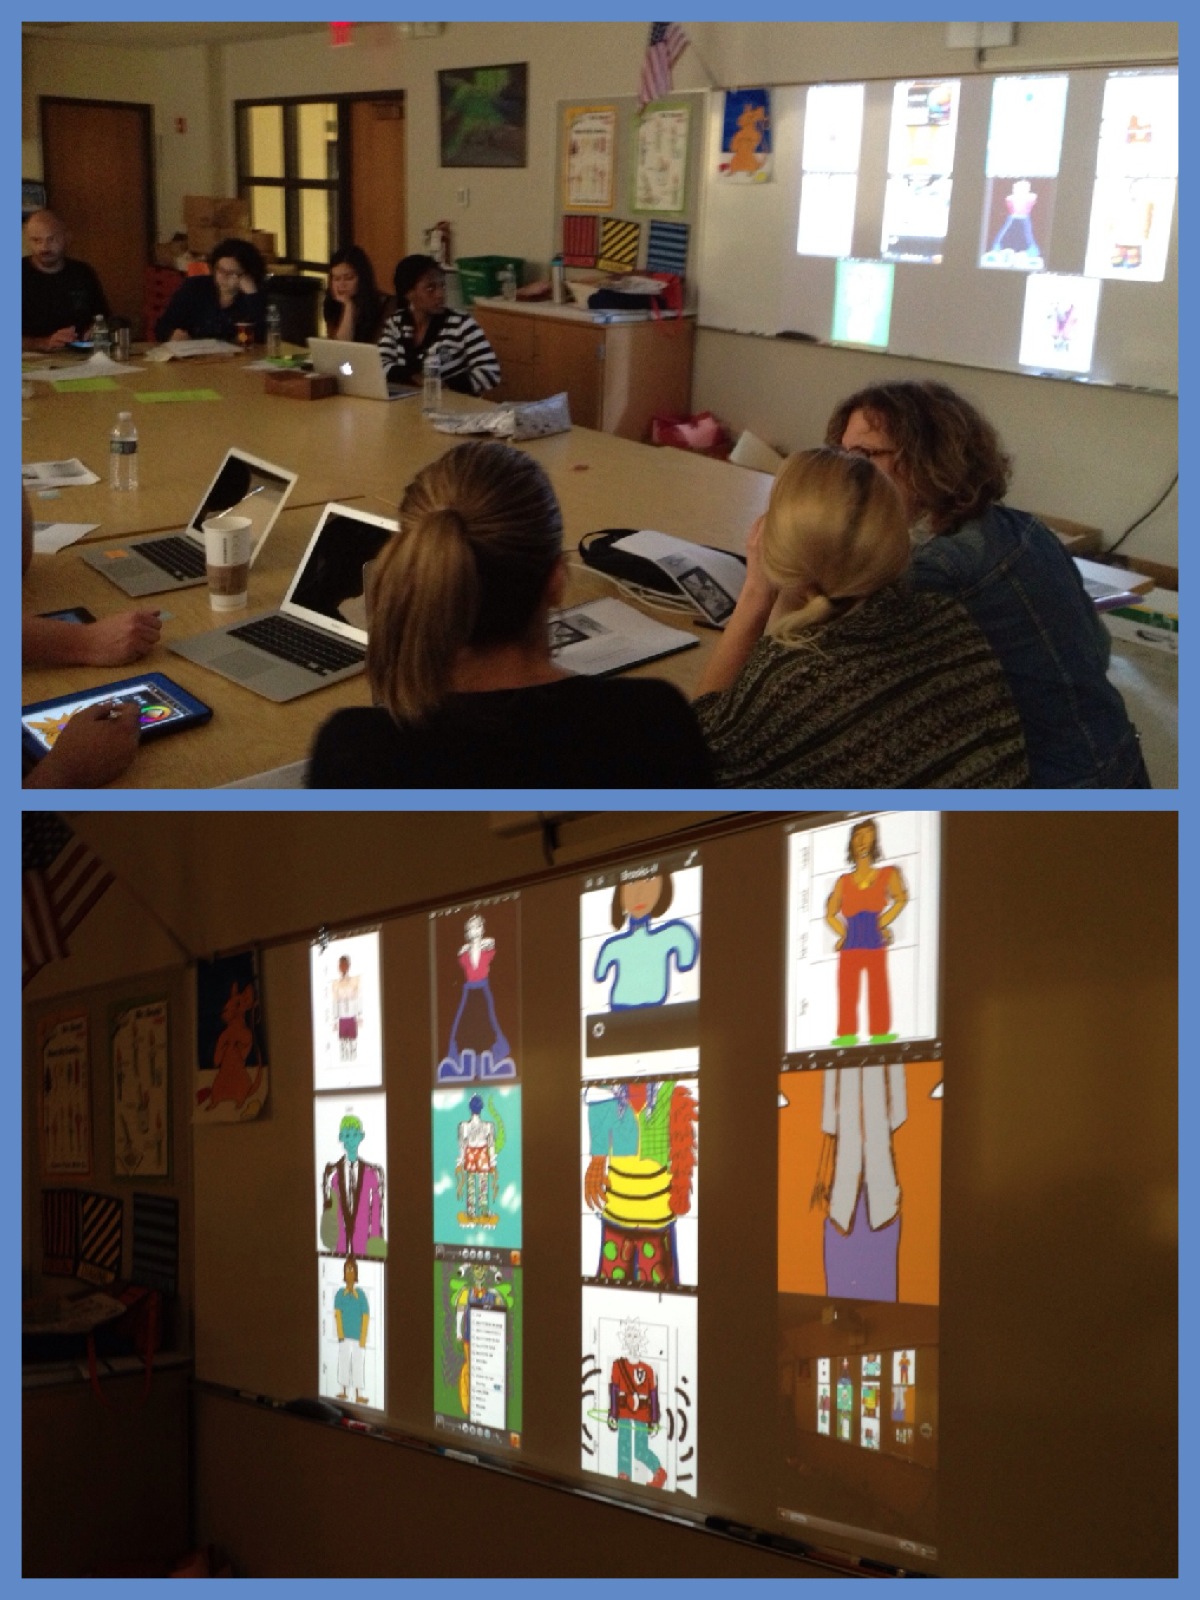
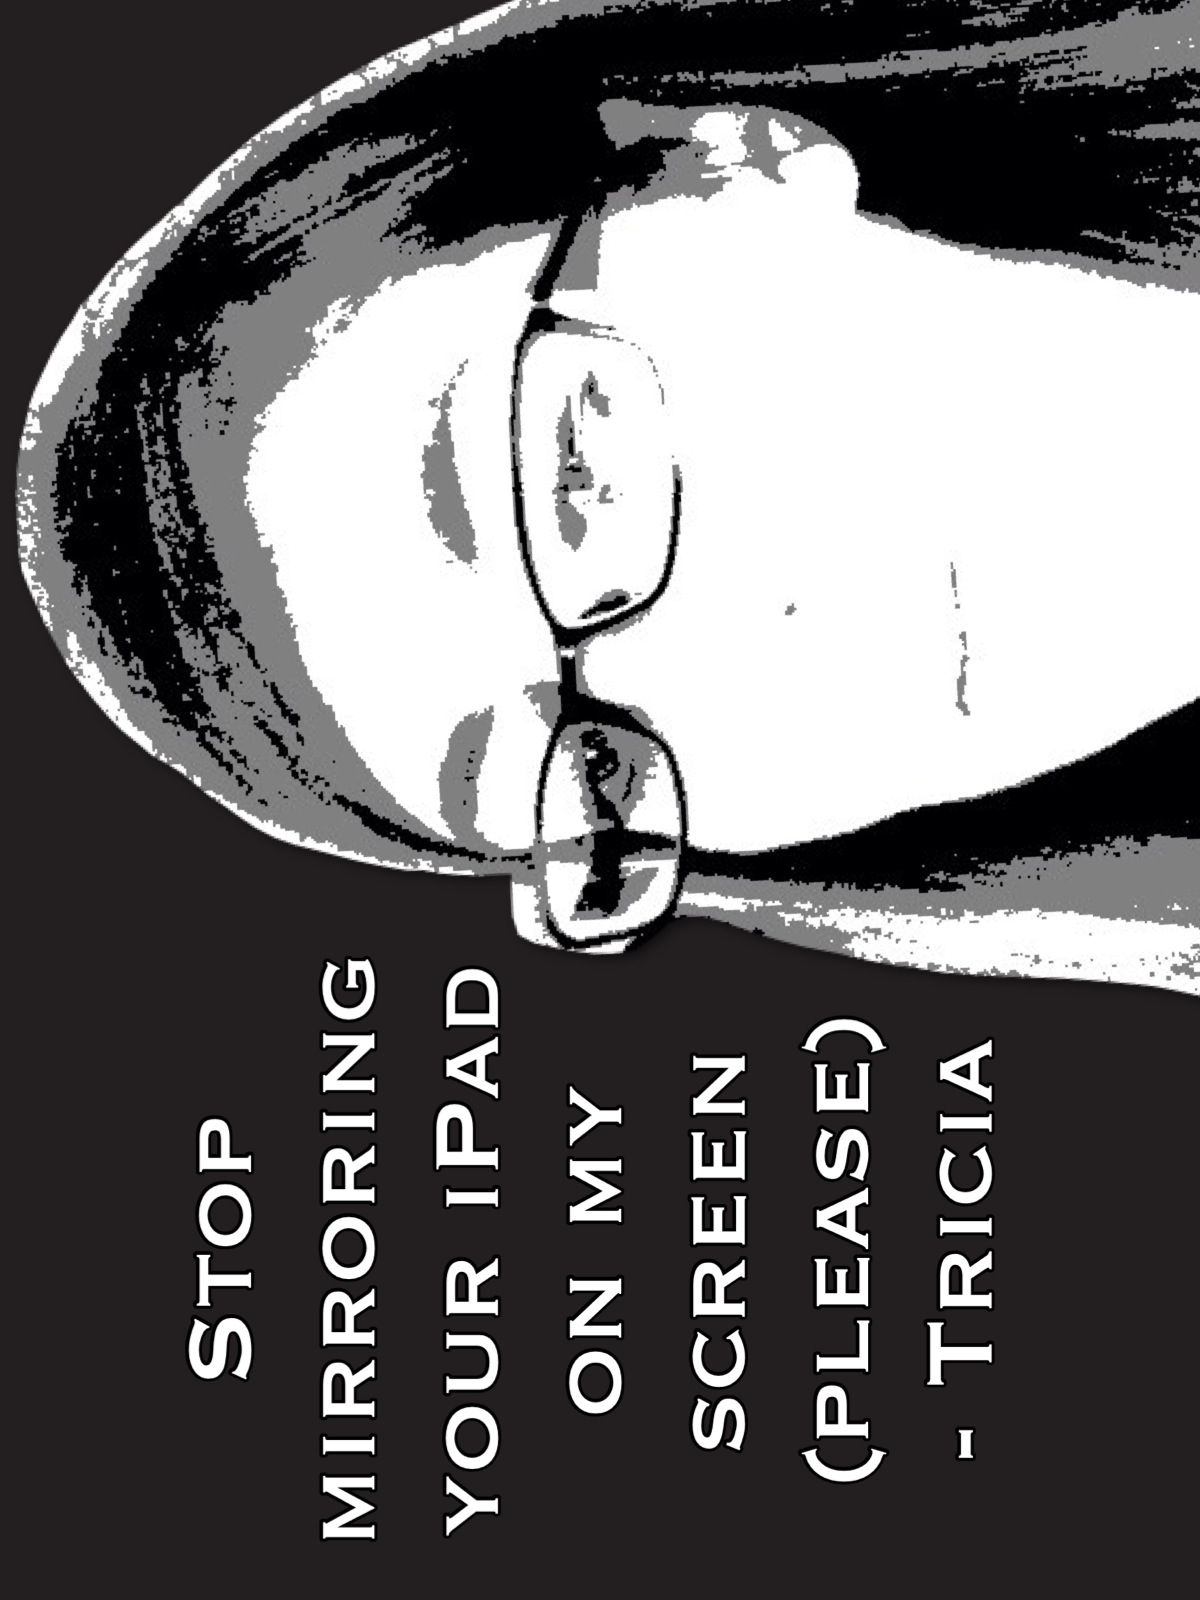
Our finished collages turned out AMAZING! I'm so excited and inspired by what my 5th graders are able to accomplish on iPads. --->Take a moment to view the post here. --->Or go straight to their online gallery here. I love working with art teachers on generating ideas for incorporating iPads into the art room. During the last couple of iPad workshops we would start creating by using the free app Sketchbook Express. I love the simple interface yet powerful possibilities of this FREE app. After trying our hand at drawing (see this collage of teacher's collaborative figures) we would learn to share our work with each other via AirServer on my laptop. Each participant can mirror their iPad and share the screen with each other without ever leaving their seat. See what that looked like here. There are drawbacks with teaching students to use airplay to mirror their iPads and that was demonstrated repeatedly during my last workshop. Someone kept interrupting my presentation by accidentally choosing to mirror their iPad through my laptop from a different room in the building. This would shrink my display and sometimes knock me off the stream entirely. Imagine the havoc our students could create if they used this tool for evil. (Don't get ideas, please) 
Photo Collages made in Sketchbook Express
Photo Collages using Sketchbook Express
|
Sign up for my newsletter
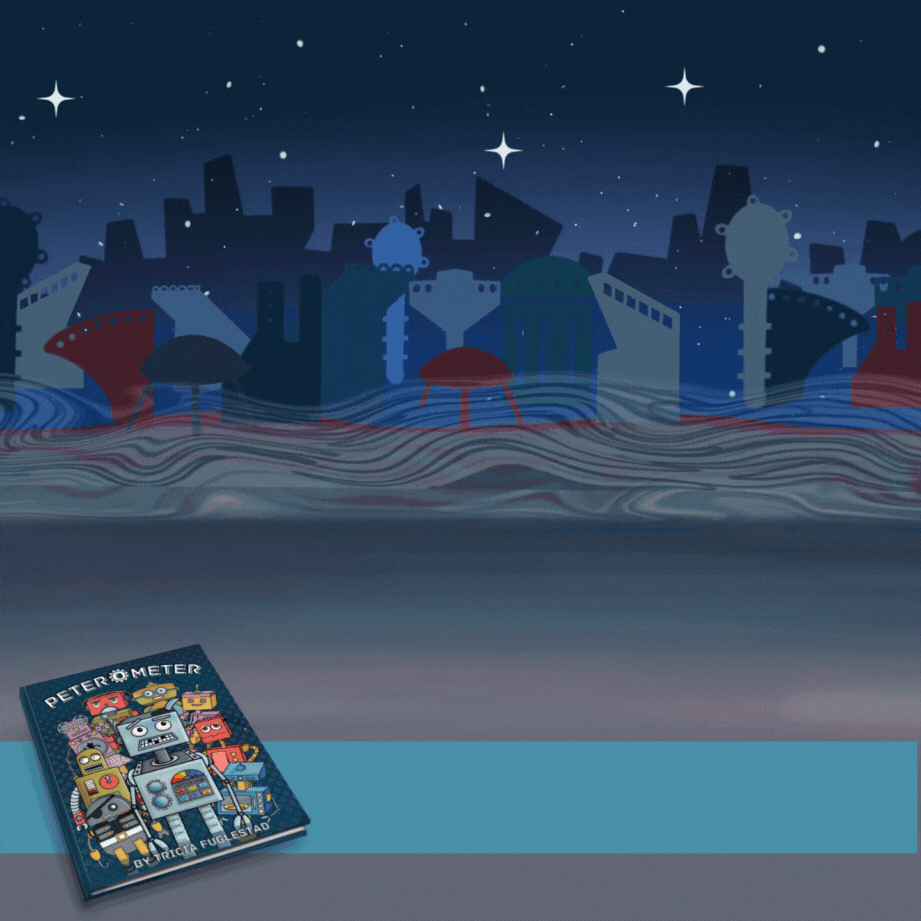
Learn about PETER O'METER,
my AR SEL Children's Book
Visit My TpT Store
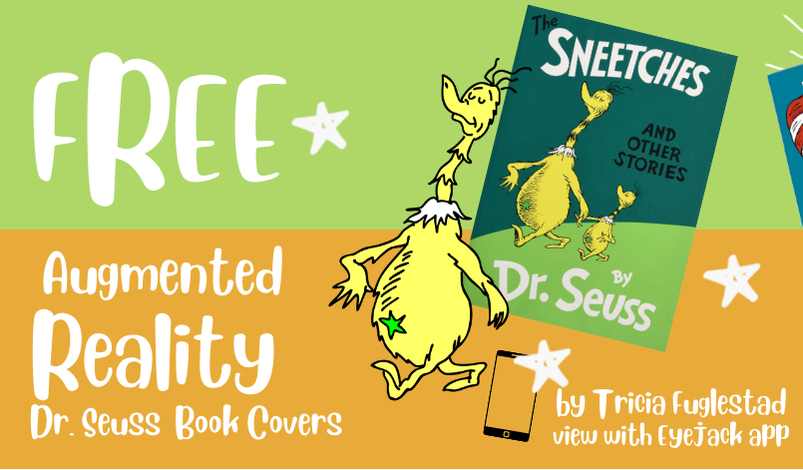
Grab my AR Freebie
Fuglefun Store Index
Loading
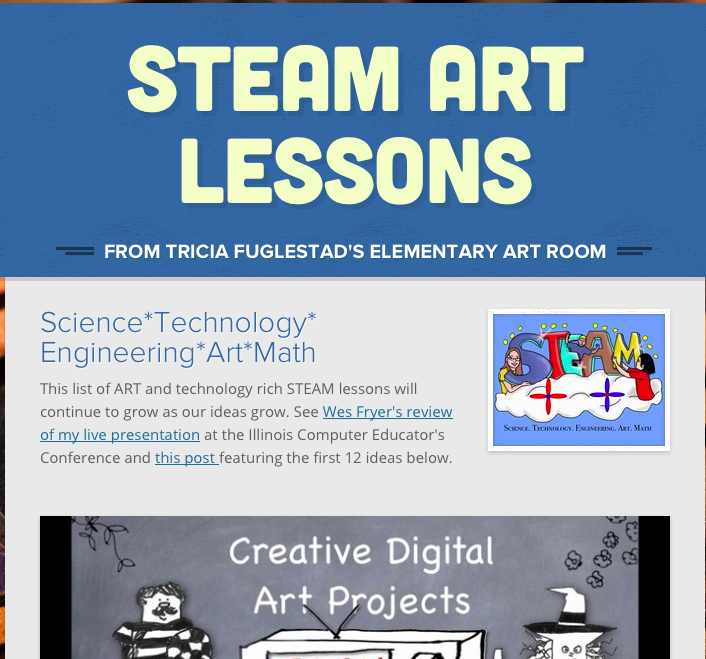
Click to view links to 230+ of my STEAM art lessons here
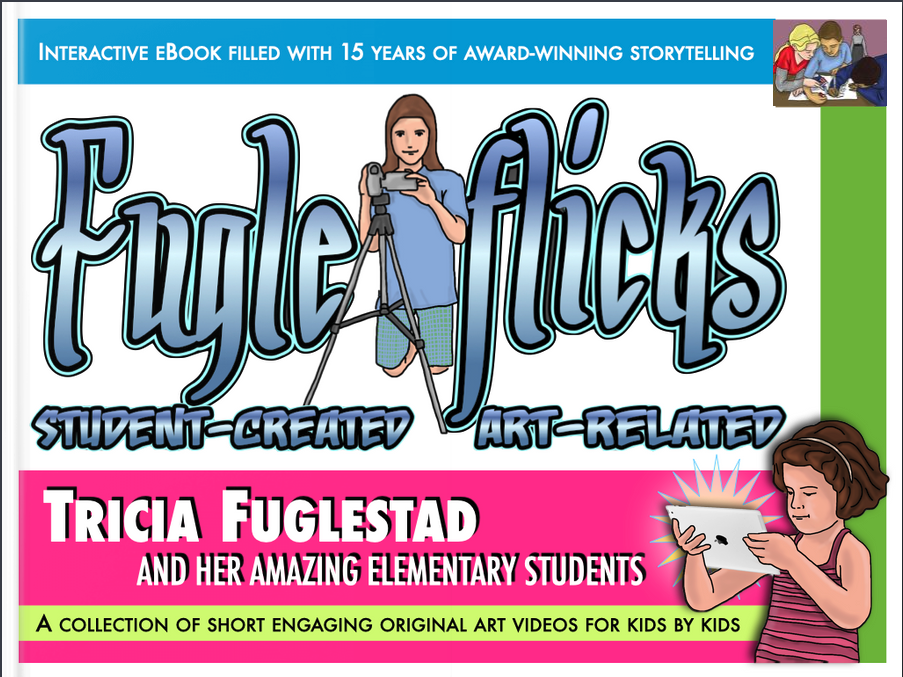
Interactive Fugleflicks eBook
We are the 2nd place winner of the ISTE Technology in Action Video Contest.
See my post for more info. Redefining the Art Room from Tricia Fuglestad on Vimeo. 
Art of Ed Interview on STEAM

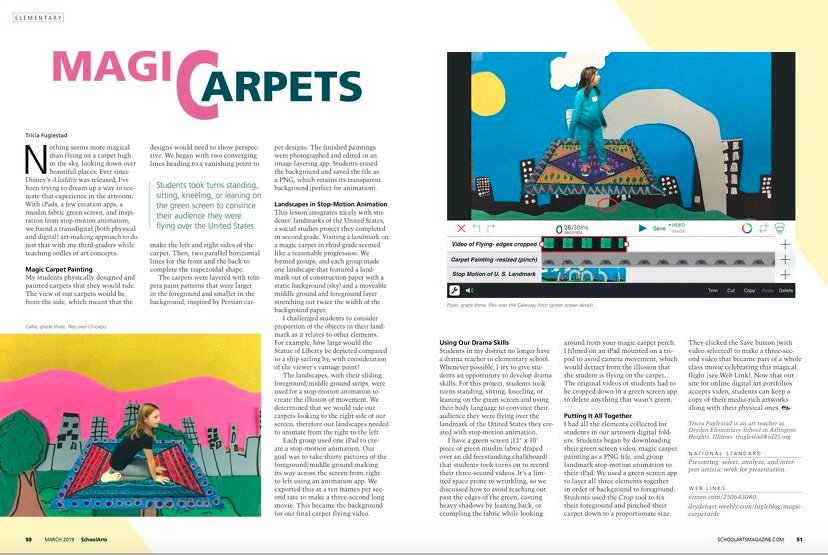
Read our Magic Carpet Ride lesson SchoolArts, March 2019
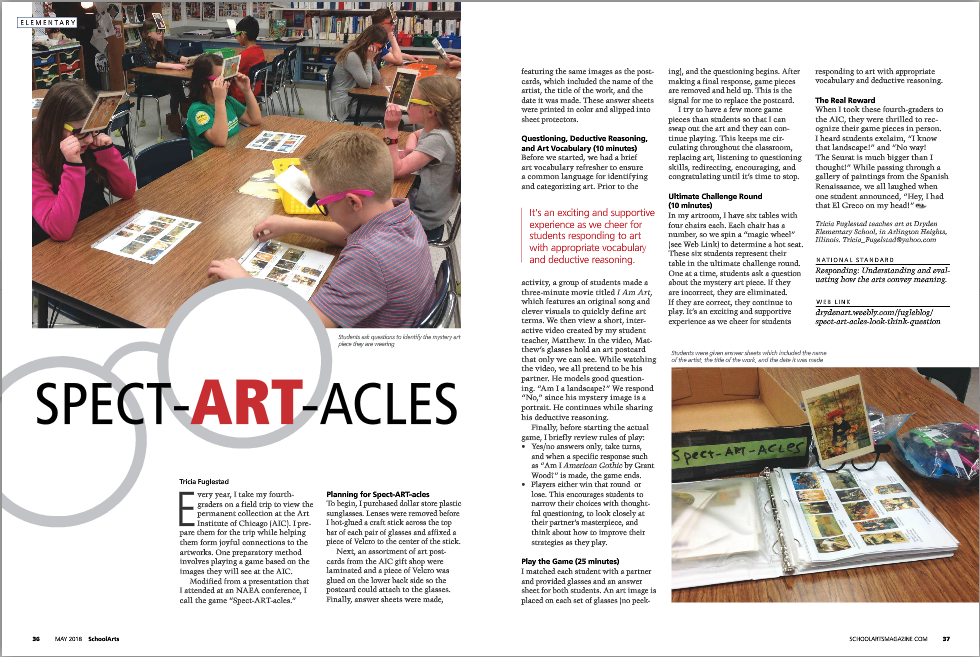
Read our SPECT-ART-ACLES article in School Arts, May 2018
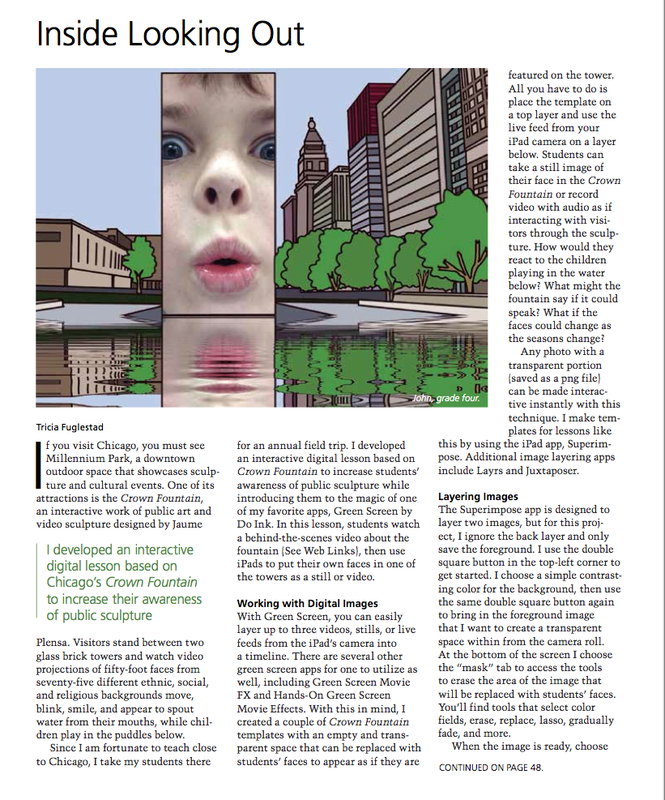
Read our School Arts Article April 2016 for an iPad lesson
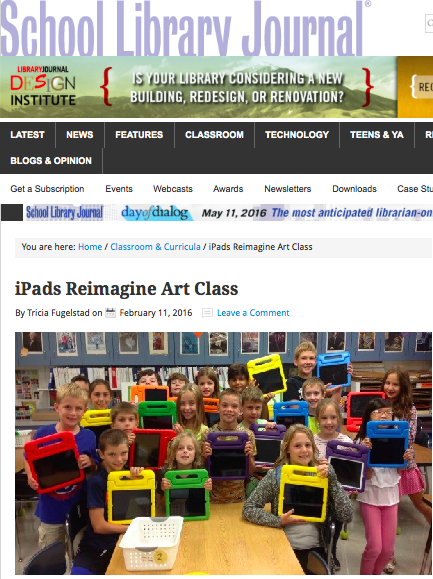
Read our School Library Journal Article about iPads

Help fund this Science + Art project (click link)
Voting ended

Did you see our School Arts Article? April 2014
Did you see our School Arts Article? March 2014
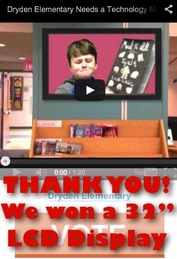
Did you see our School Arts Article? Nov. 2013

Dryden Art 2013-14 from Tricia Fuglestad on Vimeo. 
View this musical tribute to the hard working teachers at Dryden and the students they love to teach.
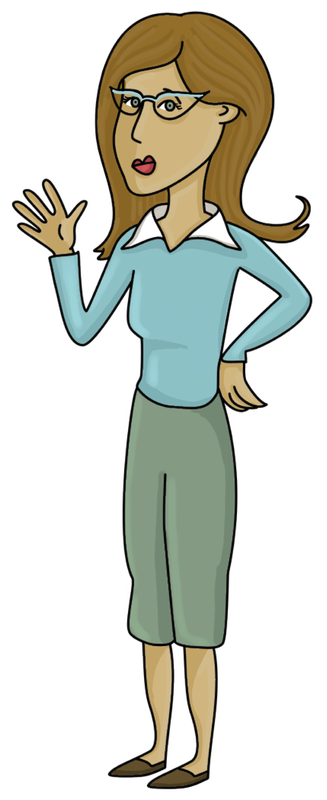
Common Core Crazy from Tricia Fuglestad on Vimeo.  Mrs. Fuglestad. Click to see how I made this image. 


About MeTricia Fuglestad, NBCT, 
Life is too short for long faces.
Archives
October 2022
Categories
All

 This work is licensed under a Creative Commons Attribution-NonCommercial-ShareAlike 4.0 International License. |


 RSS Feed
