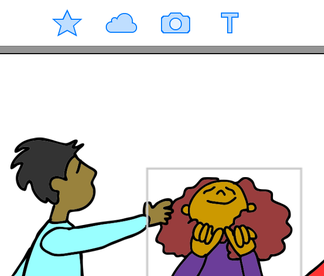
Rotoscope animation (drawn over video) of Mrs. Fuglestad and steamy hot cocoa
UPDATE: I Packaged the Animated Still Life Lesson with Hot Chocolate here!
with Step-by-step directions, animations, video tutorials, augmented reality steps
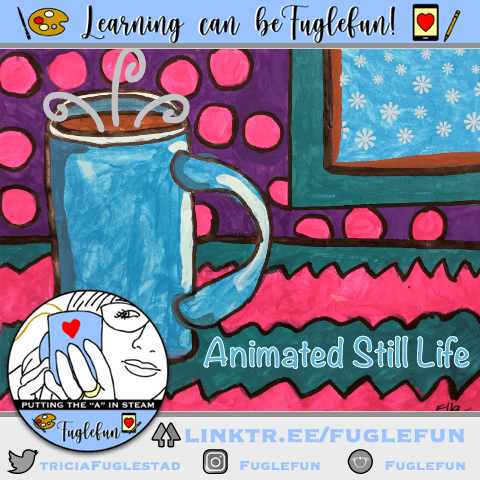
Click the image to explore the packaged lesson

My third graders are going to explore the primary & secondary colors, complementary colors, patterns, rotational symmetry, while learning the geometry of a circle in these color wheel paintings. Then they will be compared to op art as students rotate and digitally fall into them using Do Ink drawing and animation app on the iPad.
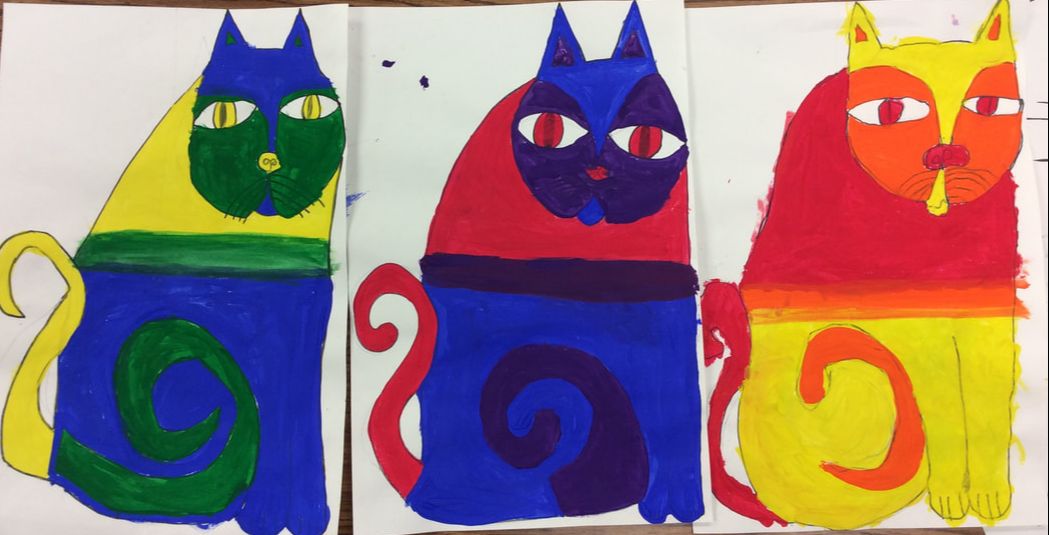
Analogous colors are next to each other on the colorwheel.
Student Art: view the gallery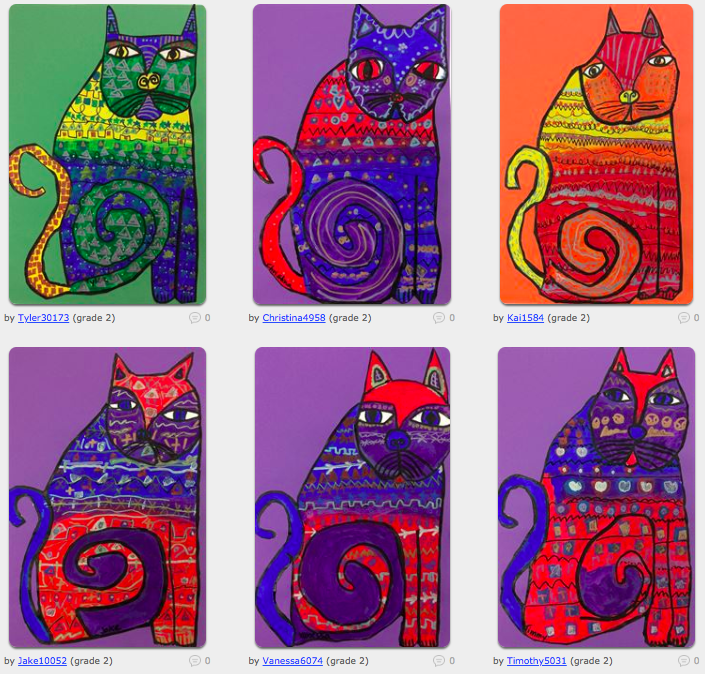
Resources:
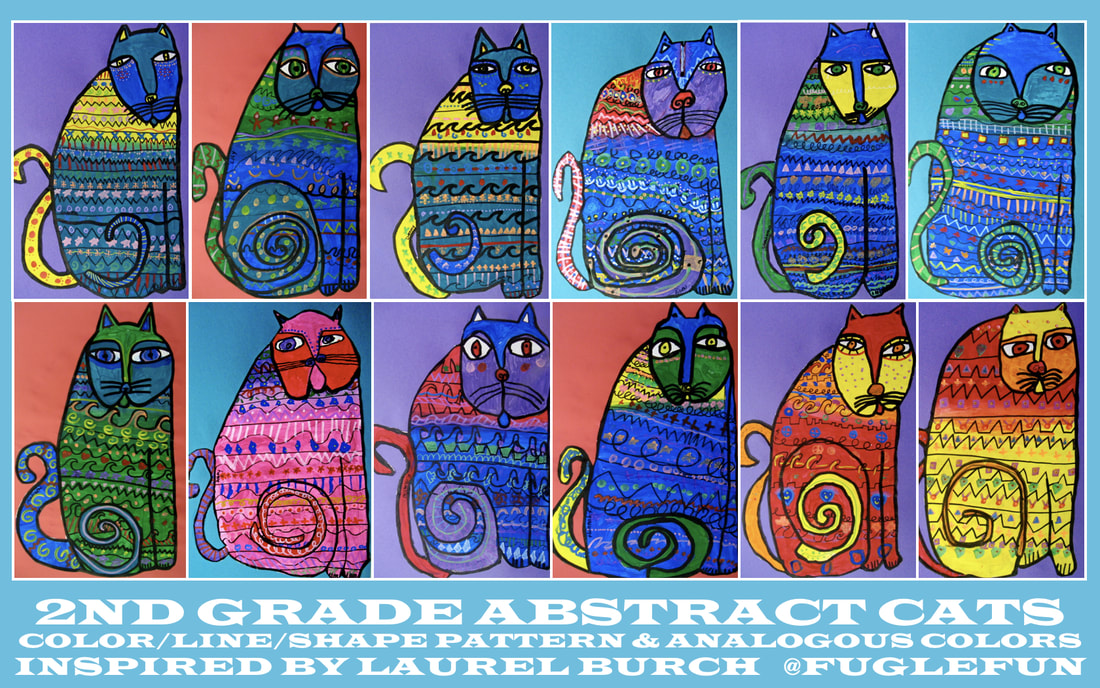
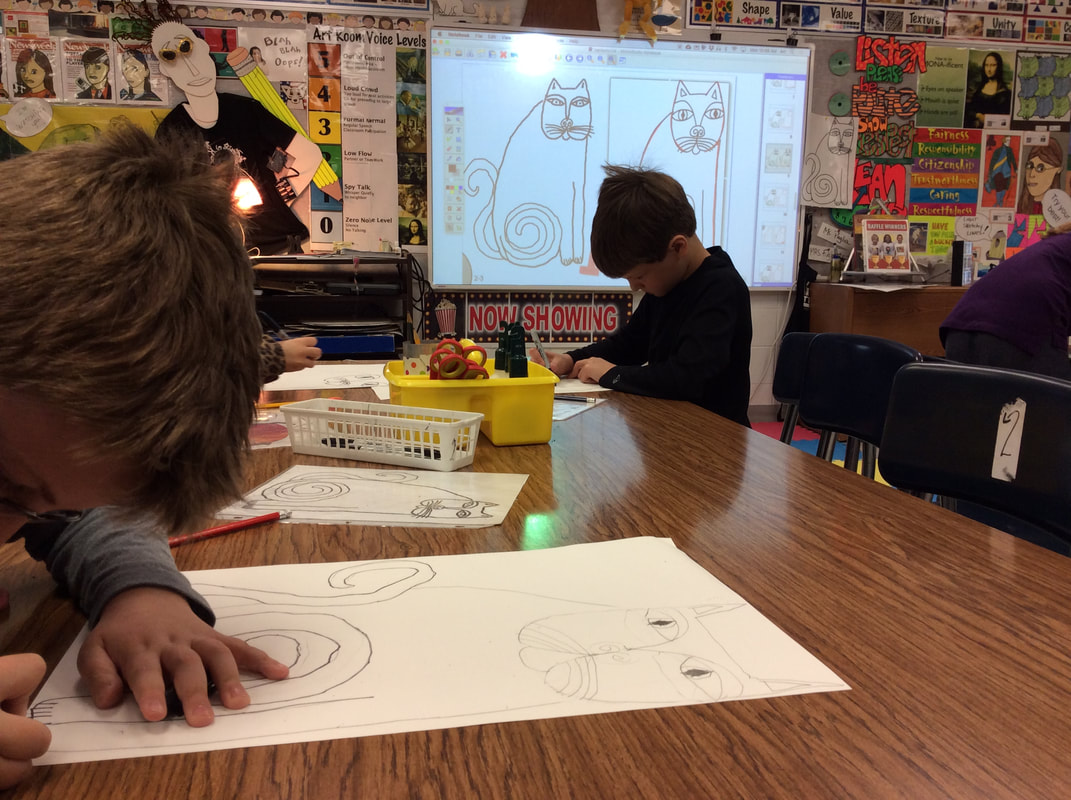
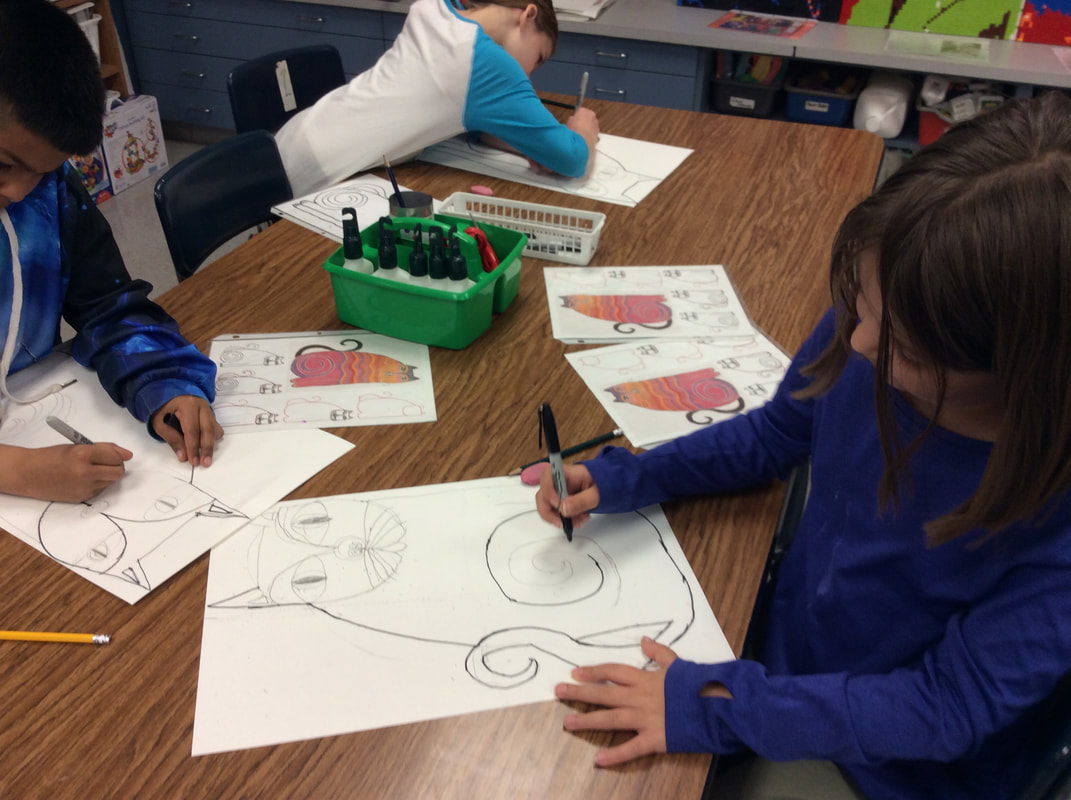
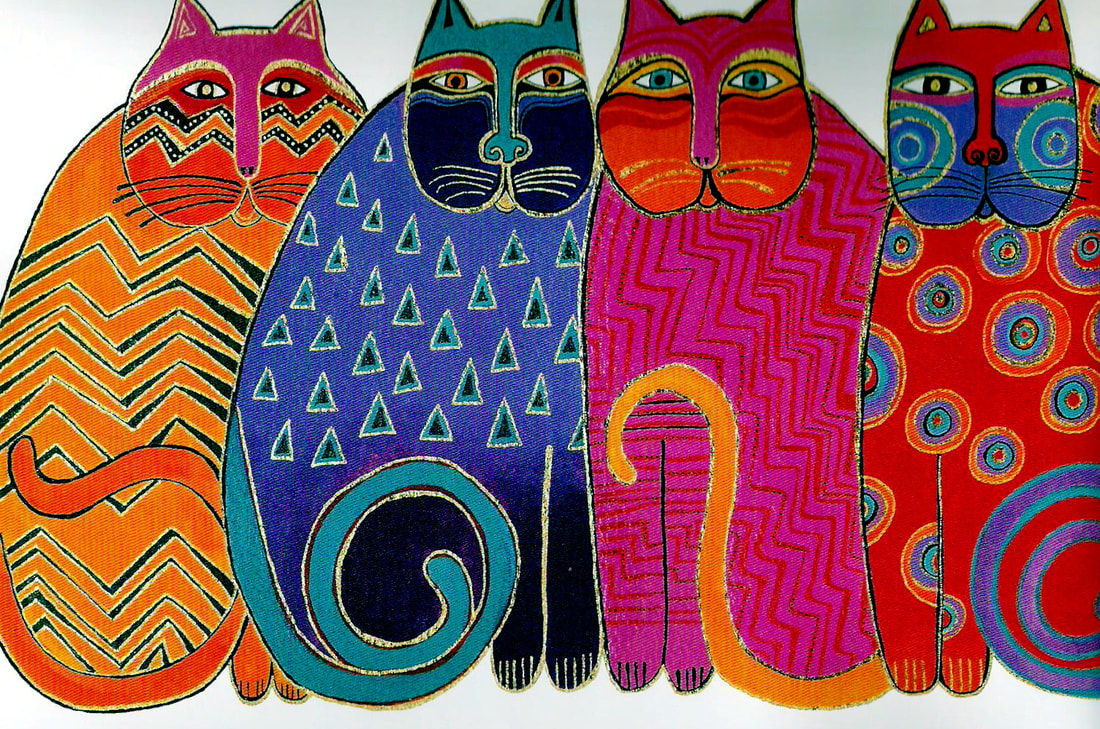
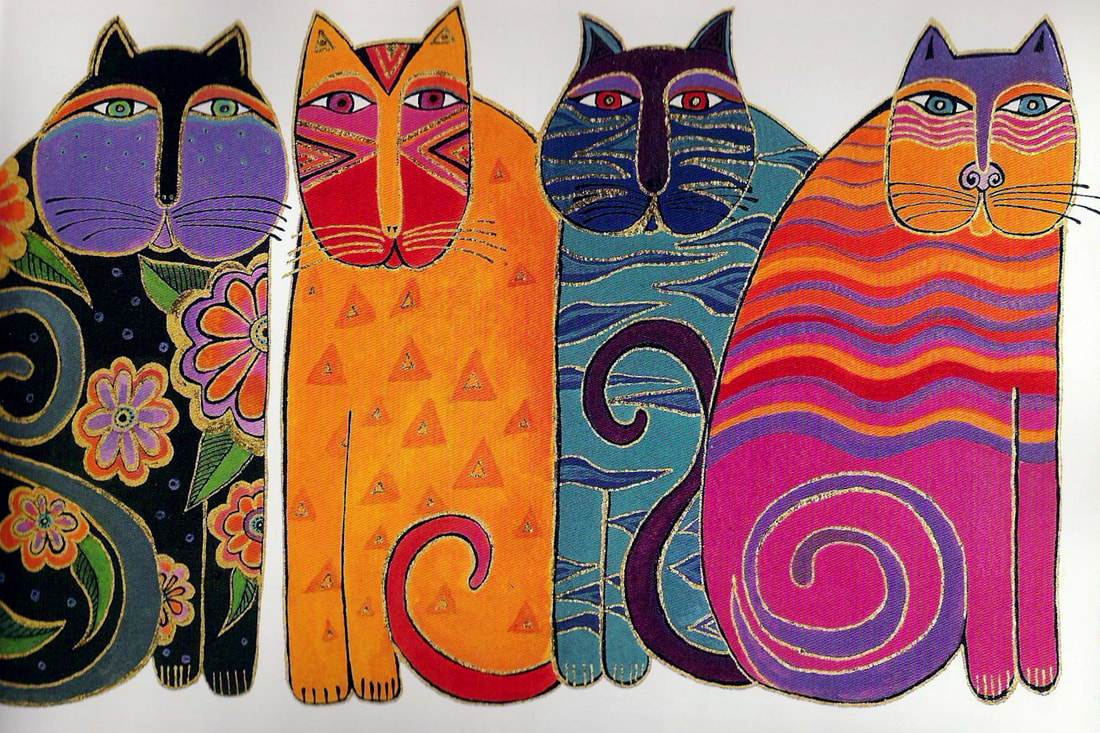
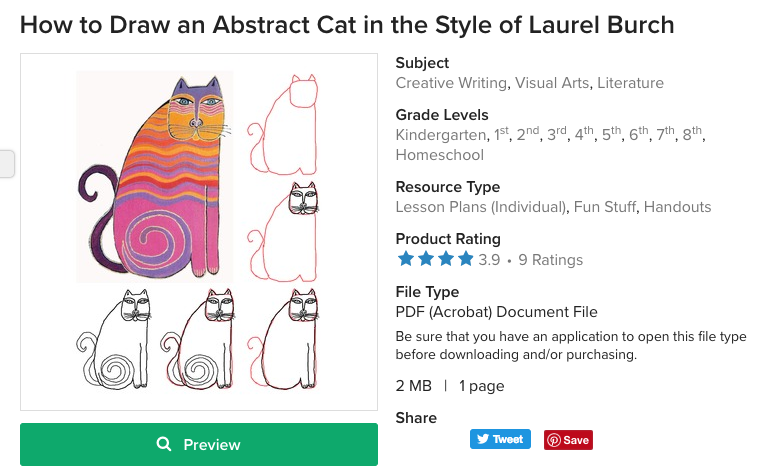
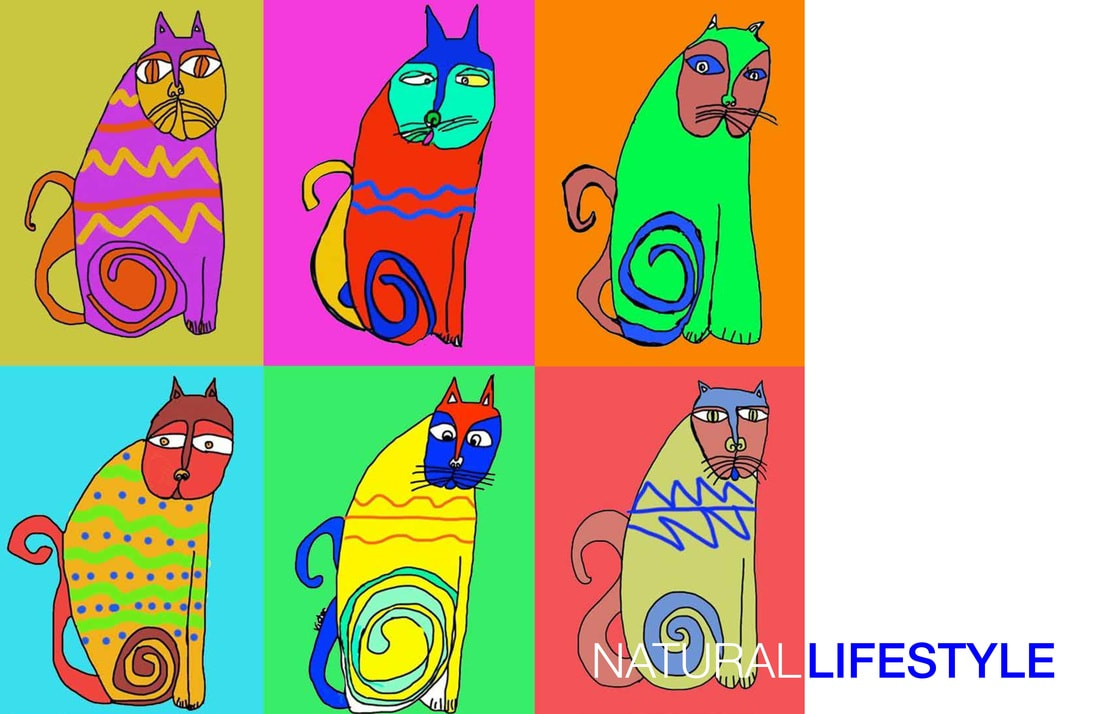
Students use patterns to fill these cats. This Fugleflick, Repeat, talks about line, color, and shape pattern. See my students working while listening to this music video.
Repeat from Tricia Fuglestad on Vimeo. Other Cats (safeview)Digital Version of this lesson:


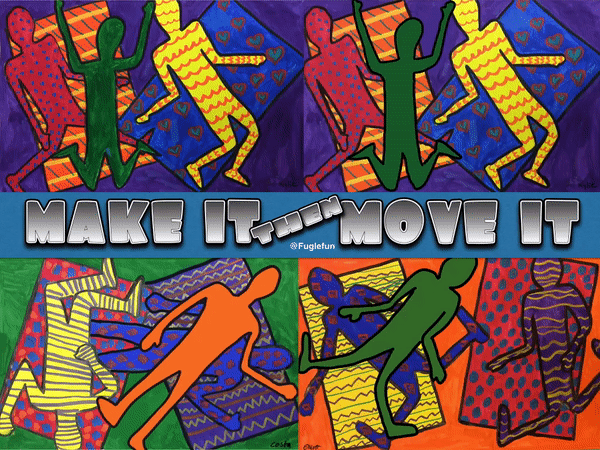
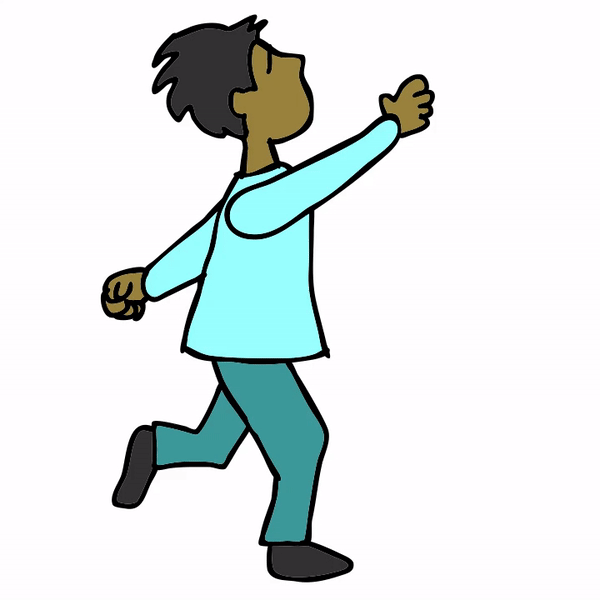
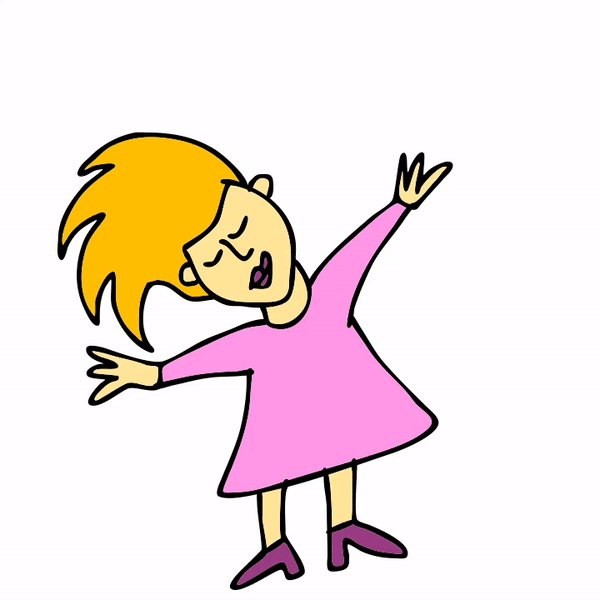
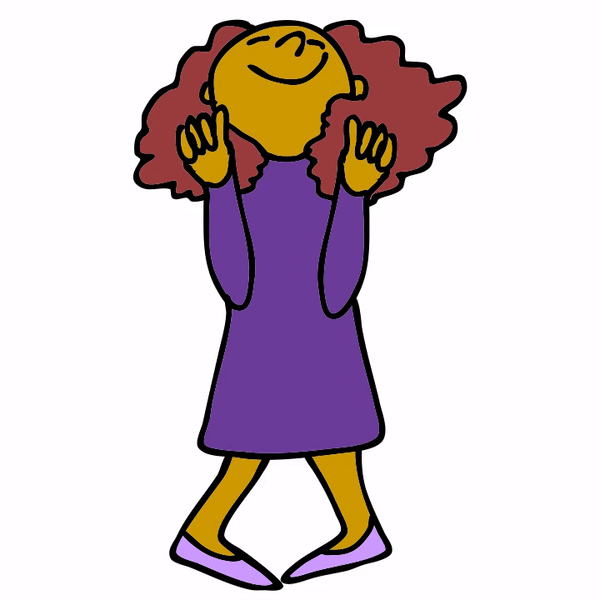
This DANCE PARTY was inspired by the Christmas dance party scene in the Peanuts animation where each child is dancing in place on the dance floor in a continuous loop. We can try something similar using the Do Ink Animation app with these steps:
1. Get inspired by Peanut's Dance Party2. Each student creates one dancer
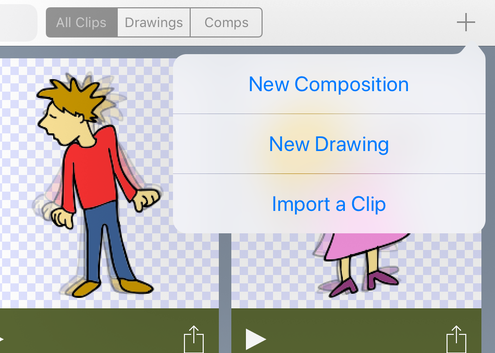
1. Open up Do Ink Animation app and chose a "new drawing"
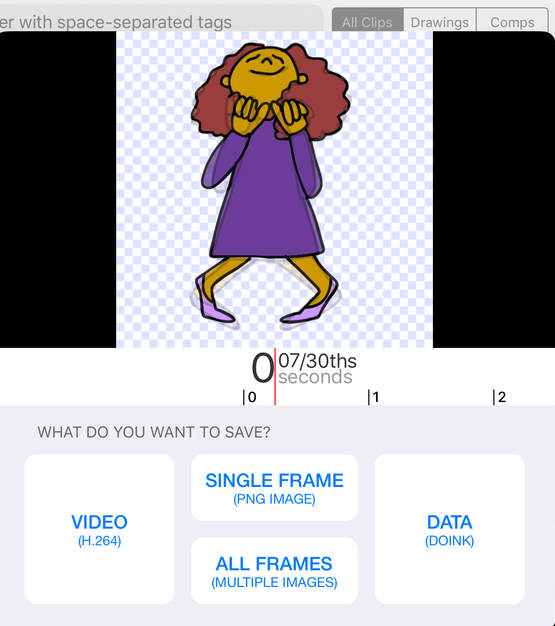
2. Choose brush size 5 and black and draw your first pose with closed shapes (so you can pour for coloring later) 3. Click the + in the timeline (bottom right corner) and draw the next pose 4. Repeat until you have 5 poses 5. Use the pour bucked and color each frame with the same color scheme. 6. Click on pose 4 in timeline, chose the double arrows to reveal "copy" & choose it 7. Click on frame 5 (last frame) and click "paste" 8. Click on frame 3, choose "copy". Click on last frame (now frame 6) click "paste" 9. Click on frame 2, choose "copy". Click on last frame (now frame 7) click "paste" 10. Click the play button and see if the animation loops nicely
2. Share the Do Ink Files
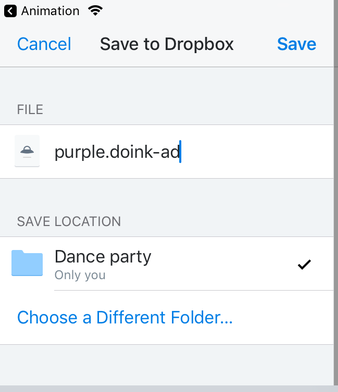
One of the cool things about the Do Ink animation app is that you can share your files from one device to another. We used the DropBox in my art room so students would save their animation using "DATA" then choose "Dropbox" and navigate to the Dance Party folder, rename it and save.
Sharing our original Do Ink files means that we and put together a group animation with multiple dancers while retaining all all layering, resizing, and editing functions.
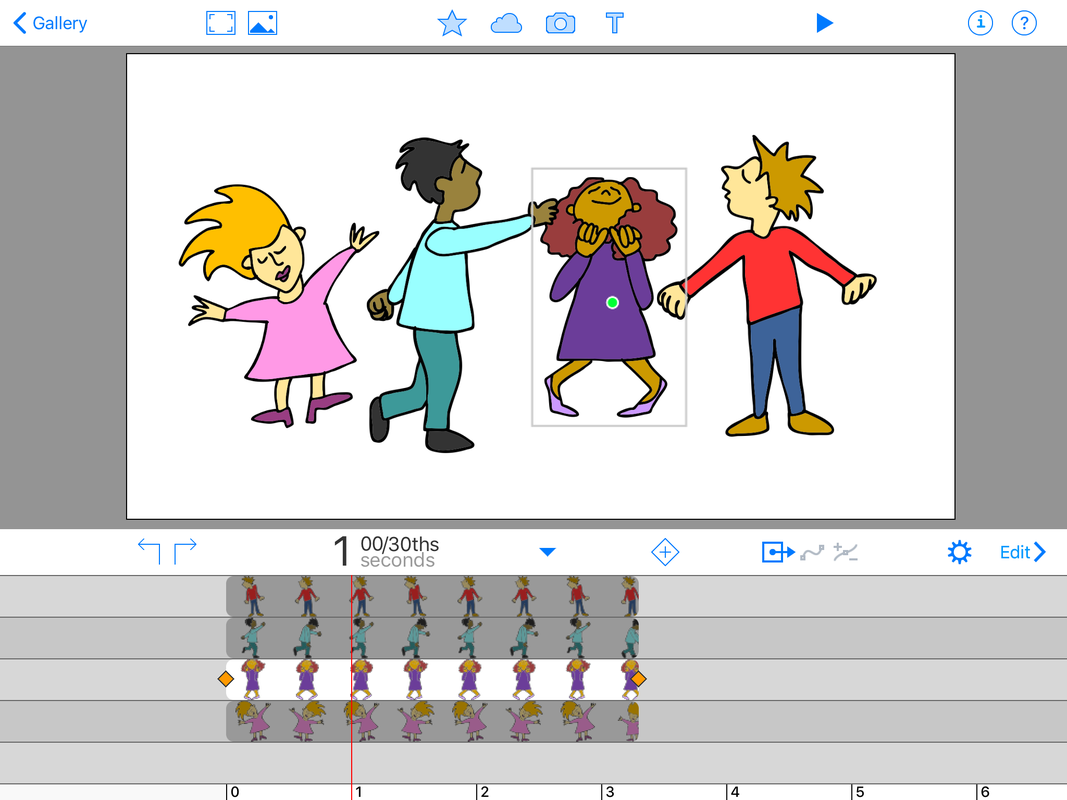
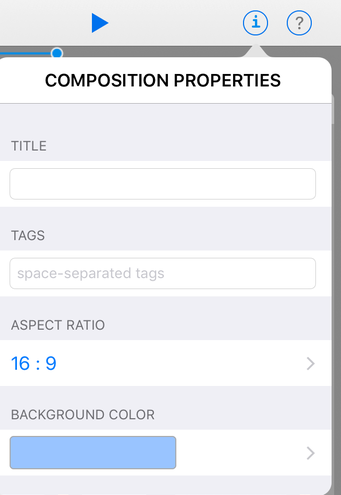
3. Bring the dancers into 1 composition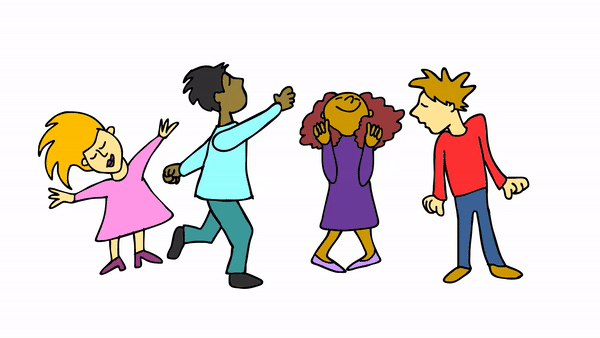
4 dancers in one (16:9 ratio) composition with empty background
4. Flipbook designs w/lines & shapes
Students can work in pairs on designing a shape or line design for the background of their party. It's helpful if they choose 16:9 ratio as they create. I would recommend NOT using black in the outlines or anywhere. It will look too busy in the final piece and visually confuse the viewer since the figures are outlined in black.
5. Layer in & fade the background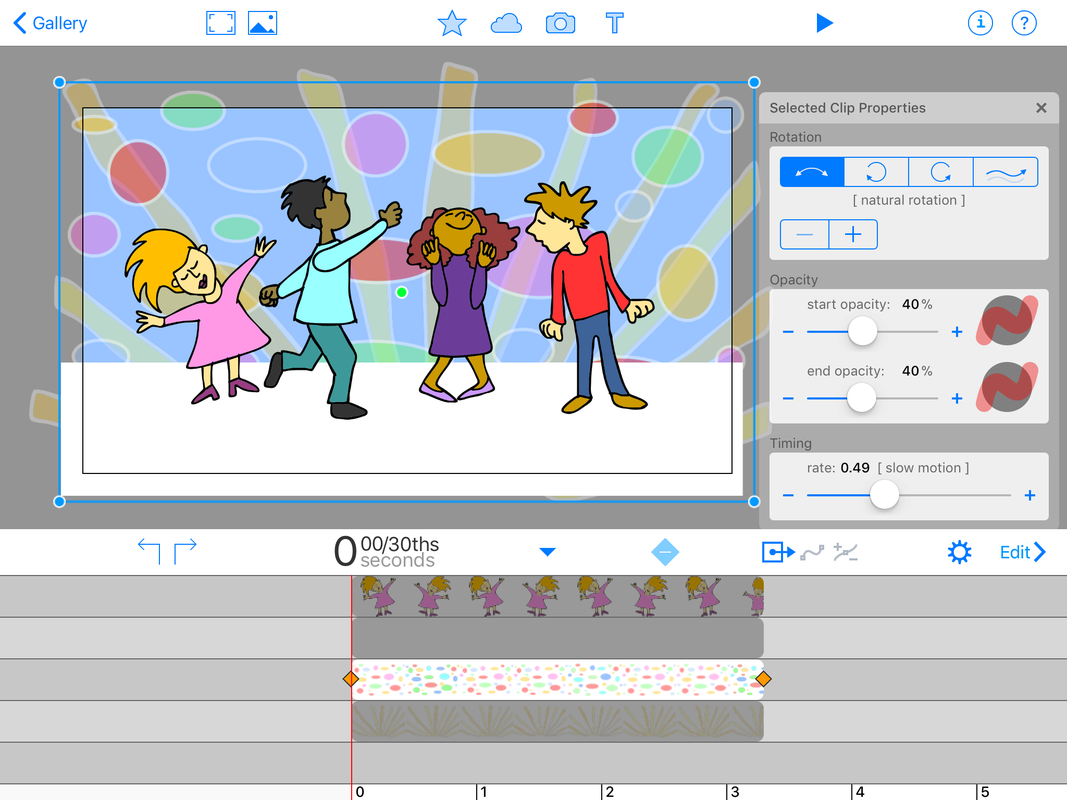
Use the gear to select transparency in and out on the background layers
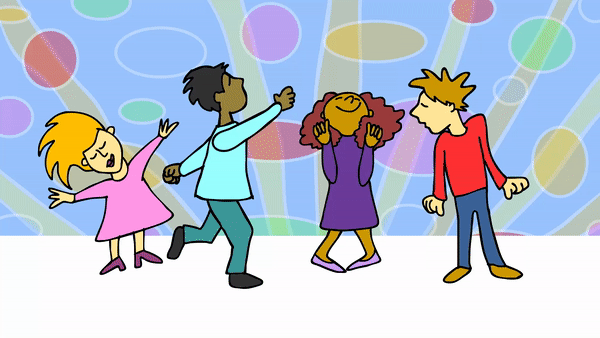
Dance party: 4 dancers, two backgrounds, one floor with a background color
Related Projects:
Alien Music Invasion post full of fun musical creatures
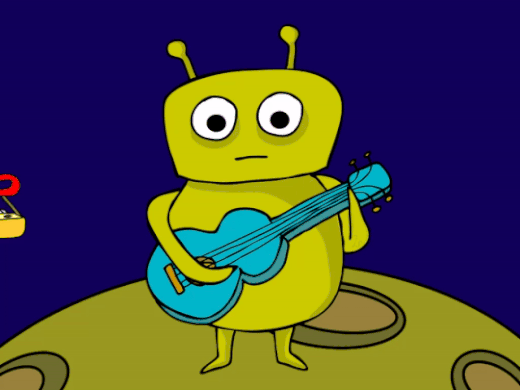
Click to see this project full of singing, dancing, and instrument playing aliens
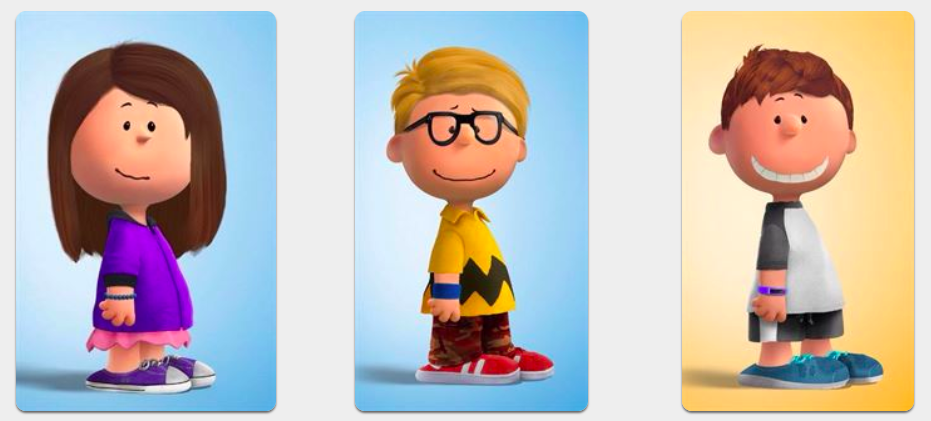
Peanutize yourself like my students did using this link.
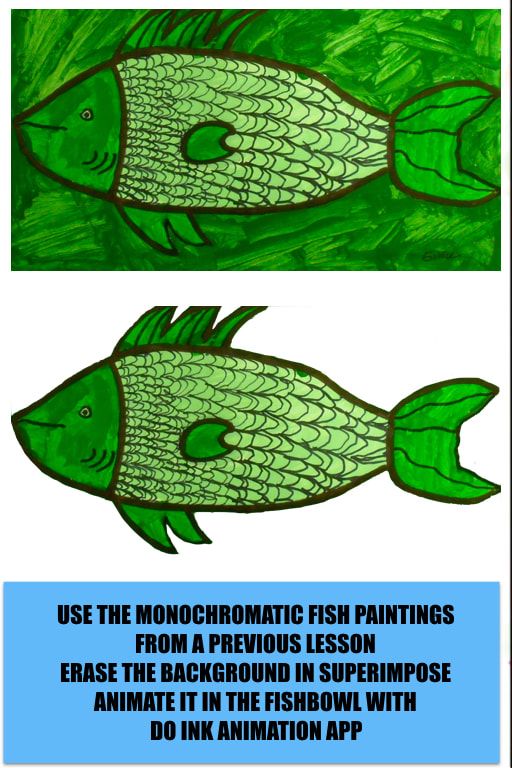
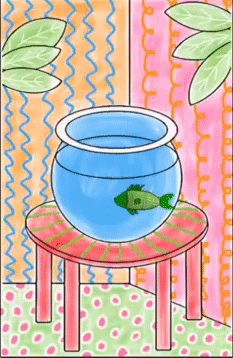
Resource: Learn about line and shape pattern with this fun (and repetitive) fuglelflick, RepeatRepeat from Tricia Fuglestad on Vimeo. 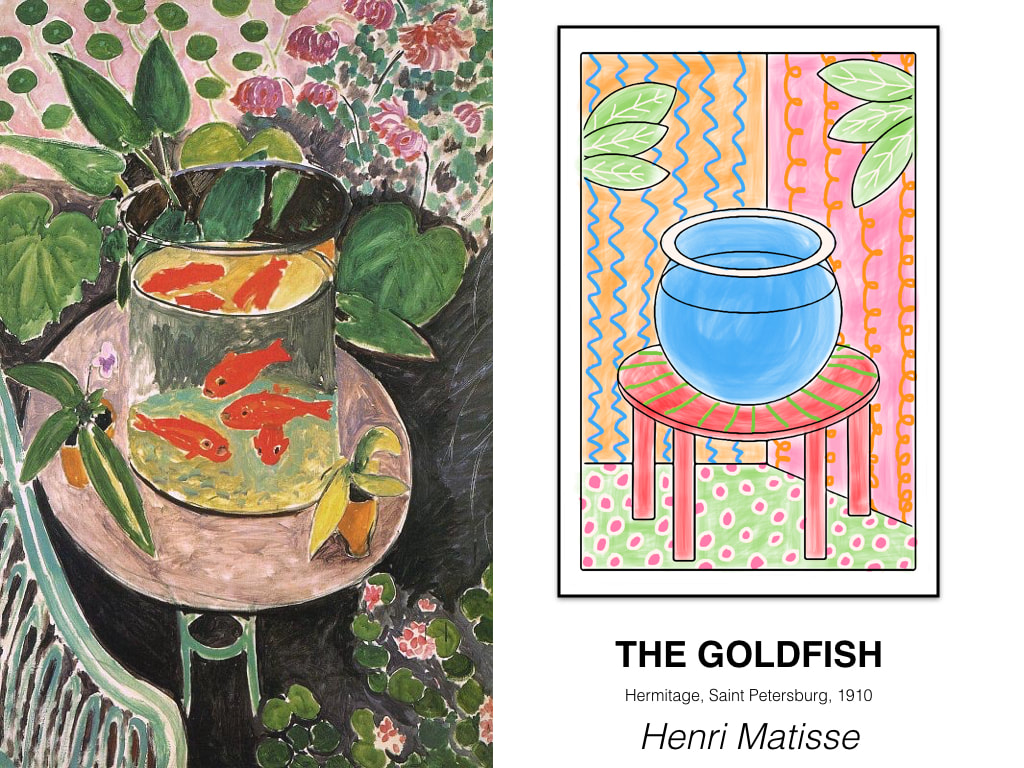 After 1st graders finish making their monochromatic fish paintings I have a new idea for them. We will learn to draw shapes into forms, create an interior space, fill it with pattern, and balance it with color using THE GOLDFISH, by Henri Matisse as inspiration. The fishbowl, however, will be empty at first. 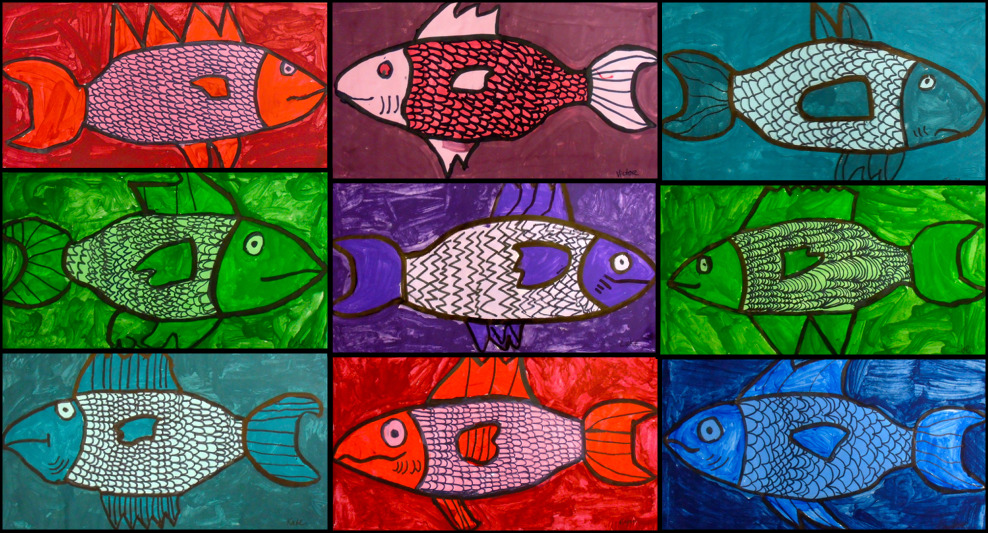 Click to view the monochromatic fish lesson Below is a slideshow that leads students through the steps for drawing where they will turn a circle into a fishbowl, make an oval table, design a corner of the room, and use color and pattern in the style of Henri Matisse.
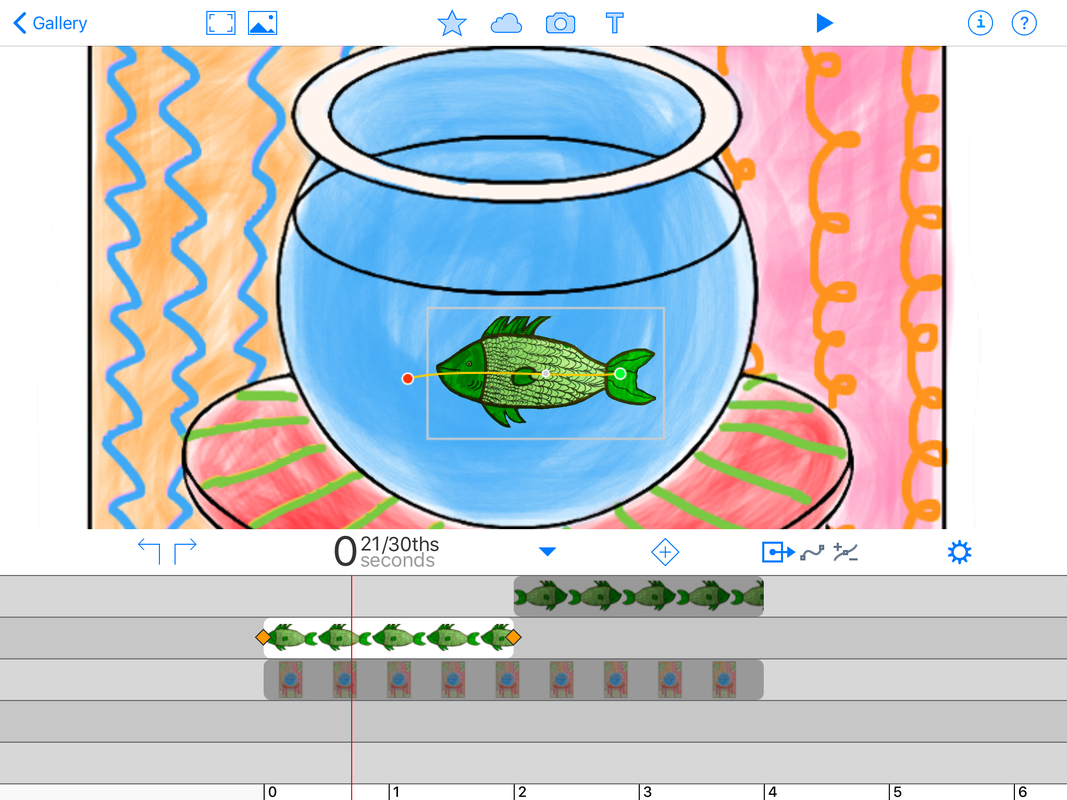 Students will make their swim around in their fishbowl using the Do Ink Animation app 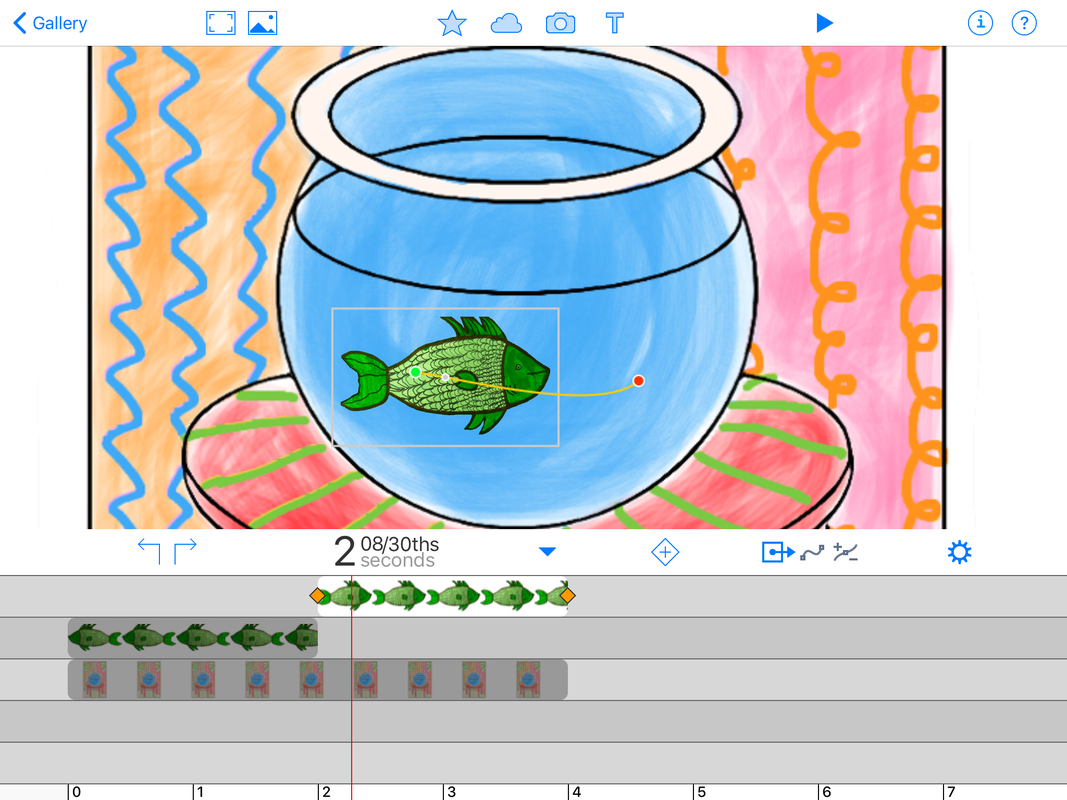 They will move it one way 2 seconds, flip it, and move it the other way 2 seconds 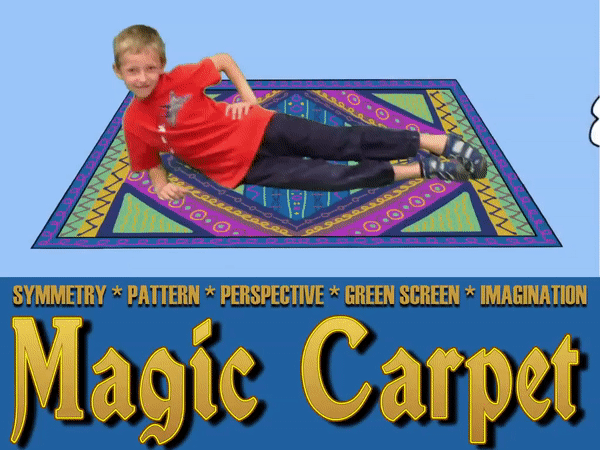 Digital Carpet Painting:
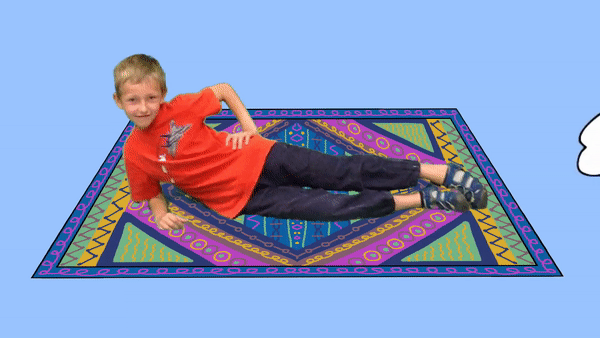
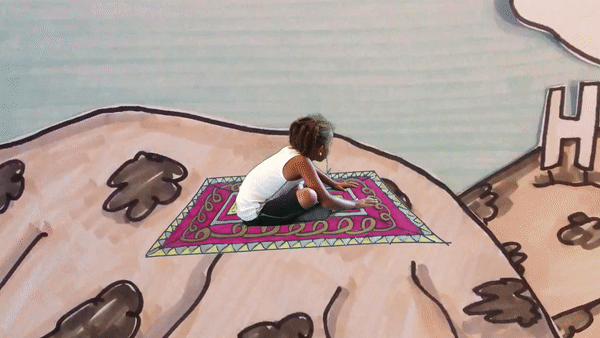
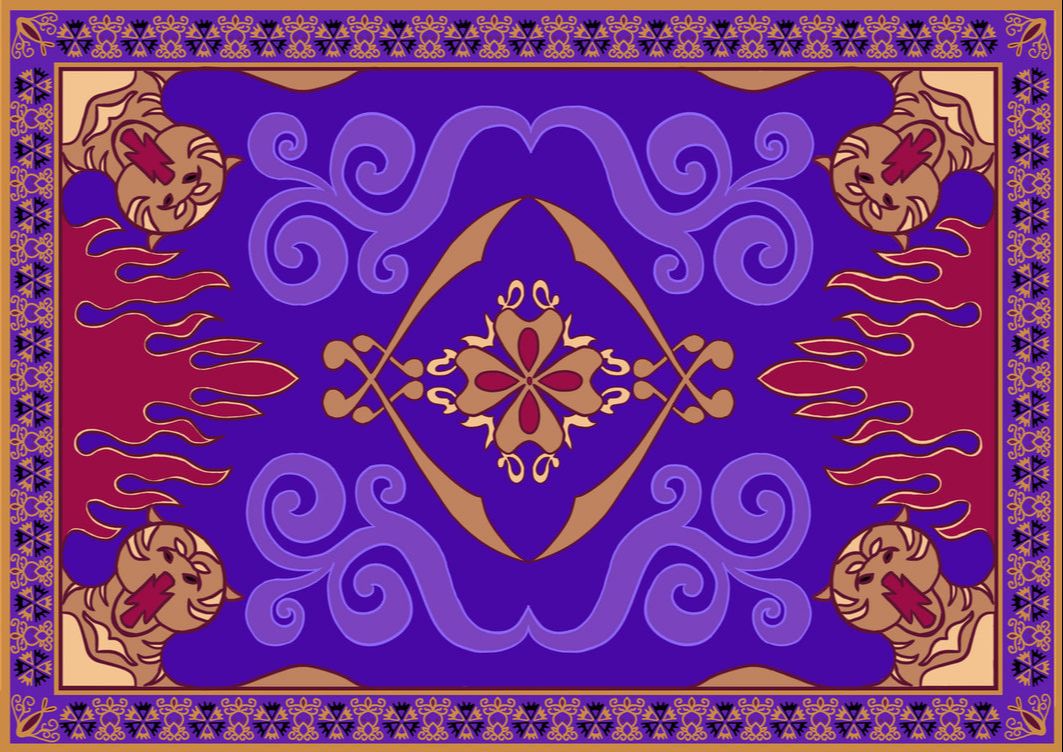
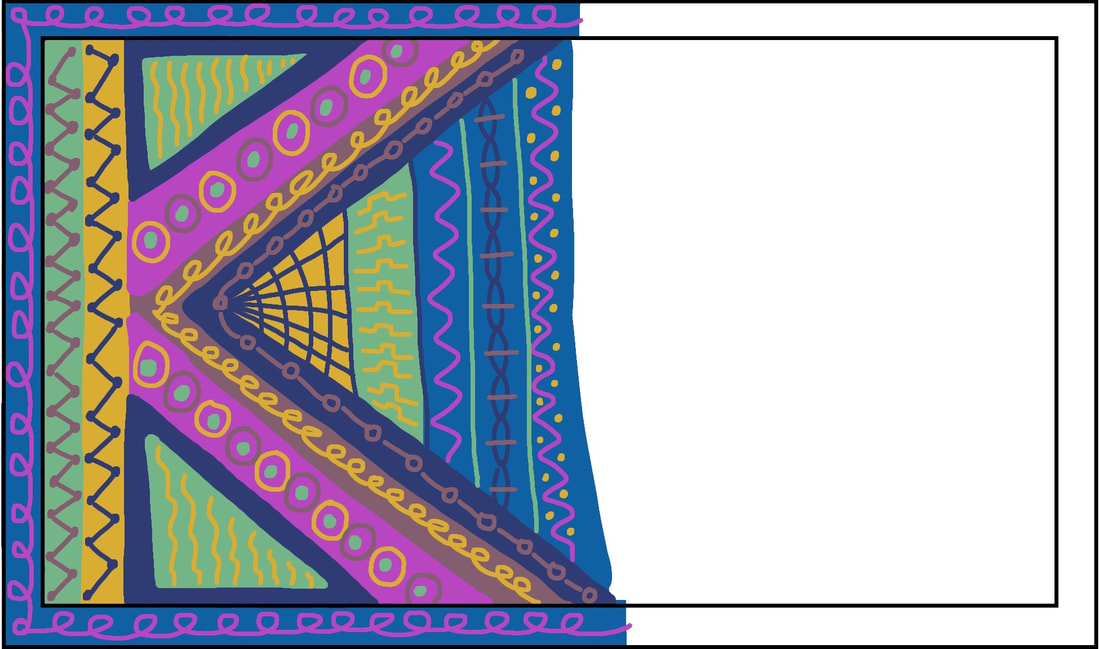 I began coloring base colors and added line/shape pattern above on only 1/2 carpet 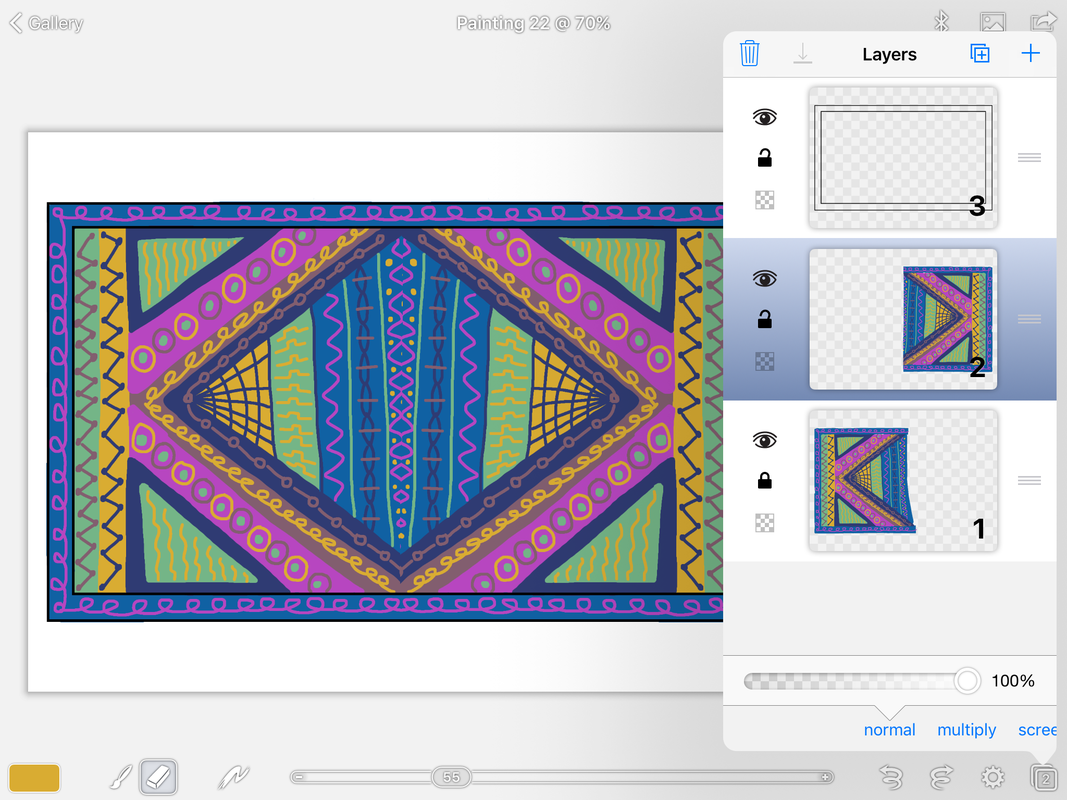 I duplicated the painting layer and used the horizontal flip button to create symmetry 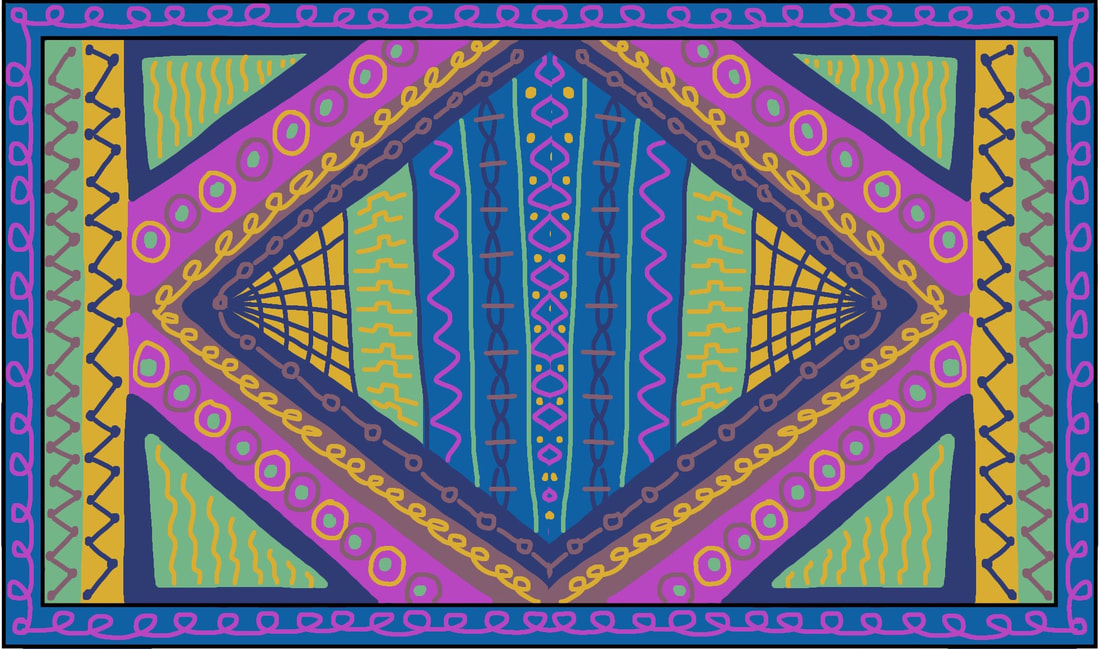 The finished carpet is a symmetrical rectangle-not ready for flying yet. Adding Perspective:Before you can go on a magic carpet ride like Aladdin, you need your digital carpet painting in perspective so that you can view it from the side so you can climb aboard. I added my painting into the superimpose app over a plain color background. I found the tool mode for the foreground layer and chose perspective (the default). The configuration needed could be pulled and stretched by grabbing the handles on the image or you can chose a pre-created configuration at the bottom of the screen. I chose the one all the way on the right. Then, chose the checkmark to apply. 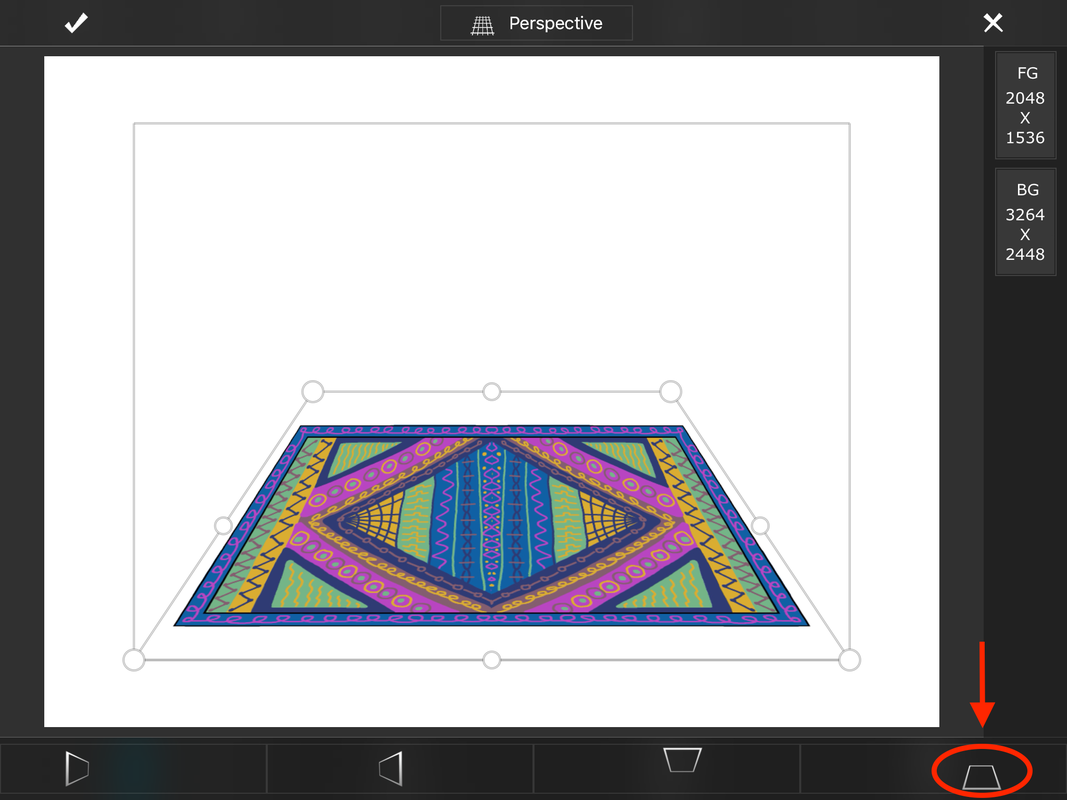 Superimpose App has a tool mode that allows you to add perspective with a simple button  Save the carpet in perspective with "save mask as png" to keep the transparent background Fly on carpet (using still images)This simple method will get your students up and flying without animating a background. They could pose as if they are riding their magic carpet paintings, use the superimpose app to layer their photo onto the carpet, and take it for a ride using the Do Ink Animation app over a background photo (like clouds). This would also create a fun still image for students' Artsonia gallery.  Moving Background Video:
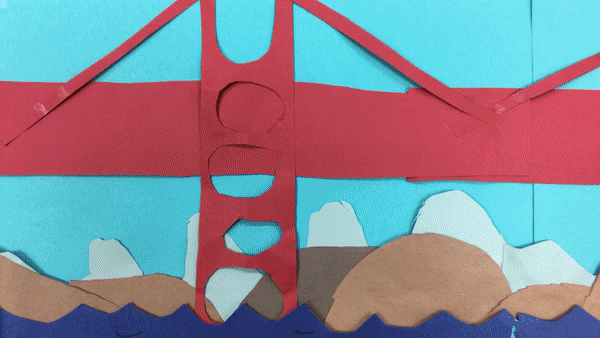
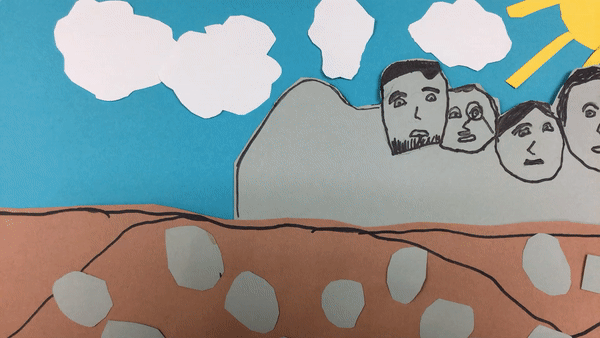
 Clouds moving fast to show flying-created in Do Ink Animation App One really fun way to extend this lesson into geographic/cultural studies is to have each student draw a landmark that they could fly over: Eiffel Tower, Big Ben, Statue of Liberty, Mt. Rushmore, The Pyramids, Great Wall of China, Stonehenge Grand Canyon, Red Woods, Golden Gate Bridge, Taj Mahal, Hohenzollern Castle, The Leaning Tower of Pisa, etc. See this list of 15o famous landmarks. Film the Green Screen:
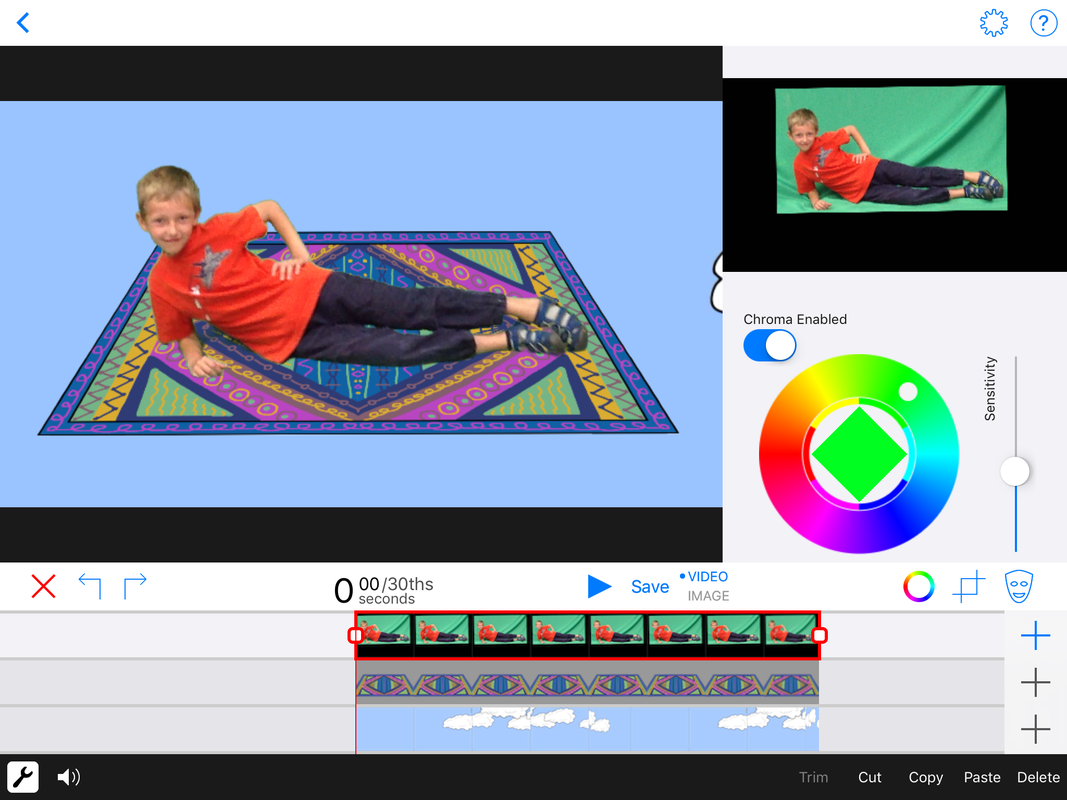 Do Ink Green Screen App 1. background video 2.carpet in perspective 3. Green Screen Video
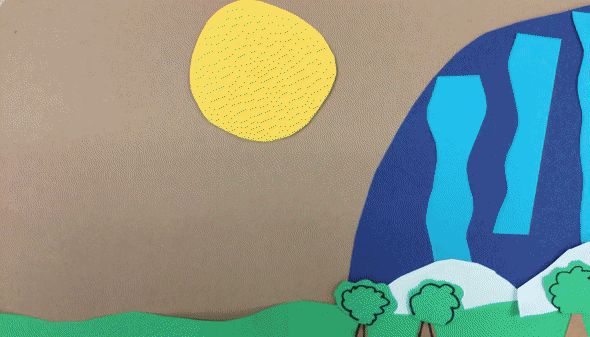
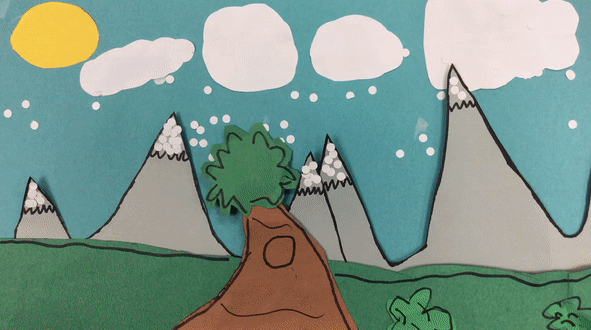
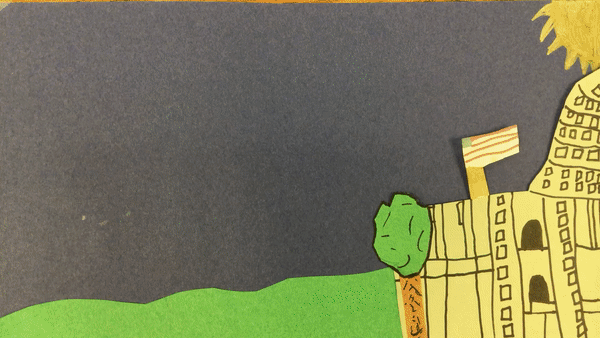
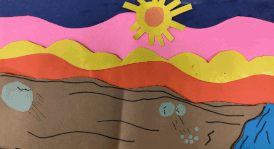
 Flying on a magic carpet Paper Cut Version: BACKGROUND: This version of the magic carpet ride lesson includes a paper cut landscape that shows foreground, middle ground, background in paper pieces. These will be animated traveling across the field of view through stop motion animation. It would be a great opportunity for students to show an understanding of foreground, middle ground, and background in the pieces they create and how they animate the scene. 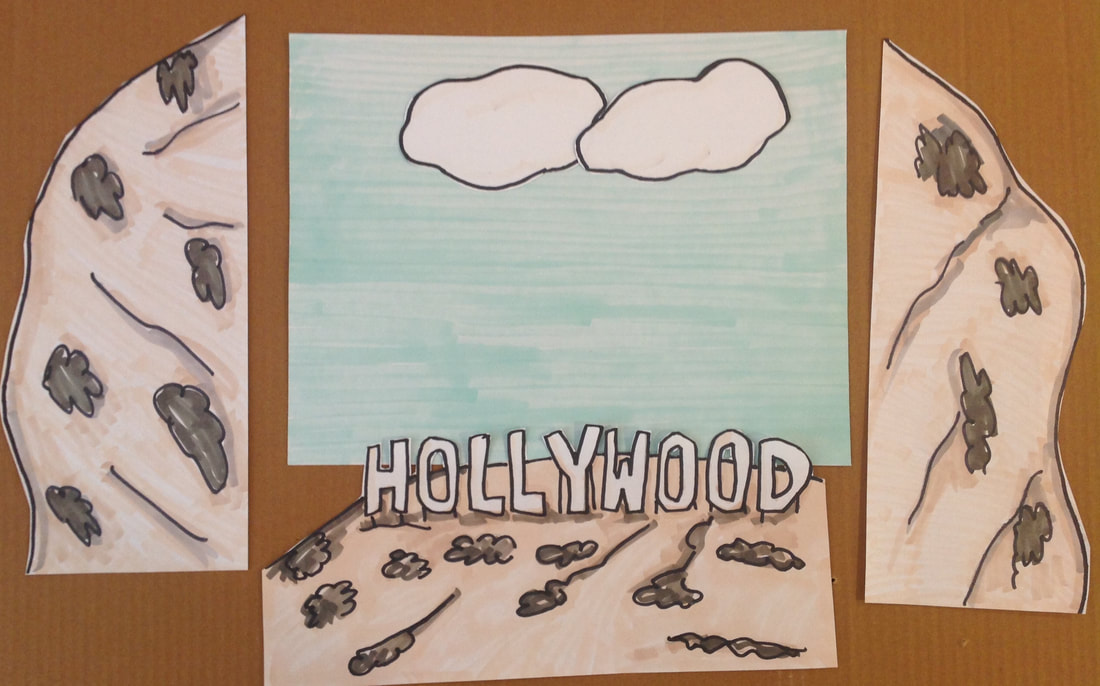 Pieces needed for a paper cut animation of flying over the Hollywood sign 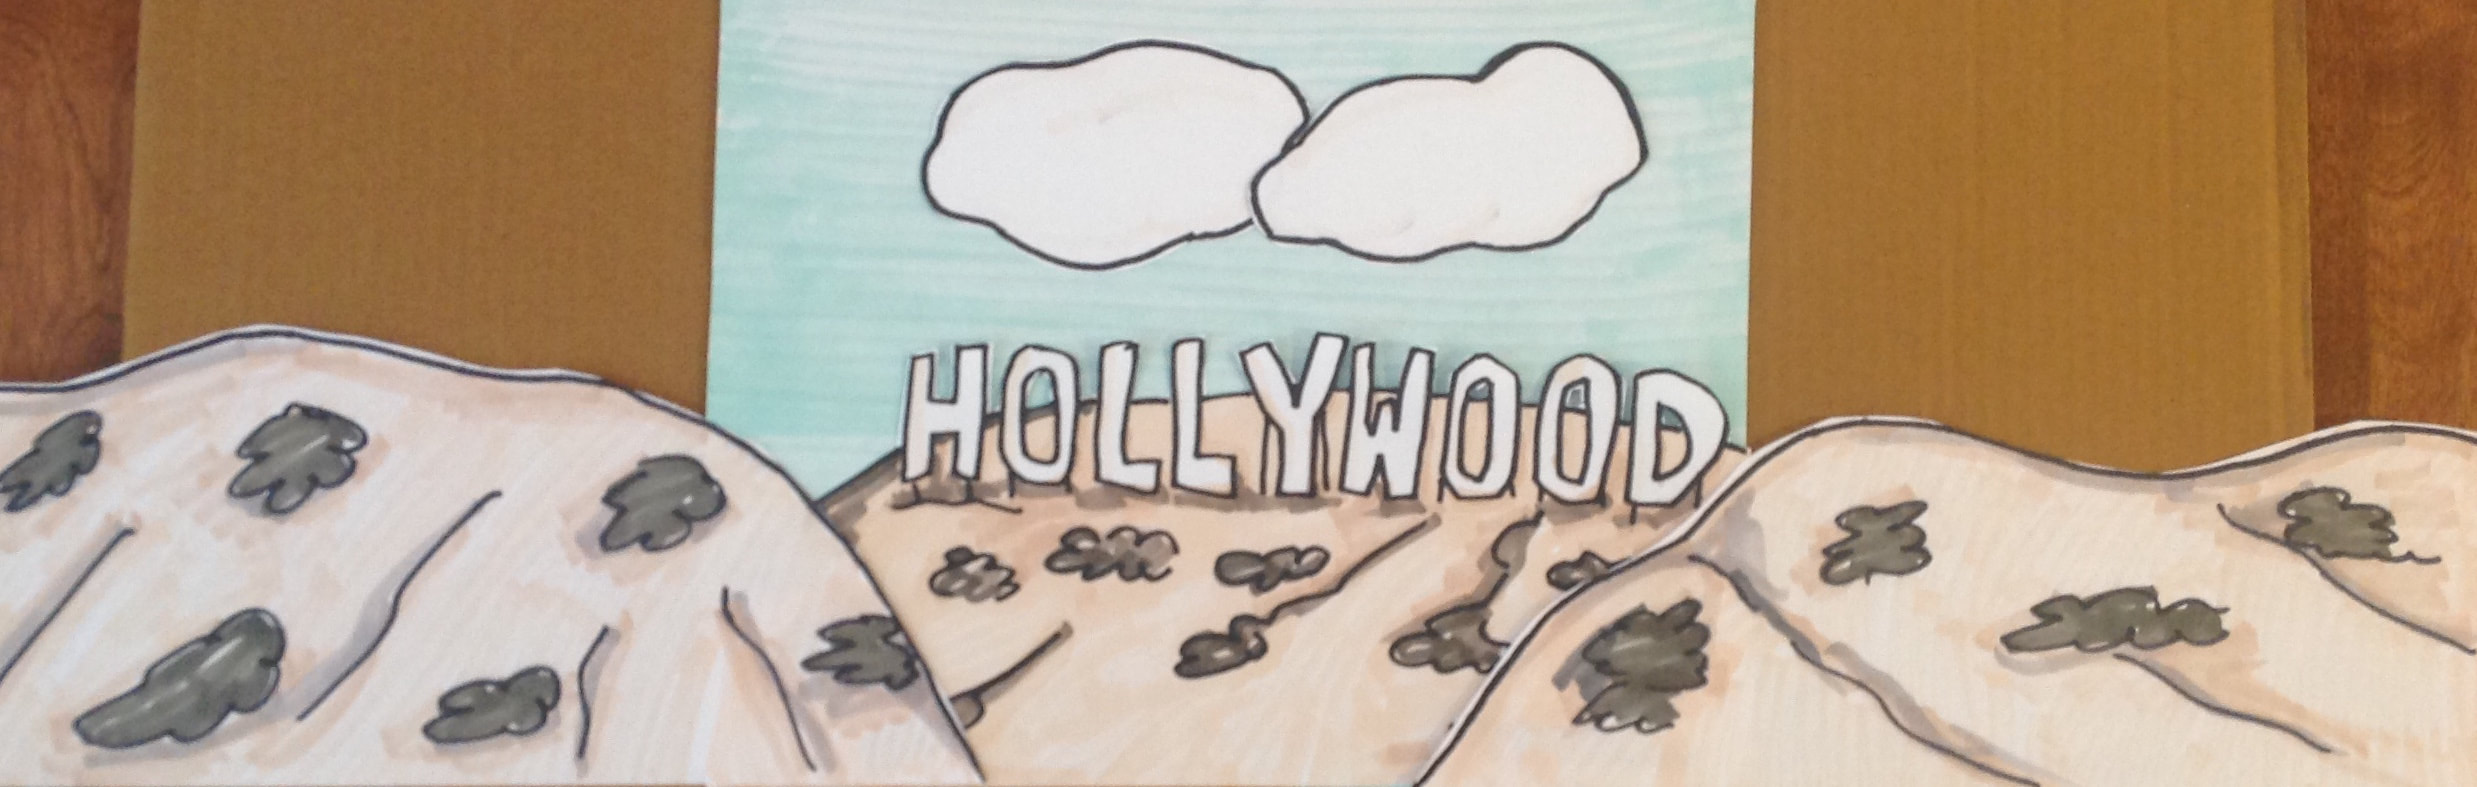 Hills in the foreground, sign in the middle ground, and sky in the background 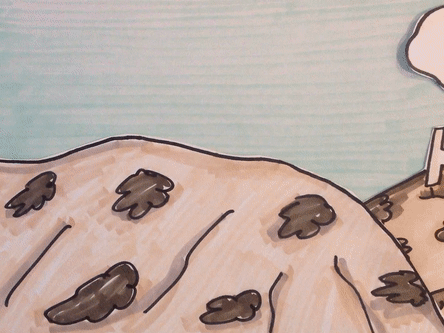 I took 40 pictures in the iMotion App at 10 fps to make a 4 sec video GROUP ANIMATION: I'm thinking that the background animation would be a group project. Each group would work on designing, drawing, cutting, and animating their landmark landscape. Each student would make their own magic carpet video of themselves flying over their group landmark landscape. Therefore, the class compilation video will only have six backgrounds but 24 videos. MAGIC CARPET MADE FROM PAPER: A digital magic carpet wouldn't look right with a paper cut background. So, they would need to make a paper carpet in perspective. This is a great opportunity to teach students about a vanishing point, converging lines, and how pattern would be small in the back and large in the front (relative size). 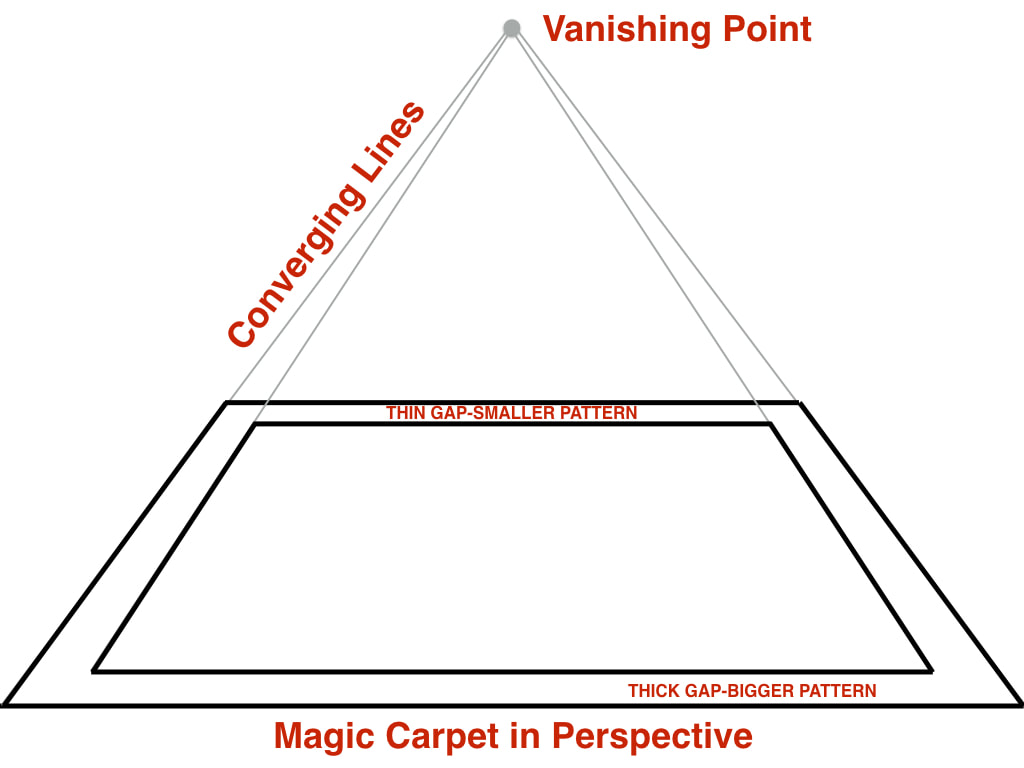 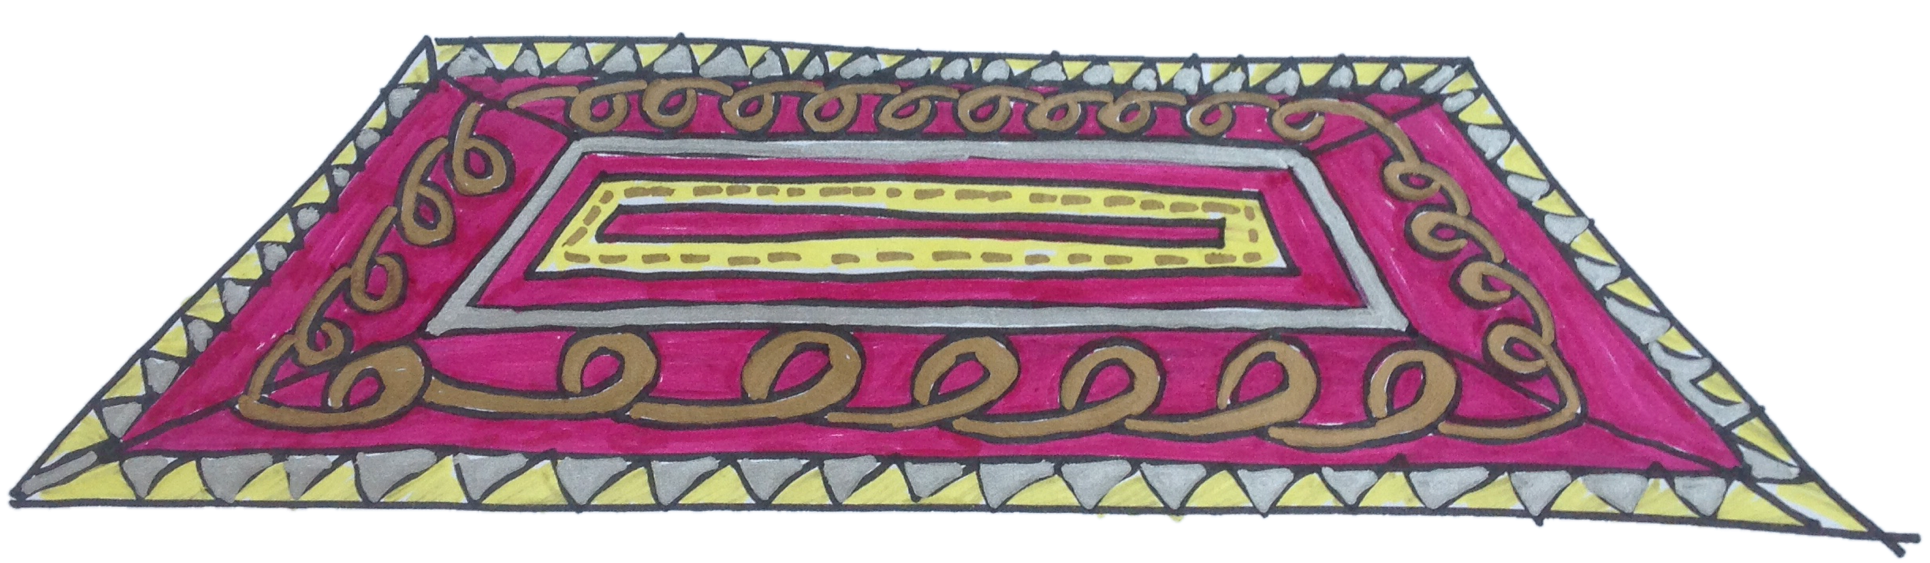 Digital picture of the paper cut carpet. I erased the background in Superimpose app Since you are not going to use stop motion for the carpet, I just took a digital picture of the paper drawing and erased the background in the Superimpose app. It needs to be digital for the green screen effect where a student rides the carpet.
 Paper Cut Magic Carpet Ride with Stop Motion Animation and Green Screen FX Students Working 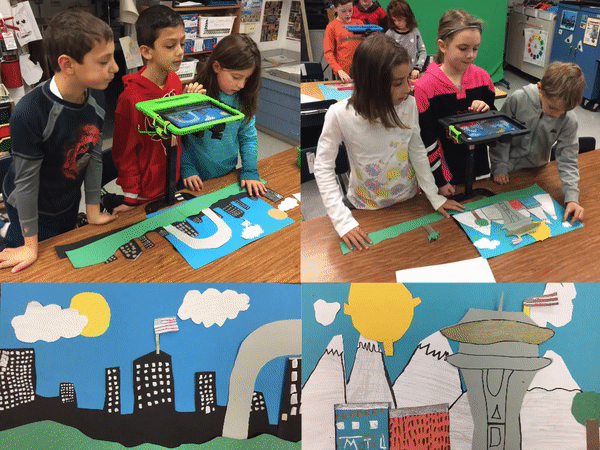
Student Results: view the paintings on Artsonia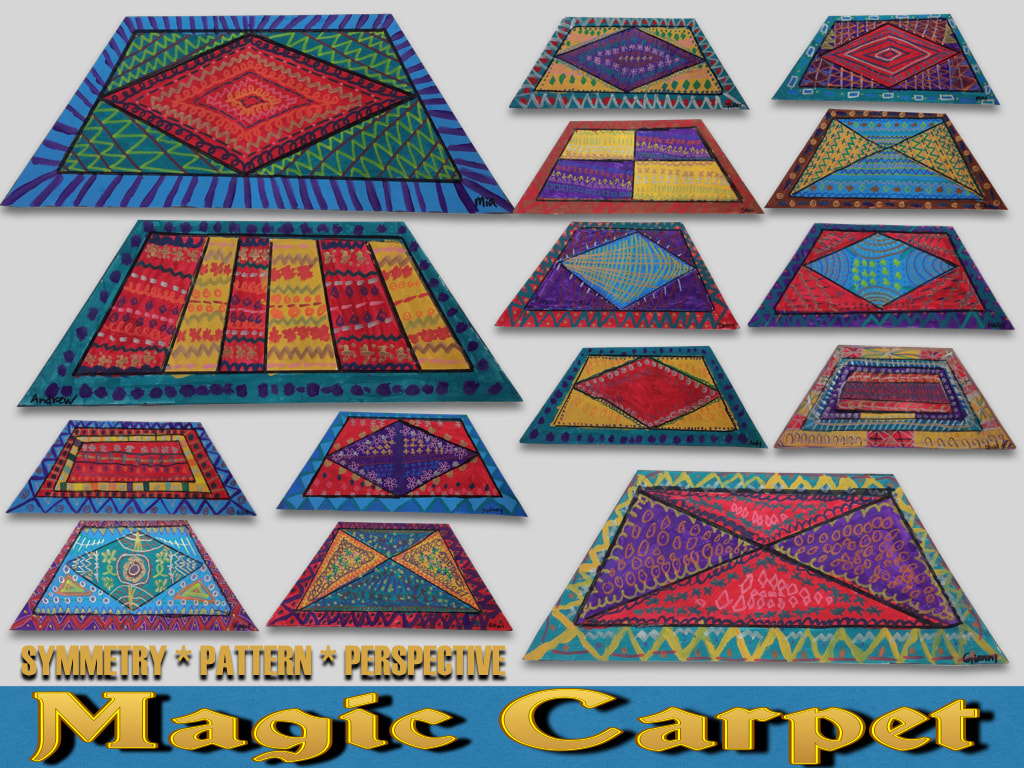

Finished: Riding over Landmarks3-1 MAGIC CARPETS from Tricia Fuglestad on Vimeo. 3-2 MAGIC CARPETS from Tricia Fuglestad on Vimeo. 3-3 MAGIC CARPETS from Tricia Fuglestad on Vimeo. 3-4 MAGIC CARPETS from Tricia Fuglestad on Vimeo. Resources:This link takes you to a travel website featuring 150 famous landmarks. Every student can feature a different landmark in the background video/animation. This would make the class video even more exciting as they fly over scenes from around the world. 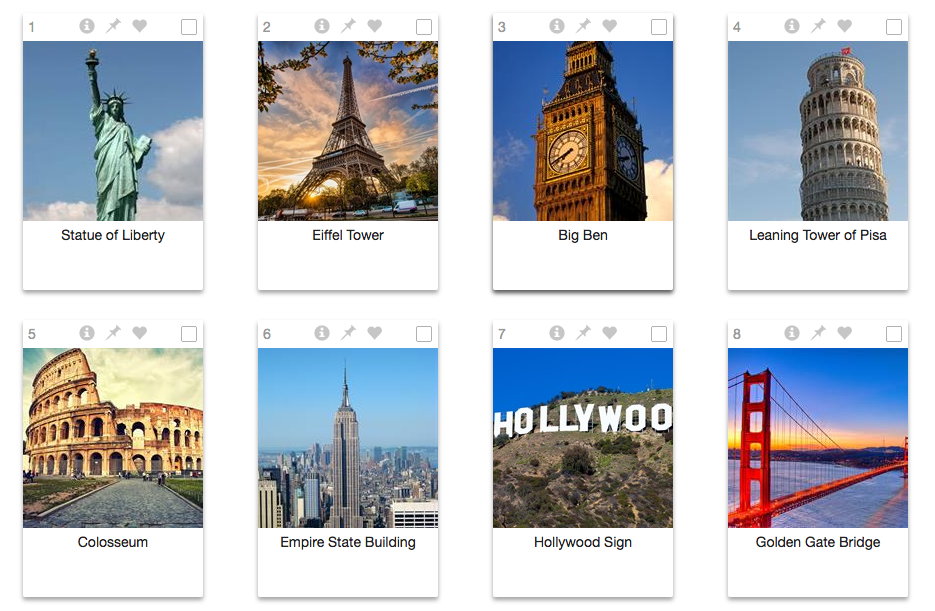 View this safeshare.TV link of the "Whole New World" scene from Aladdin. 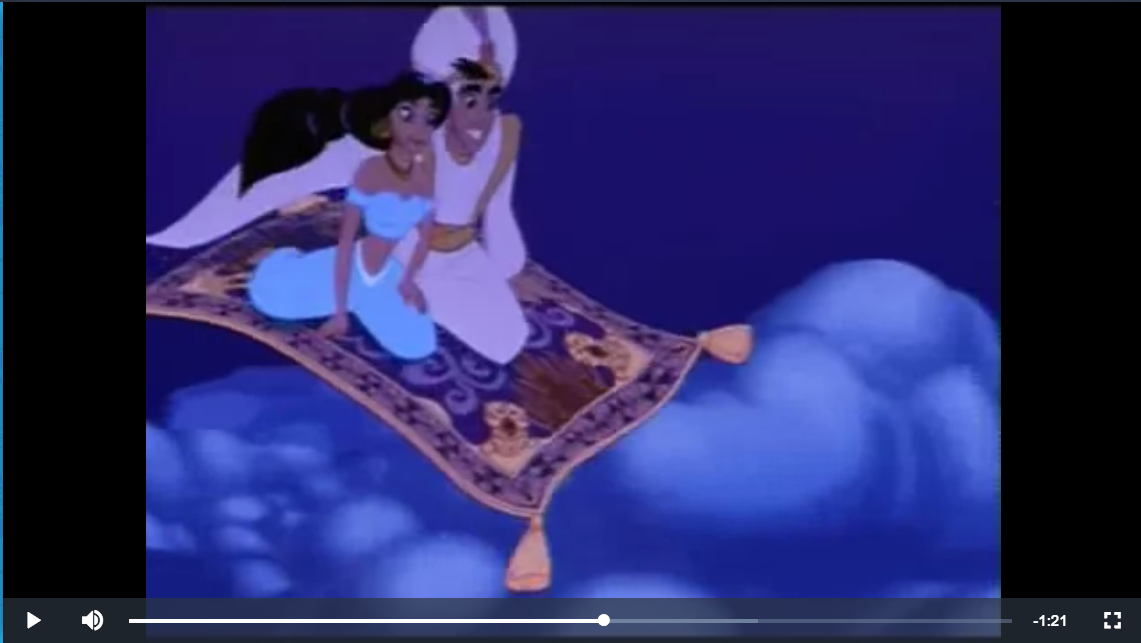 Update: SchoolArts Magazine ArticleI wrote up this lesson for the March 2019 Edition of School Arts Magazine. View it here. 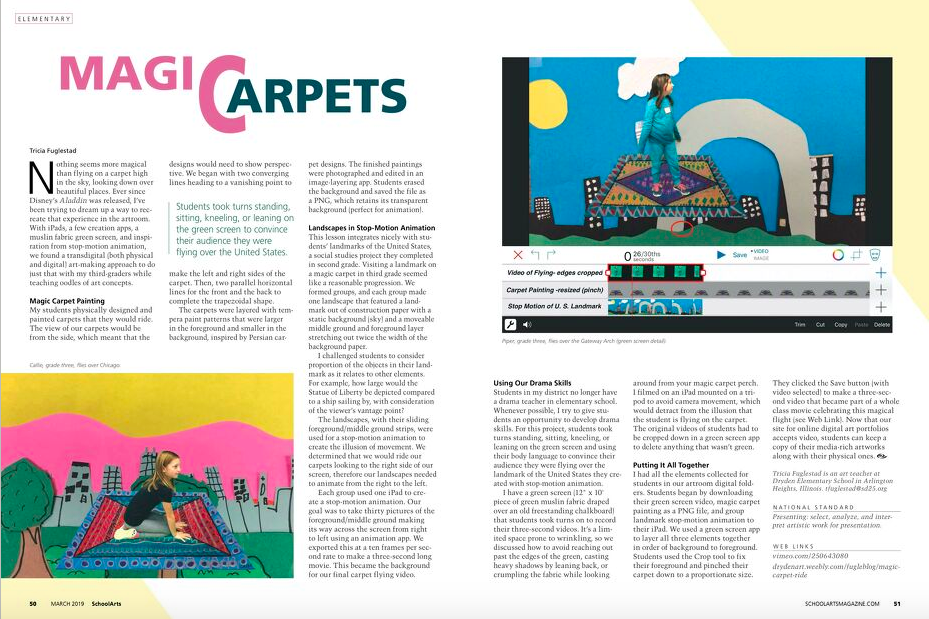 ..and other Individual Rotoscope Animation Ideas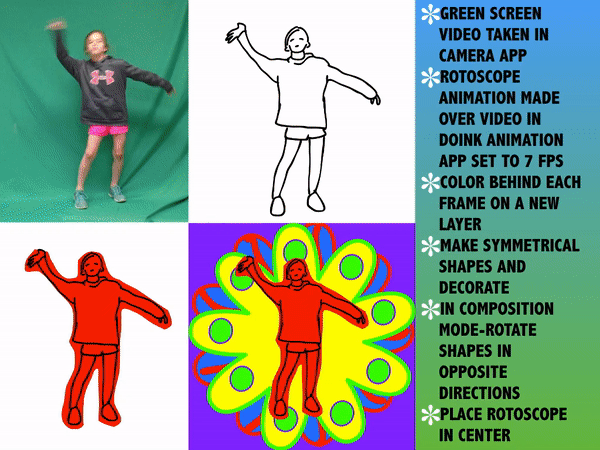 One of the super cool things about Do Ink Animation and Drawing app is that you can pull in photos or videos and draw over them. Drawing over each frame of a video is a technique called Rotoscope Animation. You probably have seen this technique in the famous music video from the 80's A-Ha's Take Me On. I also LOVE this music video and song by Andrew Huang, Every Night I Dream of Dancing, which is a rotoscope collaboration using 30 artists crowdsourced through the internet.
I tried many ways to instruct my students to create rotoscope animations collaboratively, but I've yet to have them create their own...until now. I think I've come up with some ideas that can make this project manageable for very little people. |
Sign up for my newsletter
Learn about PETER O'METER,
my AR SEL Children's Book
Visit My TpT Store
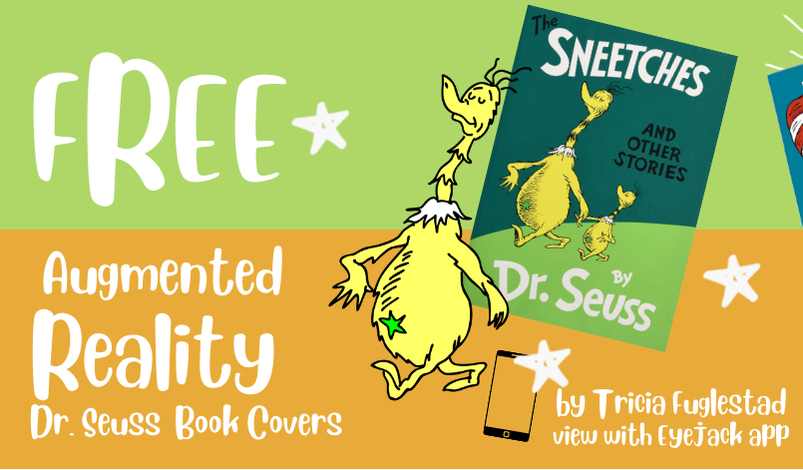
Grab my AR Freebie
Fuglefun Store Index
Loading
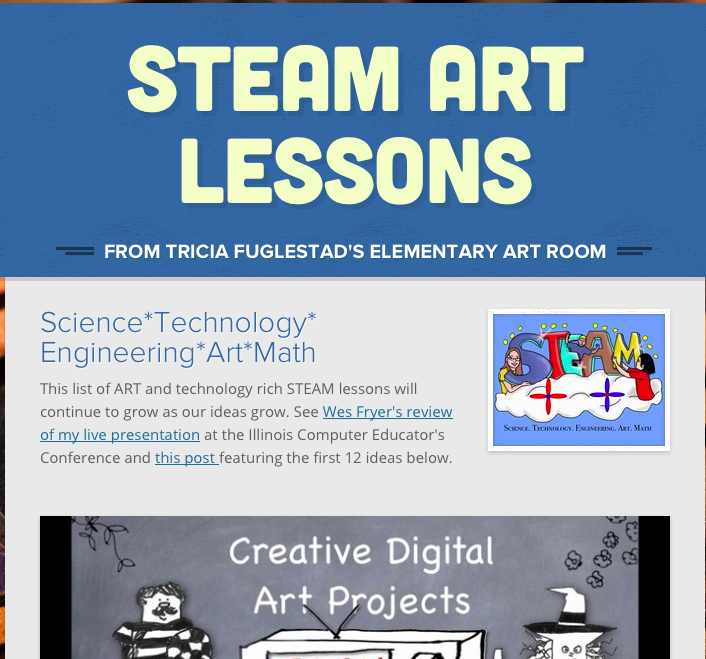
Click to view links to 230+ of my STEAM art lessons here
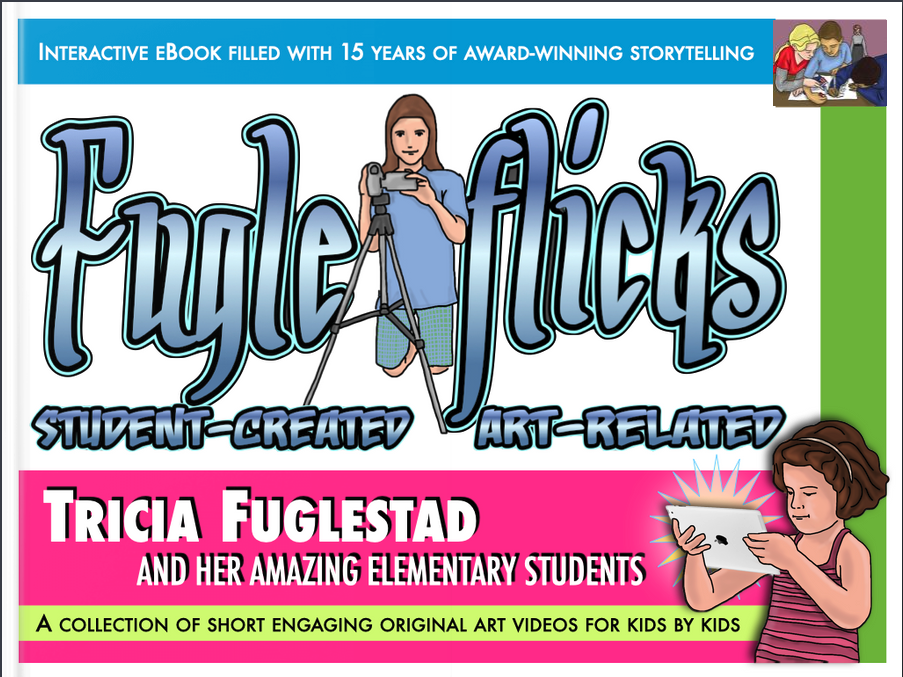
Interactive Fugleflicks eBook
We are the 2nd place winner of the ISTE Technology in Action Video Contest.
See my post for more info. Redefining the Art Room from Tricia Fuglestad on Vimeo. 
Art of Ed Interview on STEAM

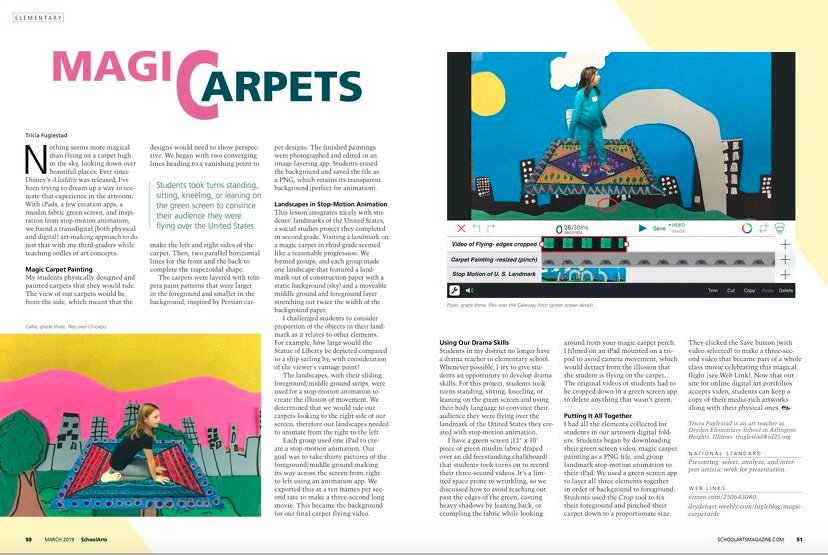
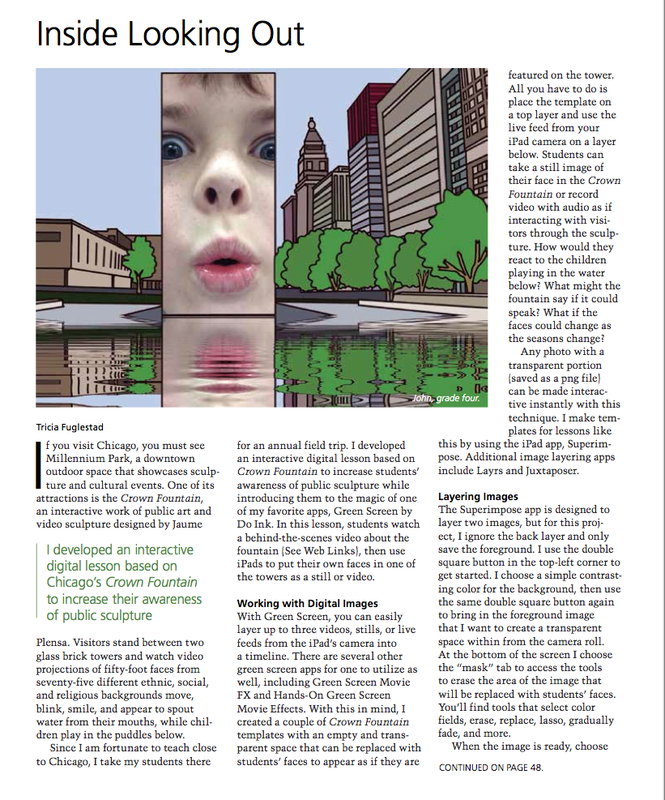
Read our Magic Carpet Ride lesson SchoolArts, March 2019
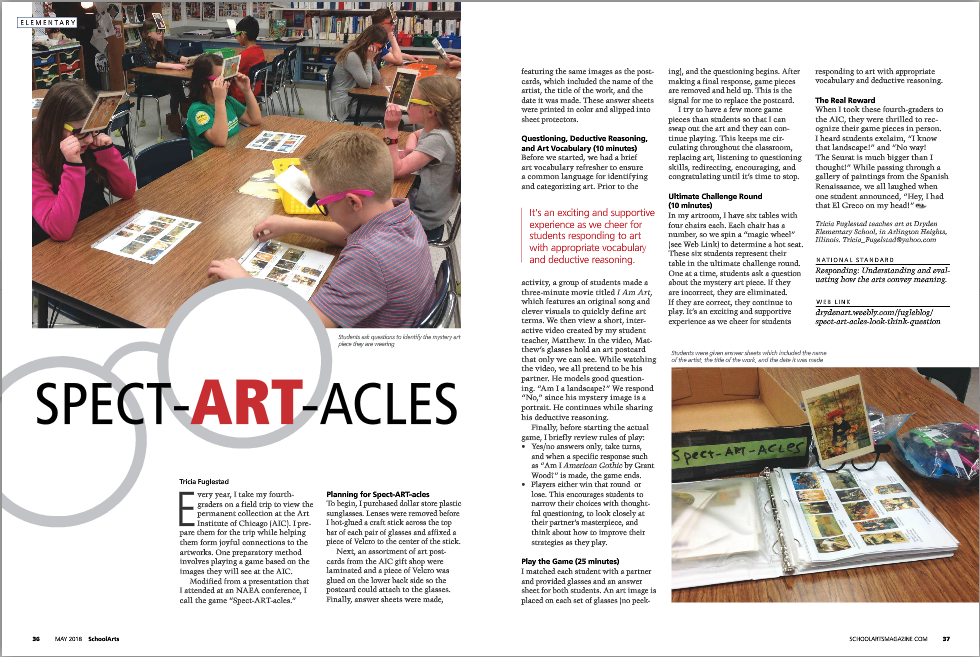
Read our SPECT-ART-ACLES article in School Arts, May 2018
Read our School Arts Article April 2016 for an iPad lesson
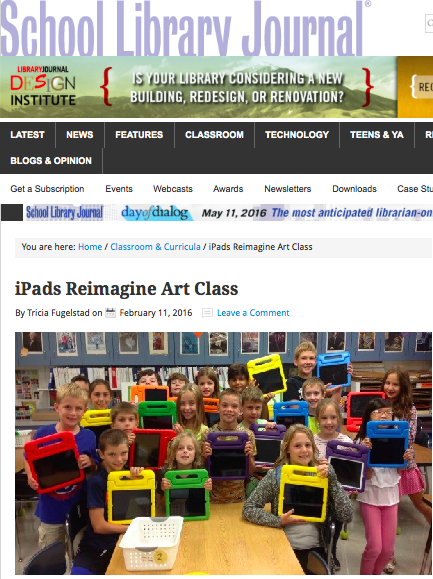
Read our School Library Journal Article about iPads

Help fund this Science + Art project (click link)
Voting ended

Did you see our School Arts Article? April 2014
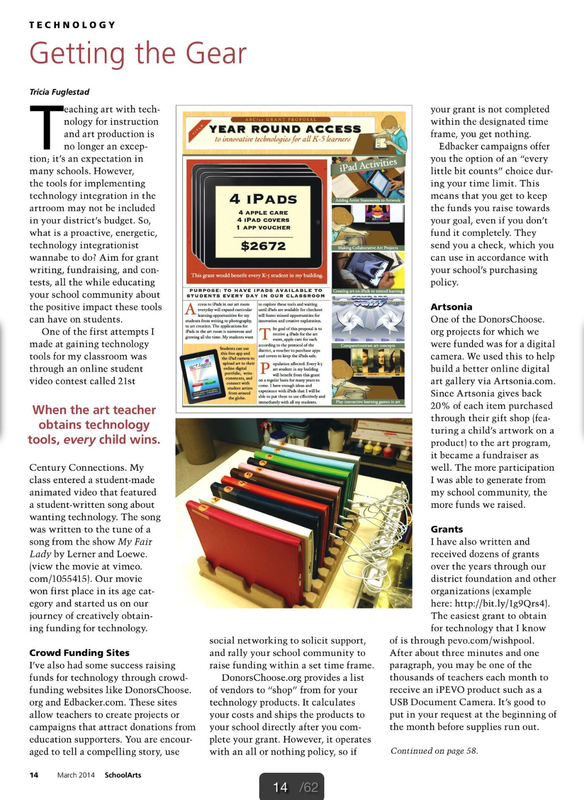
Did you see our School Arts Article? March 2014
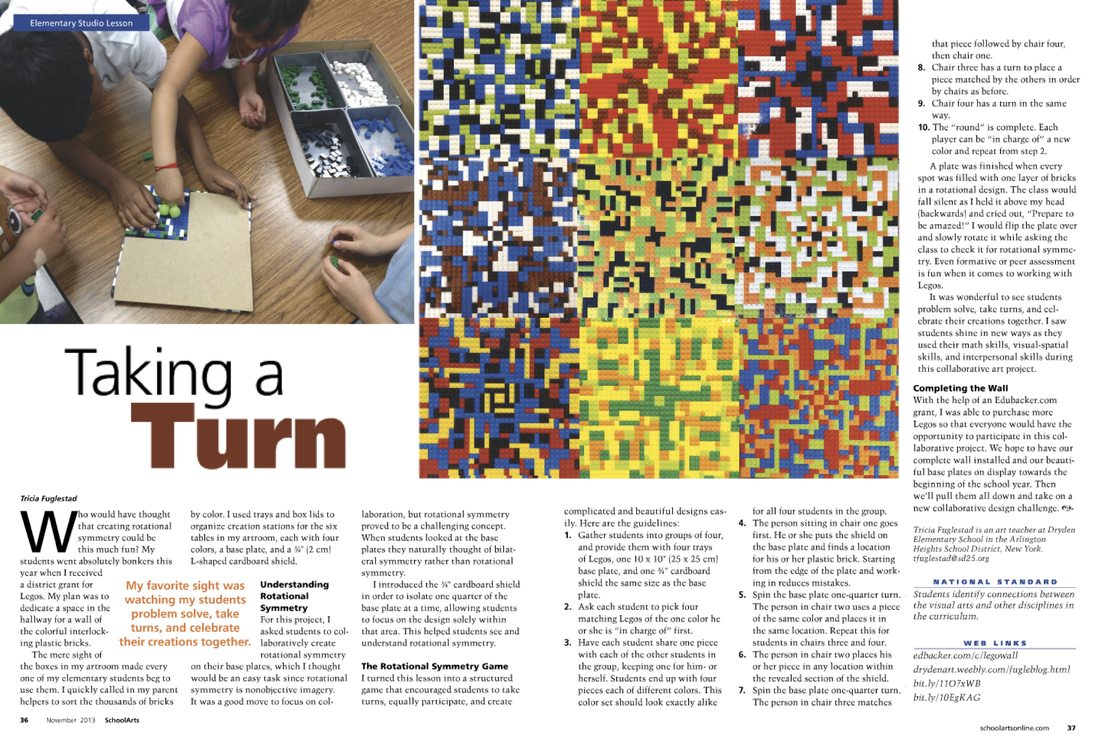
Did you see our School Arts Article? Nov. 2013

Dryden Art 2013-14 from Tricia Fuglestad on Vimeo. 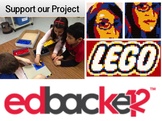
View this musical tribute to the hard working teachers at Dryden and the students they love to teach.
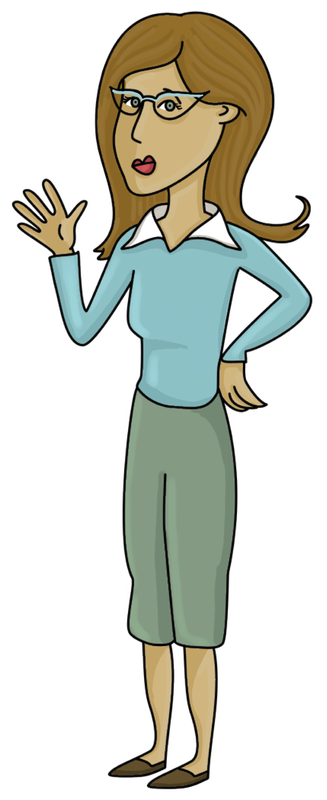
Common Core Crazy from Tricia Fuglestad on Vimeo.  Mrs. Fuglestad. Click to see how I made this image. 


About MeTricia Fuglestad, NBCT, 
Life is too short for long faces.
Archives
October 2022
Categories
All

 This work is licensed under a Creative Commons Attribution-NonCommercial-ShareAlike 4.0 International License. |


 RSS Feed
